KNX IP
This document explains how to connect KNX/IP devices to Aqara Studio.
Prerequisites
Before you start, please make sure:
- You have added the KNX/IP device in ETS6, assigned group addresses, and obtained the physical address and DPT (Data Point Type). For tutorials, see the official ETS6 Professional documentation or watch ETS for beginners, a video series released by KNX Association,.
- Your Windows computer, KNX/IP device, and Aqara Gateway are all connected to the same local network.
Add a KNX/IP Device
-
In the left sidebar, click to enter the Devices page.
-
In the device tree on the left, click the "+" button. In the popup, choose
KNX IP. -
Click
KNX IP, switch to the Add Device tab. fill in the following parameters, and then click the Save and continue button:Parameter Description Device Name The name you set for this device. Device Address The unique address of the KNX device in the KNX network. Enter the physical address set in ETS6, using a three-part format (e.g., 1.1.0). Local IP The IP address of your local device (client) for KNX network communication. By default, 0.0.0.0 means the system will auto-assign an IP. Connection Type Choose the supported connection mode: - Tunneling: For point-to-point connections (such as programming download, smart home system).
- Routing: For multicast connections (like monitoring bus traffic or group-control).
KNX Tunnel IP The IP address of the KNX tunnel server, needed for KNX/IP tunneling connections. This device acts as a gateway between KNX and IP networks, forwarding KNX packets. Required for "Tunneling mode". Format: xxx.xxx.xxx.xxx (e.g., 192.168.1.100) Router IP The IP address of the KNX/IP router, required if using "Routing" mode. It acts as a network router and forwards KNX packets to target devices. KNX Tunnel Port The port number used by the KNX interface device. This is required for "Tunneling" mode. The default is 3671. If you have changed the port, please enter your custom value. -
Upload the KNXPROJ file or group address XML file for the device (both can be exported via ETS6).
-
After a successful upload, click the Discover Points button. The system will automatically parse the file and generate a list of available data points to add.
-
Select data points and click the + button in the middle. The newly added data points will appear in the Added Points list on the right, and will also show up under the associated device in the device tree on the left.
Aqara Studio will automatically map the points of BACnet devices to the feature points in the Aqara Spec protocol accordingly, enabling standardized control and management.
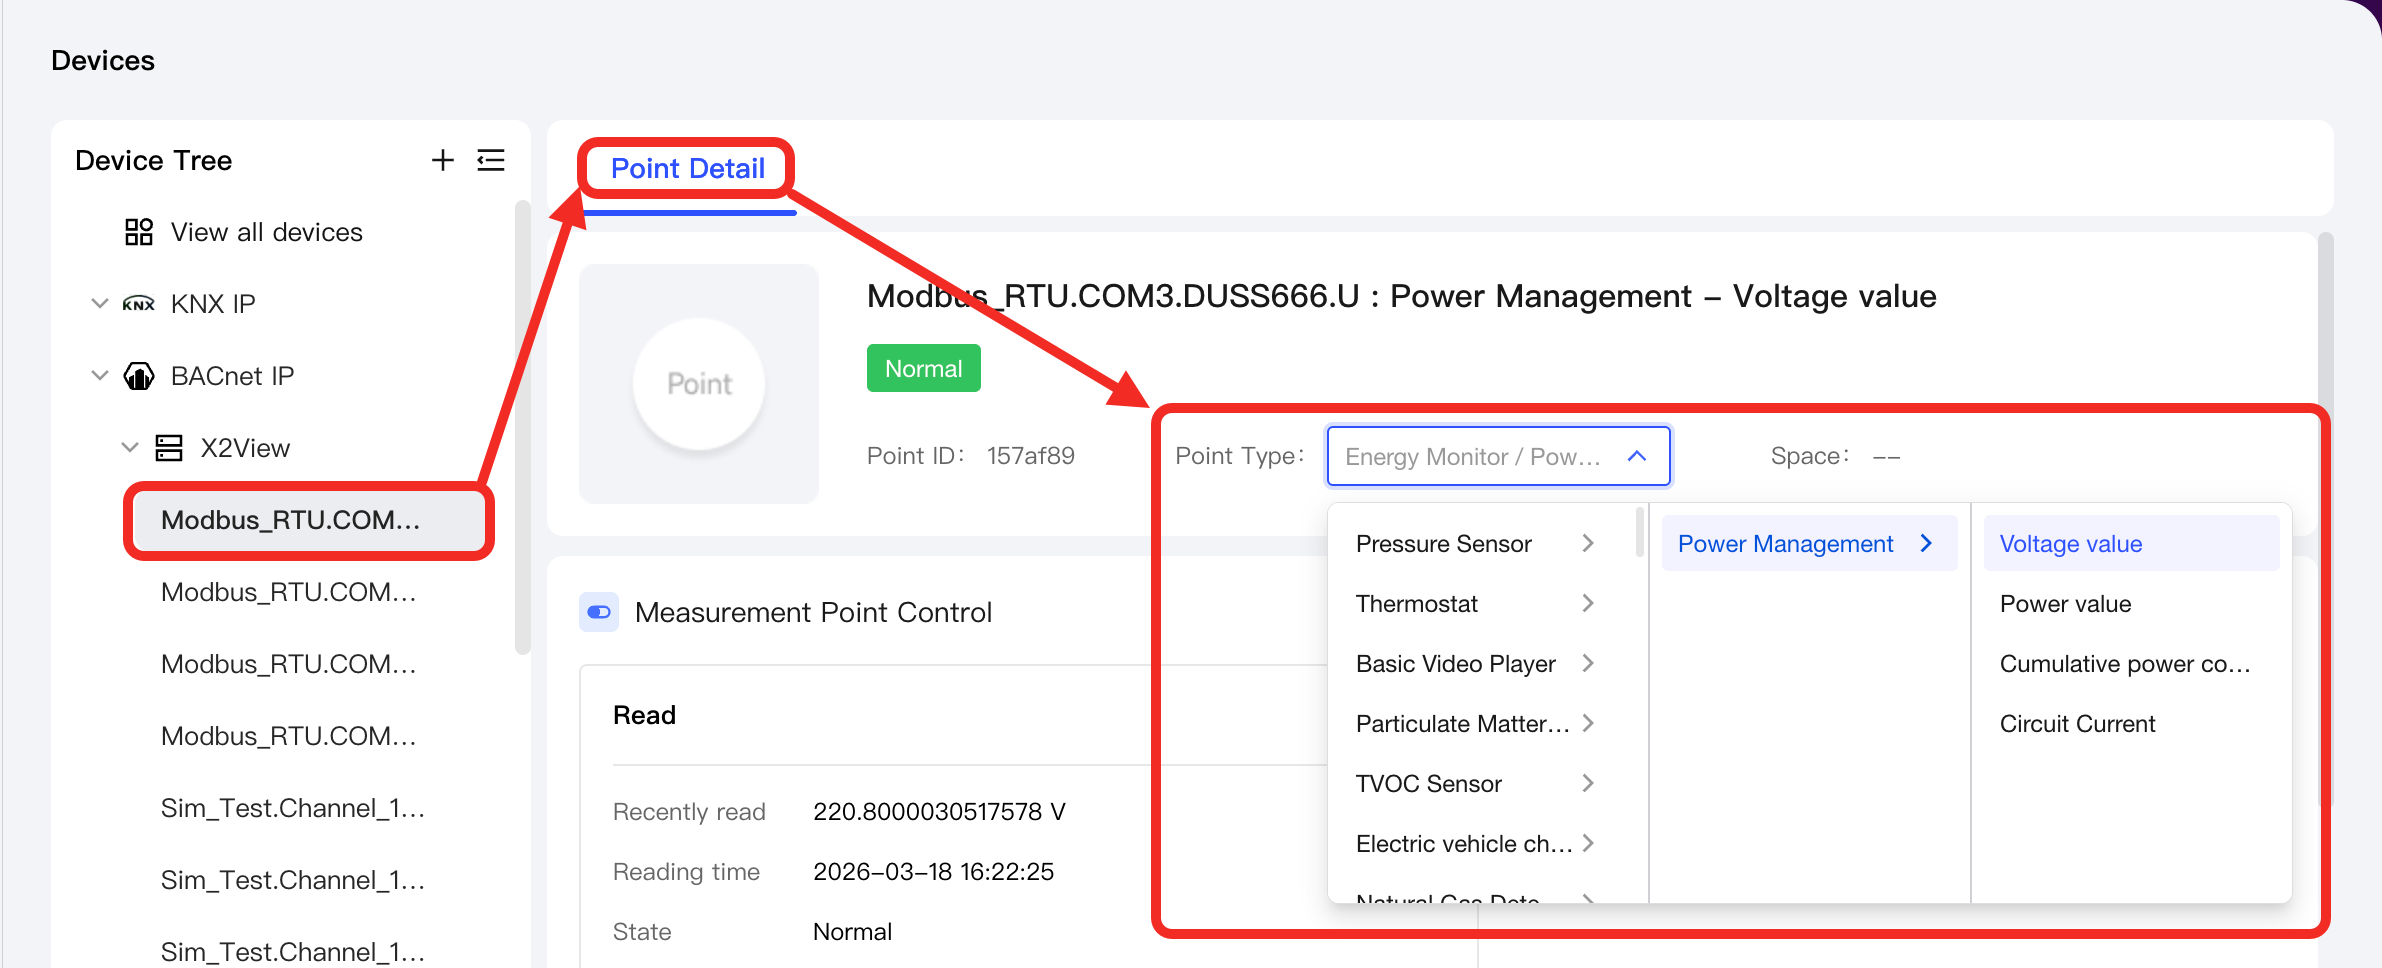
tipIf Aqara Studio mapped a point type incorrectly, you can select the point in the device tree, go to the Point detail page, and click Point Type to adjust it.
Next Steps
Now, you can view details and control the device, or use the device in automation.
FAQ
How to edit or manually add KNX points
On the "Point Discovery" tab, if you need to change details of a discovered point, or want to add a new point manually, click "Add" or "Manually Add".
You will see a popup. Provide the following information to complete the configuration:
| Parameter | Description |
|---|---|
| KNX Point Name | Custom name for your point. |
| KNX Group Address | The point's KNX group address, as set in ETS6. |
| Data Point Type | The DPT (data type) of the point, also set in ETS6. |
| Aqara Object Type | The device type this point belongs to. This is shown when you add the KNX device to Aqara Home. |