IFTTT
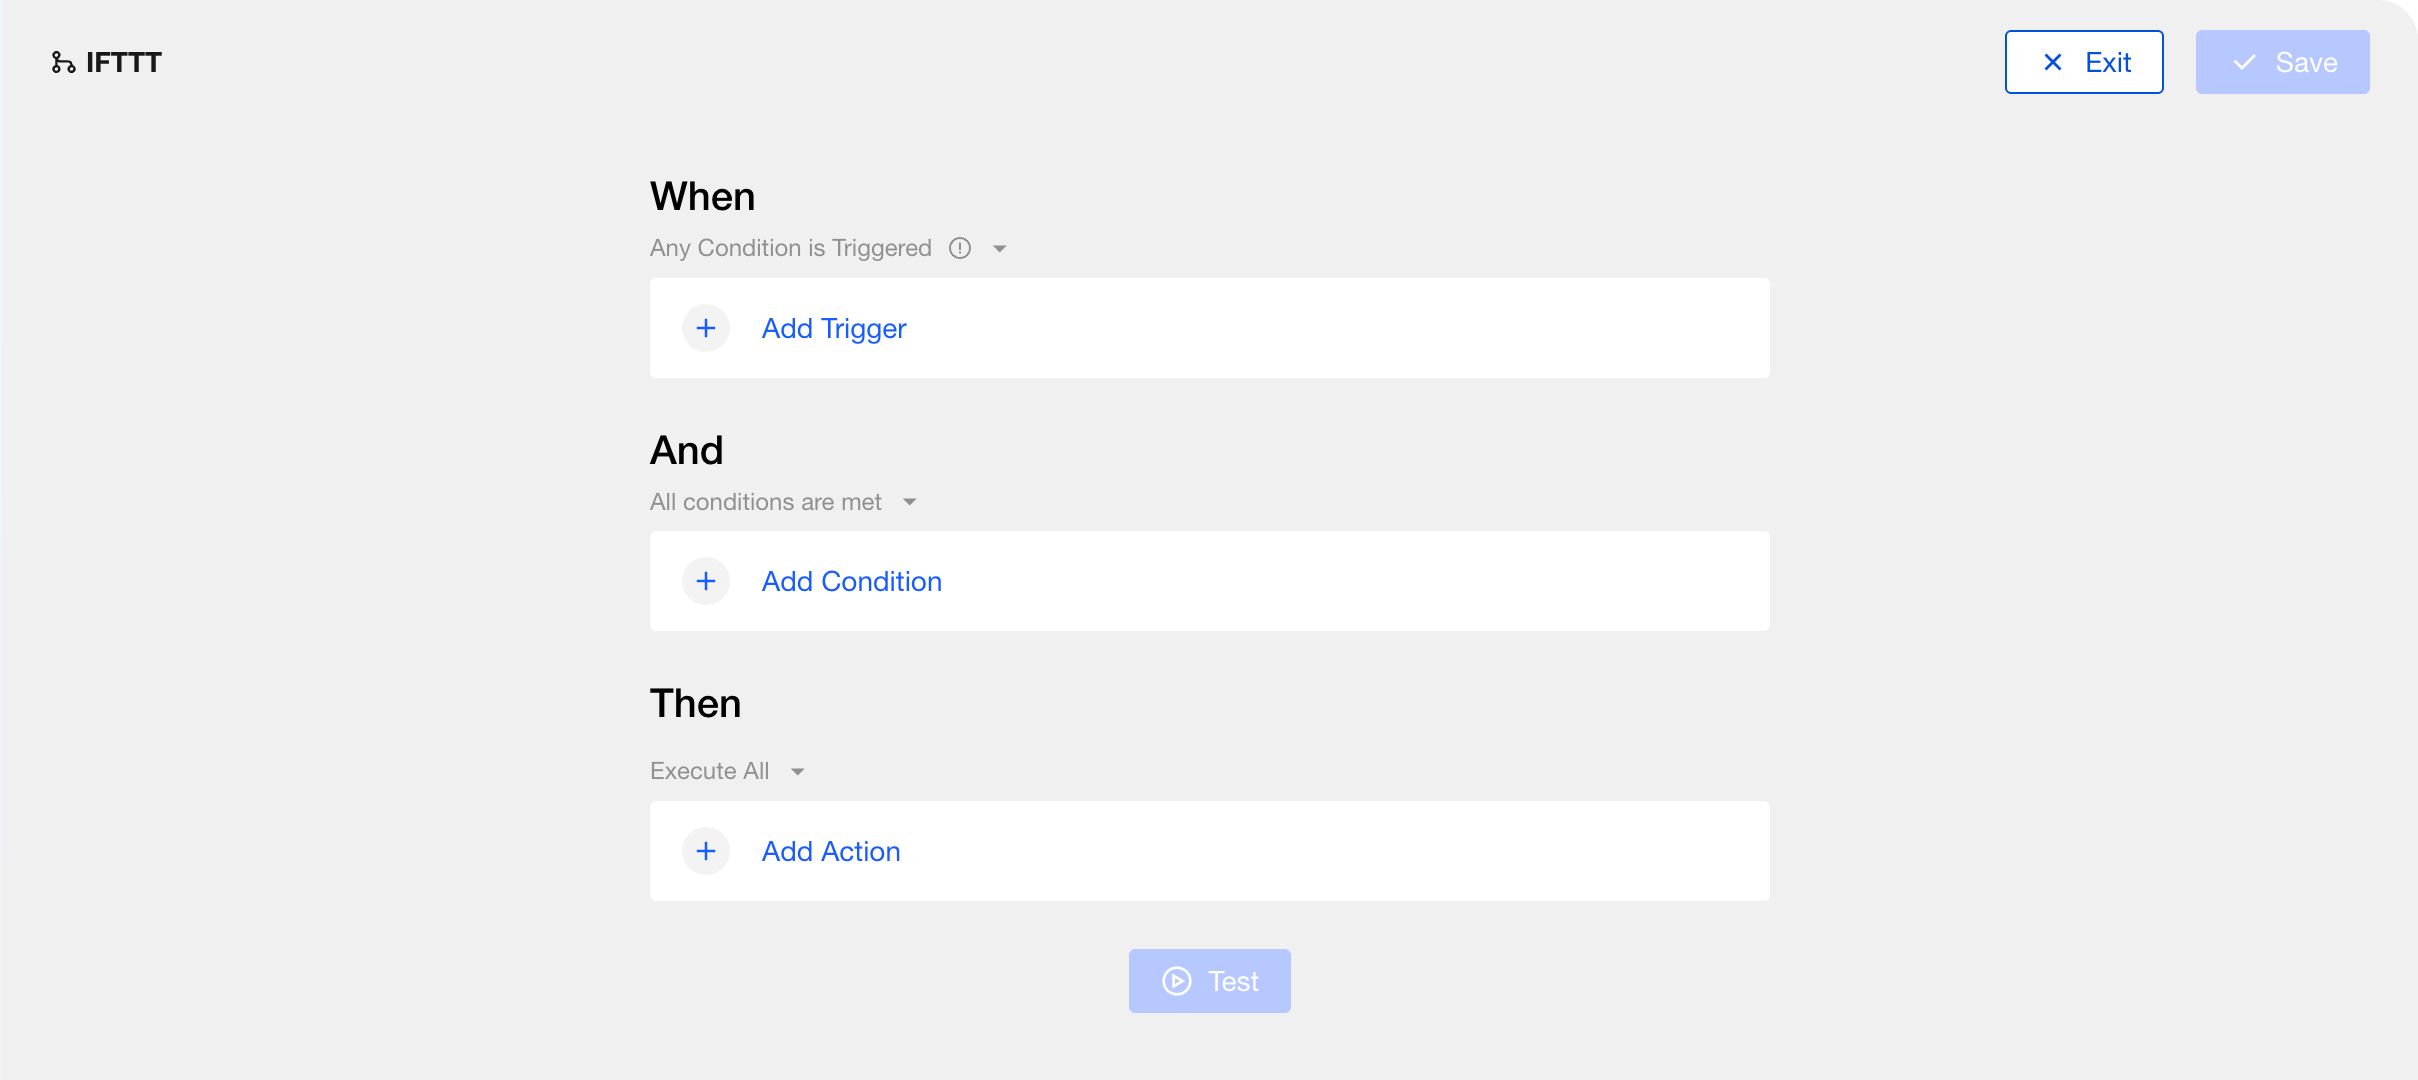
Using Aqara Studio, you can quickly set up your own automation by specifying what triggers it (When), setting conditions (And), and defining the actions (Then) you want to happen.
Create an Automation
To learn how to create an IFTTT automation, please refer to Automation - Create an Automation.
Set Up Automation
See below for how to set up an IFTTT automation flow.
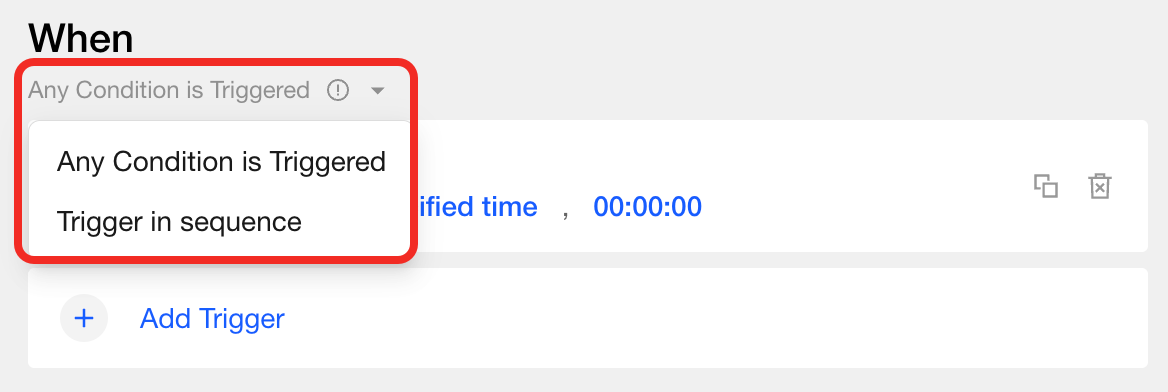
1. Configure When
The When step defines the point triggering your automation, either a device event or a specific time. Aqara Studio continuously monitors these events or times, such as "human presence detected in room" or "temperature exceeds 28°C".
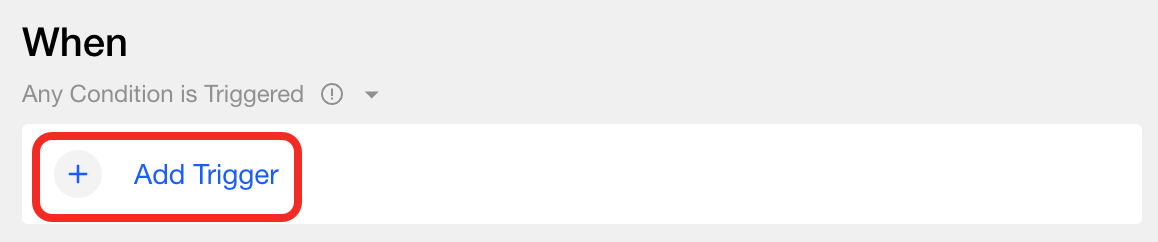
Add triggers
-
Click Add Trigger.
-
Choose Device or Scheduled Trigger.
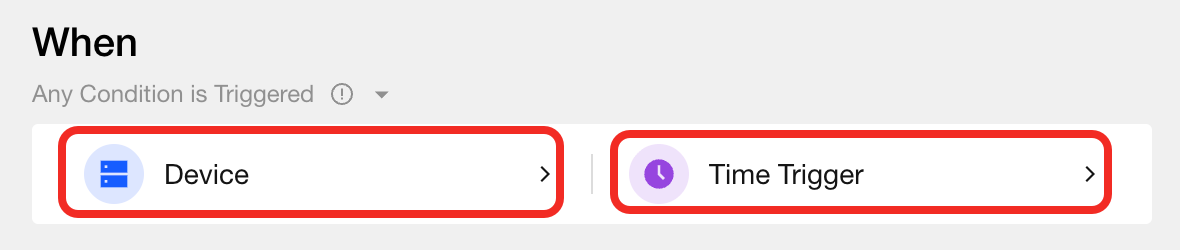
- If you choose Device:
- Add a device event
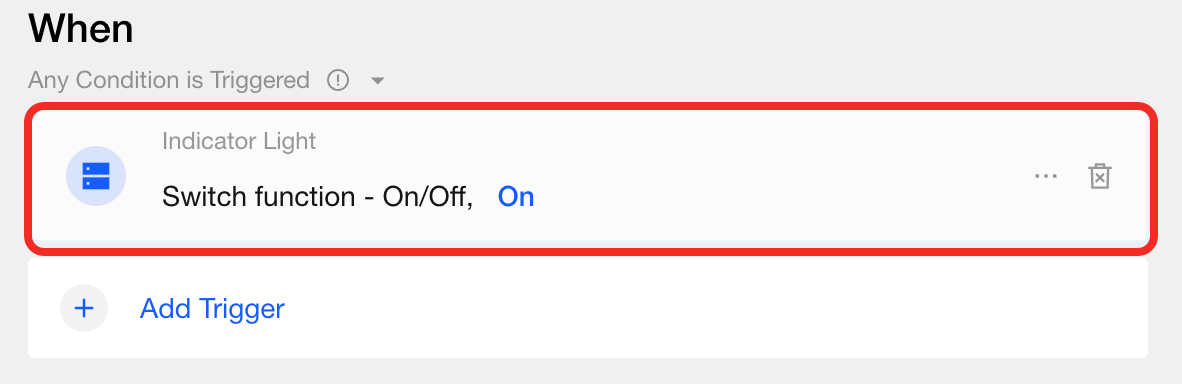
In the Device popup, select the device and function card you want, then click Confirm.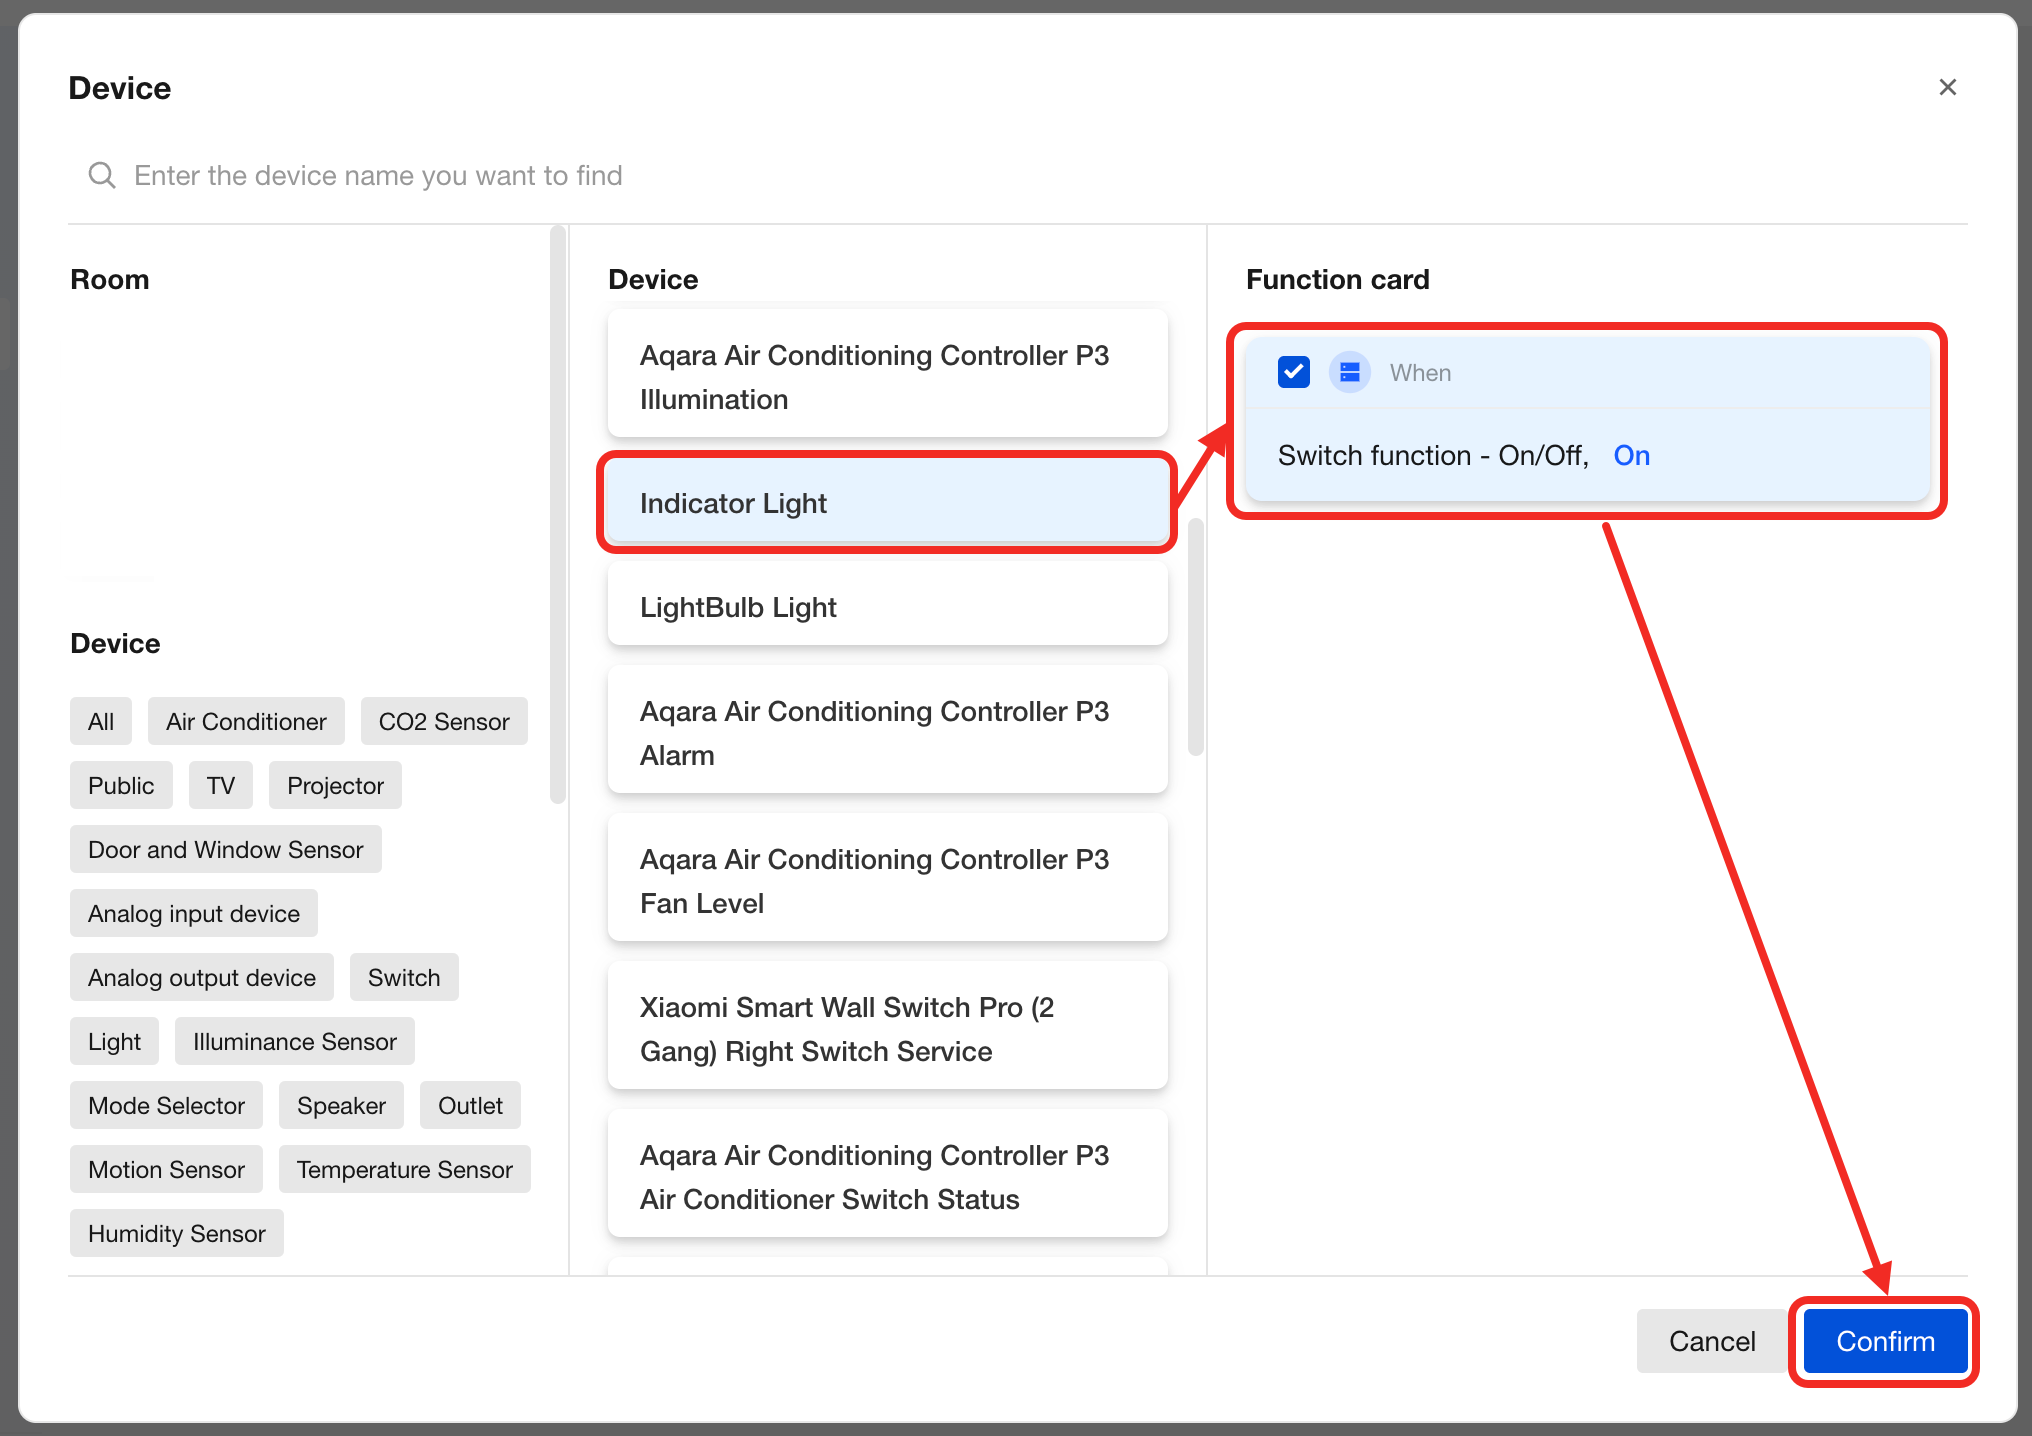 Now, in the When section, you'll see Studio will monitor this device event and its default value 24/7.
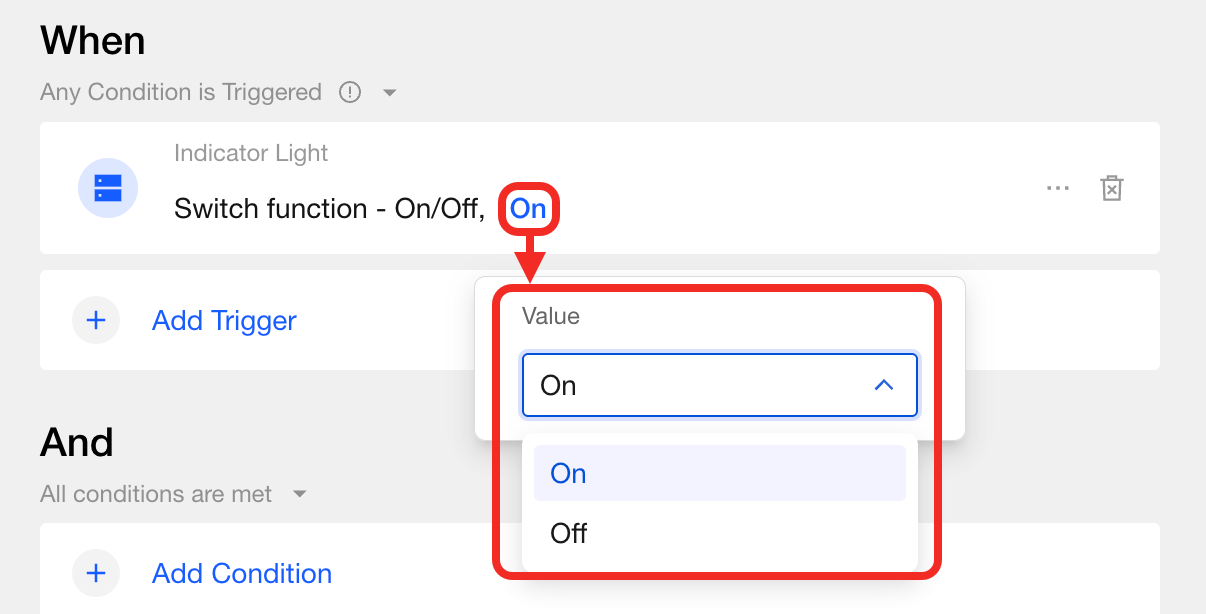
- Edit the value
If you'd like to listen for another value, click the blue text in the event to modify it.
- Add time constraints
You can add two types of time constraints for event listening: the effective time period and the required event duration.
-
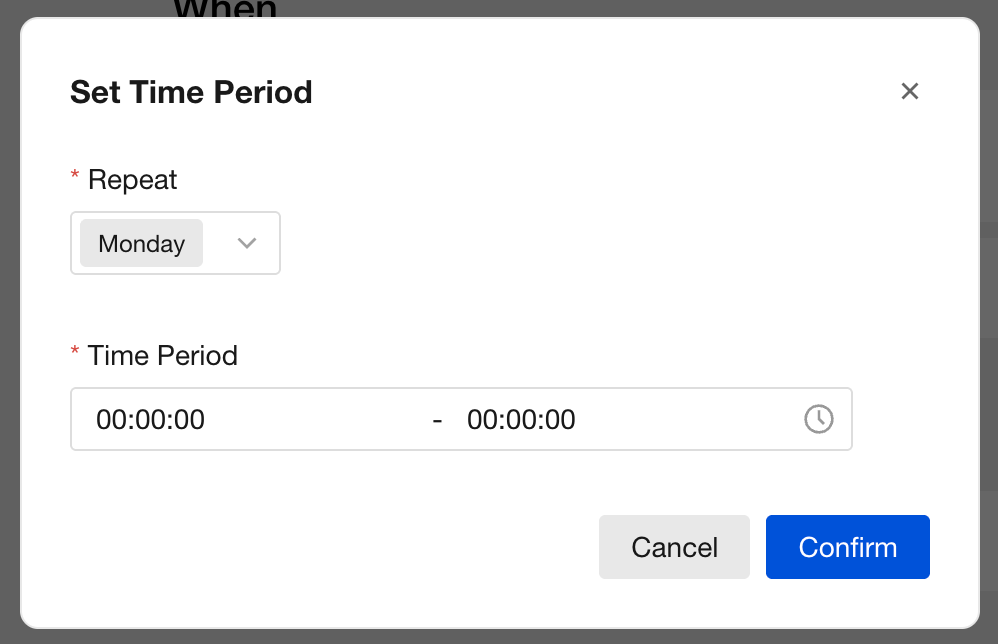
Set effective listening period
To monitor events only during specific dates/times, click ... > Time Period to configure.tipSetting the time range as 00:00:00-00:00:00 means this logic is active all day.
-
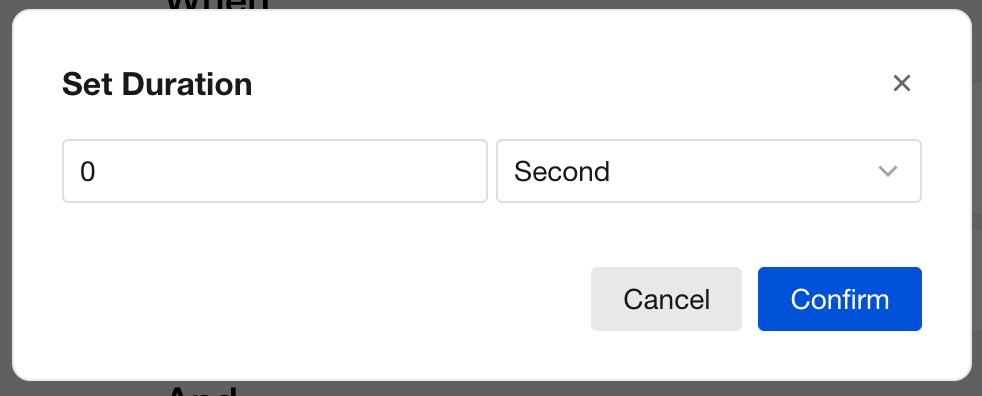
Set event duration requirement If you want the automation to trigger only when an event lasts a certain period, click ... > Duration Time to set it.
-
- Add time constraints
You can add two types of time constraints for event listening: the effective time period and the required event duration.
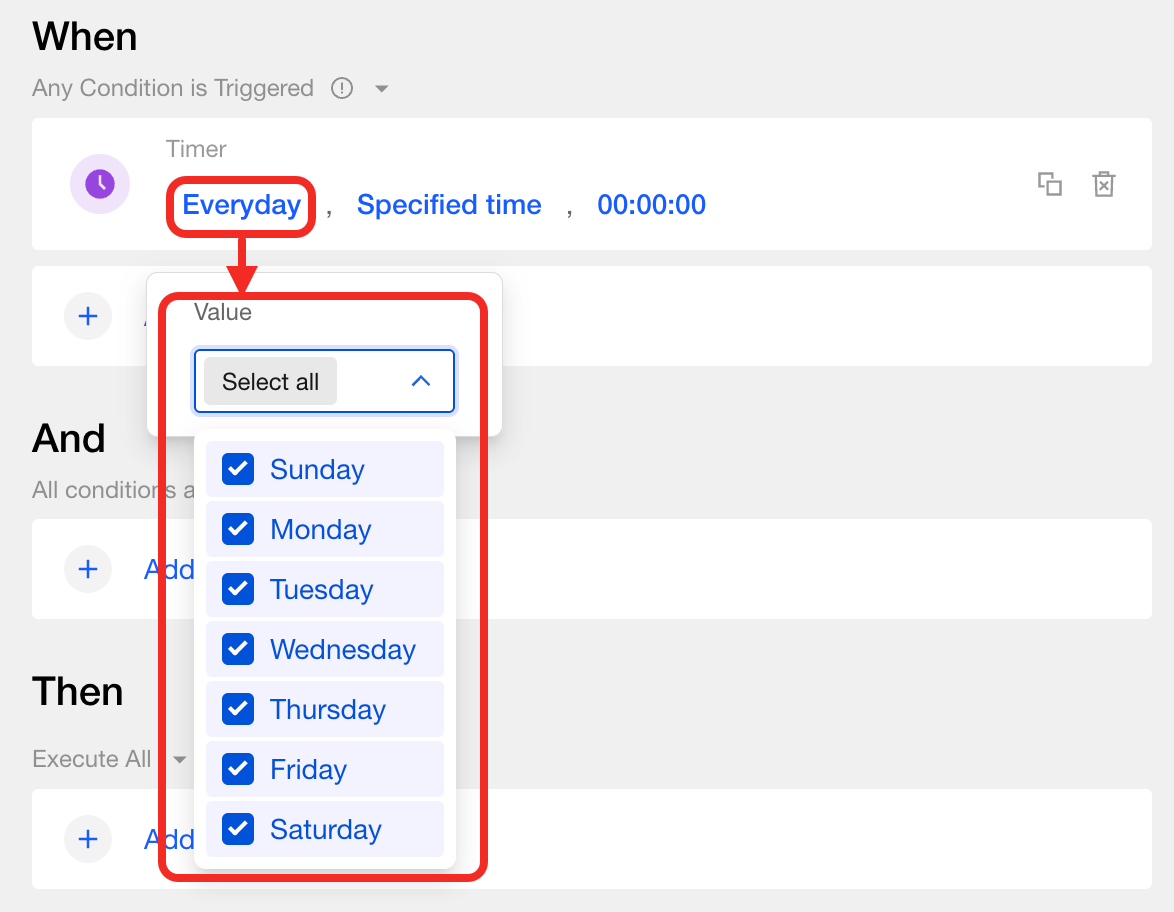
- If you choose Trigger Time:
-
Select which weekdays the action should run (multiple selections supported).
-
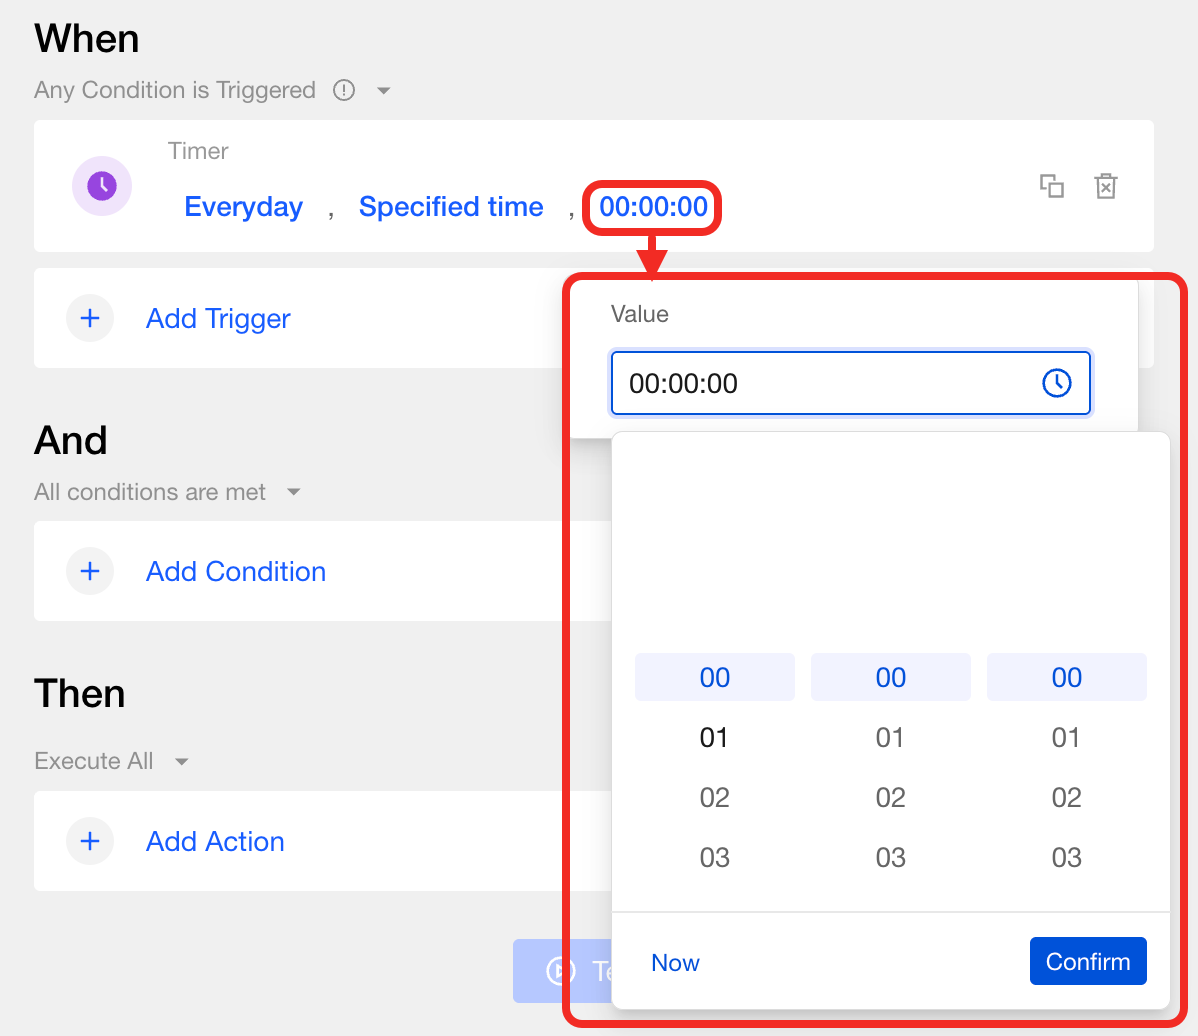
Set the type of time.
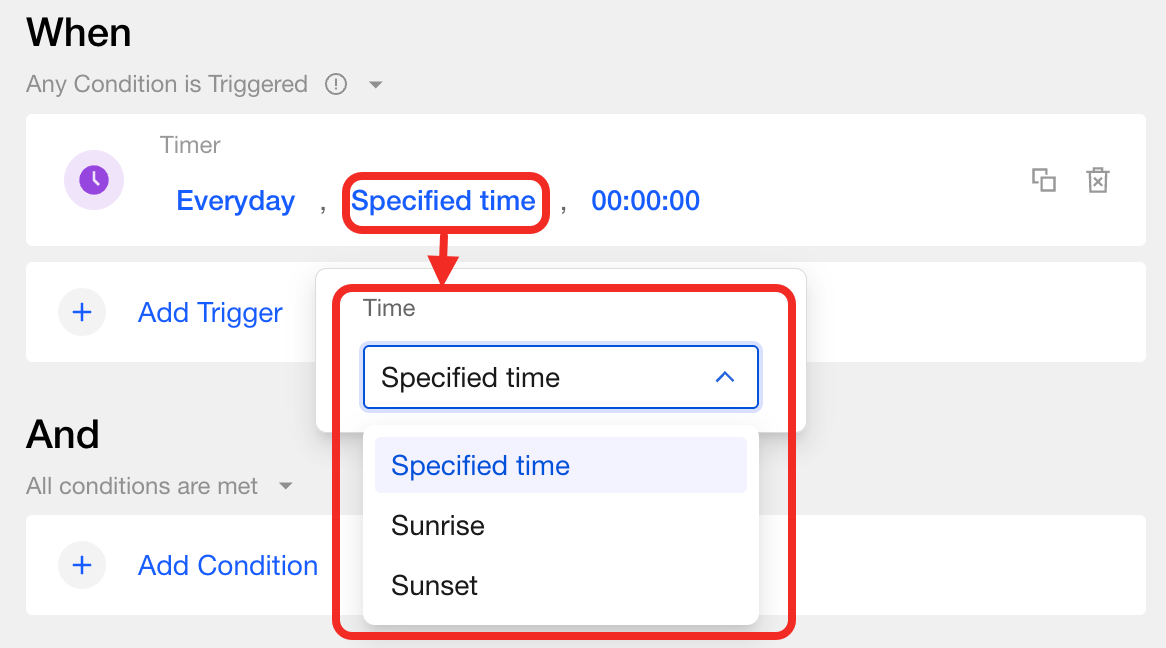 tip
tipWhen selecting sunrise or sunset, please enter your home's latitude and longitude in the following format:
- North latitude, east longitude: use positive numbers (e.g., 35.0° N →
35.0) - South latitude, west longitude: use negative numbers (e.g., 120.0° W →
-120.0)
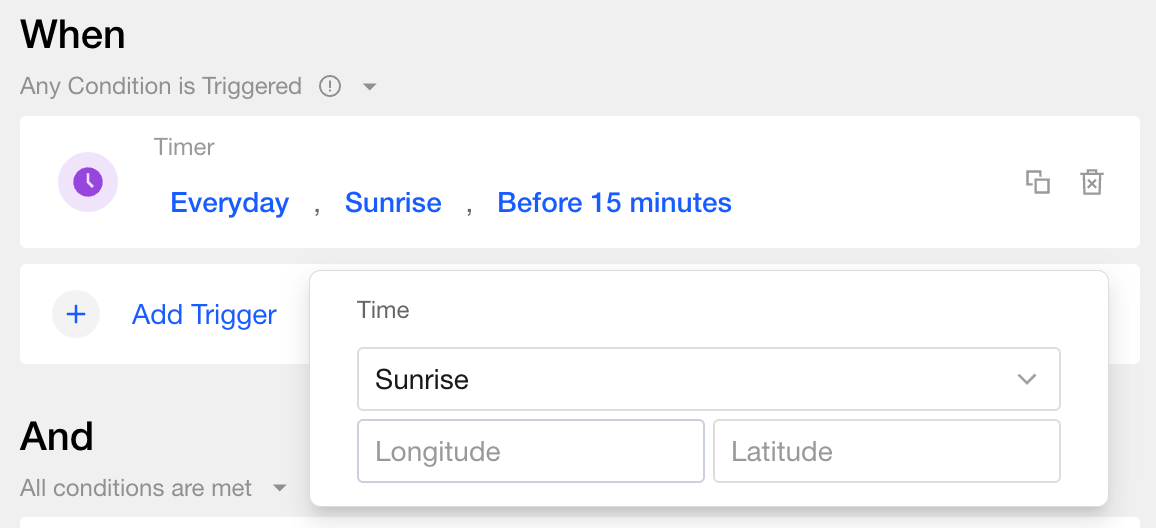
- North latitude, east longitude: use positive numbers (e.g., 35.0° N →
-
Set the exact time.
-
- Add a device event
Select Event Logic
When you add multiple triggers, you can flexibly set their relationship logic:
- Any condition is triggered: The automation will proceed if Studio detects any one of the conditions is met.
- Trigger in sequence: Automation proceeds only if all conditions are met in the specified sequence.
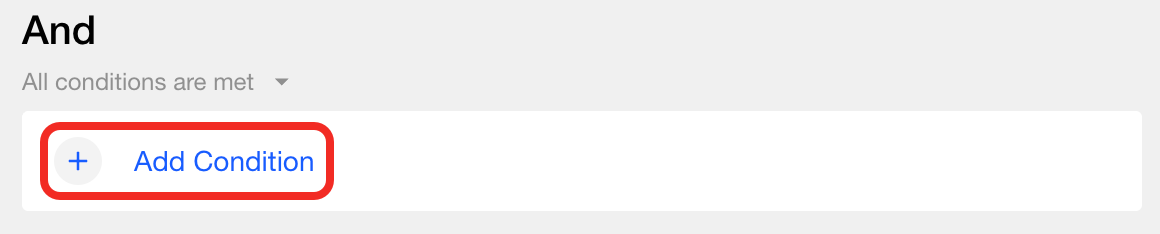
2. (Optional) Configure And
The And section is for adding extra conditions to further refine when your automation should be triggered. Only after the When conditions are met will the system start query whether the And conditions are met. Automation will only proceed if all or some of these conditions are satisfied, depending on your logic settings.
For example: Set "someone detected in the room" as a When condition, then add "air conditioner is on" in And. The automation only proceeds when both conditions are true.
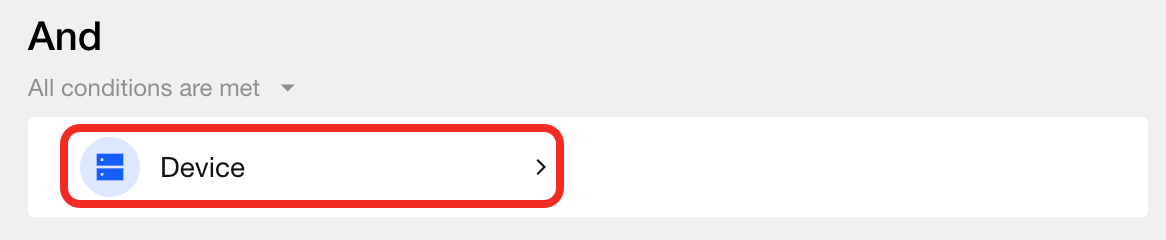
Add Condition
- Click Add Condition.
- Choose Device.
- Select the needed device and its function card, then click Confirm.
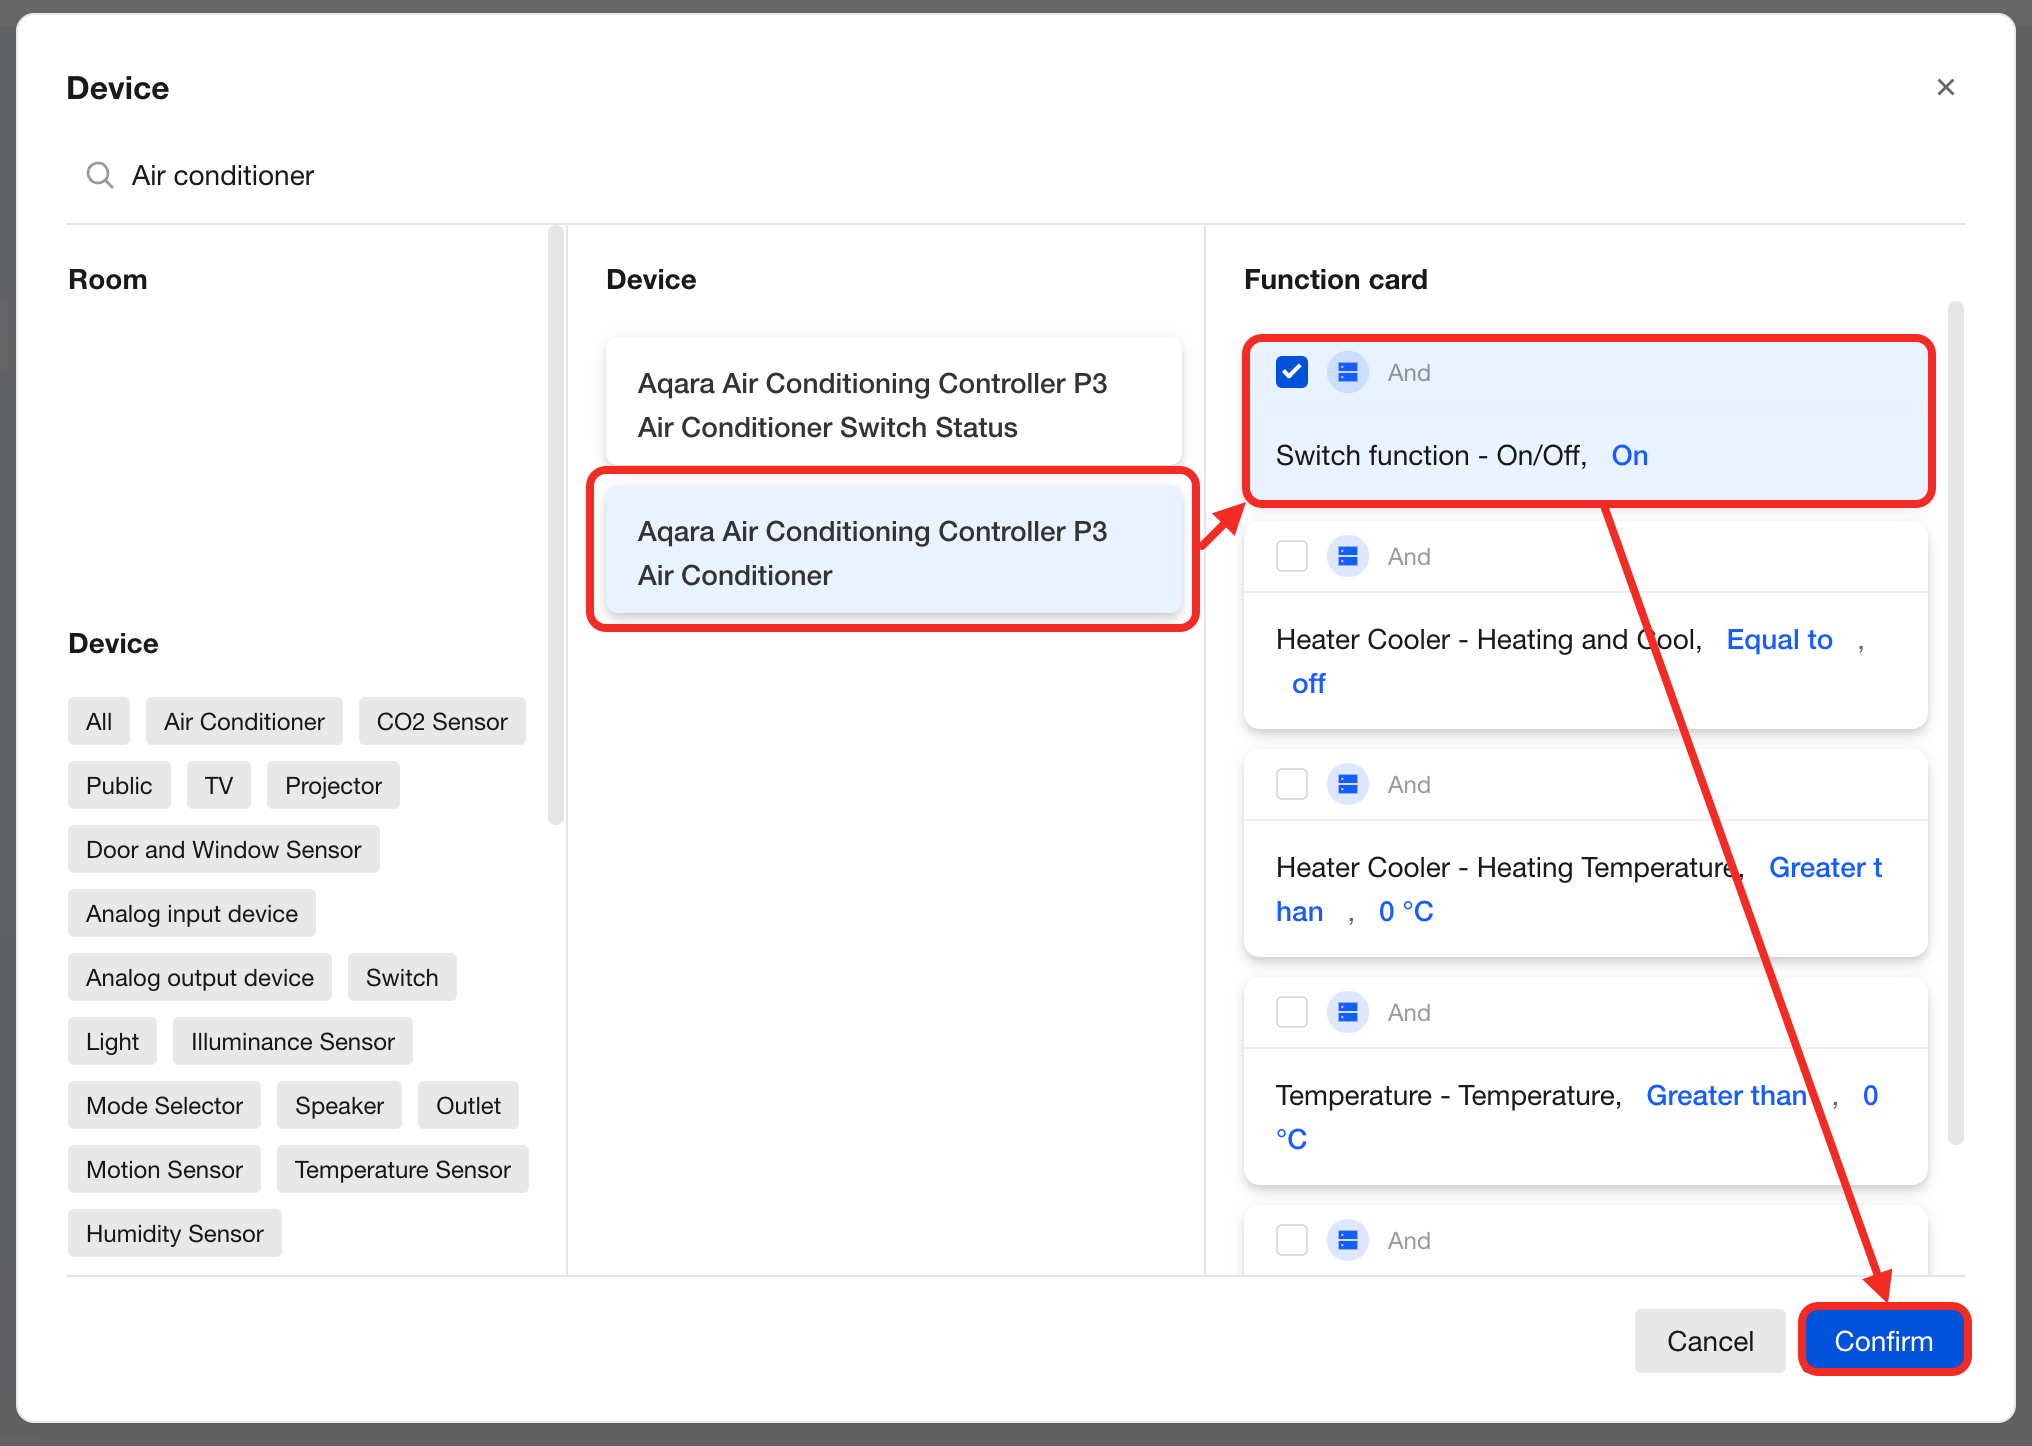 After completion, you'll see the chosen device condition in the And section, showing its default state.
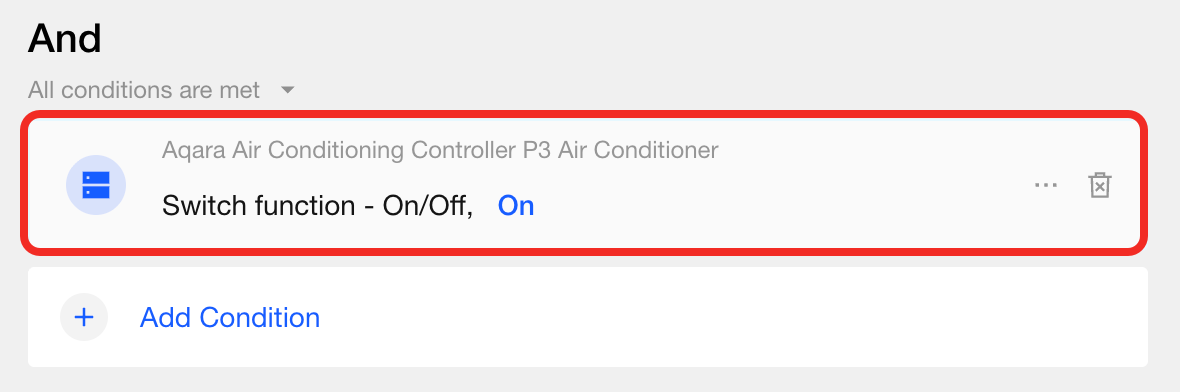
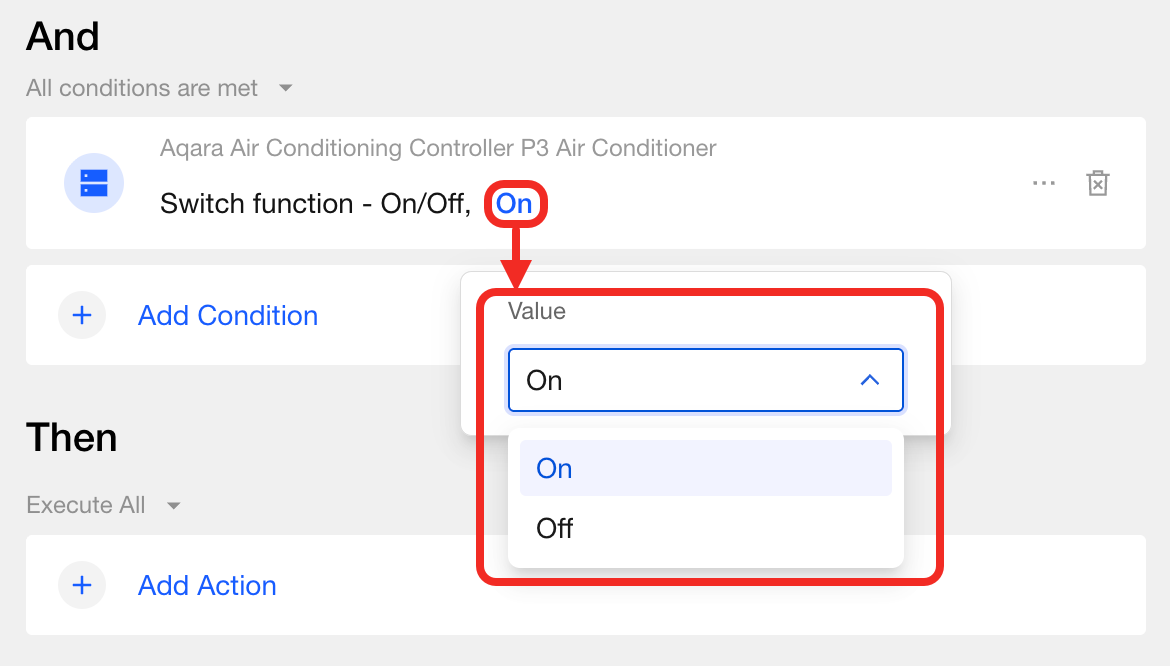
- Edit target values for condition
To check for other device states or values, click the blue field in the condition, then select or enter your target value as needed.
- Configure time constraints You can apply two types of time limits: an effective period or a required minimum duration. The setup is the same as the When step.
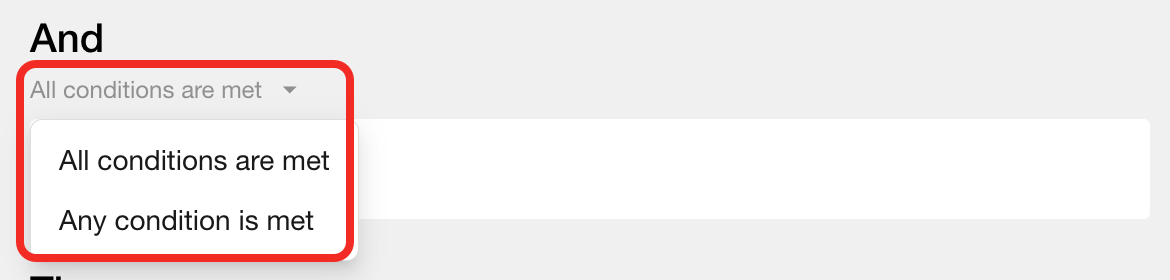
Set Condition Logic
When you add multiple status conditions, set the logic for judgment as follows:
- All conditions are met: Actions will be executed only when all conditions are met.
- Any condition is met: Actions will be executed if any conditions are met.
3. Configure Then
The Then section defines what happens when your automation is triggered. For example, you can control device switches, adjust values, etc. You can also insert delays between actions to customize the sequence.
In Then, you can add multiple actions. Each action can be set up for a specific device and control item. Common actions include:
- Switching devices on/off;
- Adjusting temperature;
- Brightening or dimming the lights.;
- Inserting delay steps so certain actions are executed after a set pause.
All actions and delays in the Then area will execute in order, providing smart and flexible linkage.
Add Actions
Actions refer to the device actions and delay steps that should be performed after the automation is triggered.
The process:
- Click Add Action.
- Choose Device or Delay execution.
- Select the needed device and its function card, then click Confirm.
-
If you choose Device:
- Add device action
In the Device popup, select the required device and function card, then click Confirm.
Now you can see the selected device action in Then with default parameter value. You can further change the value as needed.
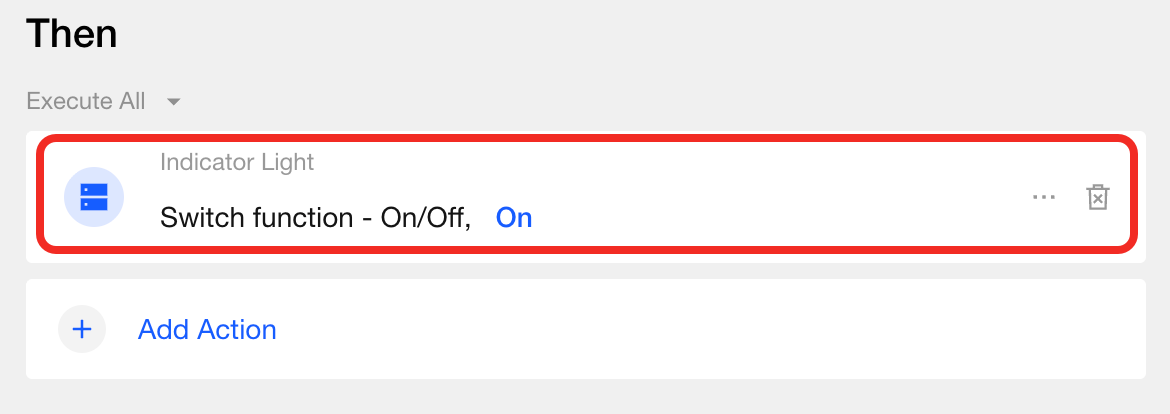
- Edit action parameters
To adjust the action's parameters, click the blue field and select or input the target value.

- Configure time constraints You can specify an effective period for the action, just like in the When section.
- Add device action
In the Device popup, select the required device and function card, then click Confirm.
Now you can see the selected device action in Then with default parameter value. You can further change the value as needed.
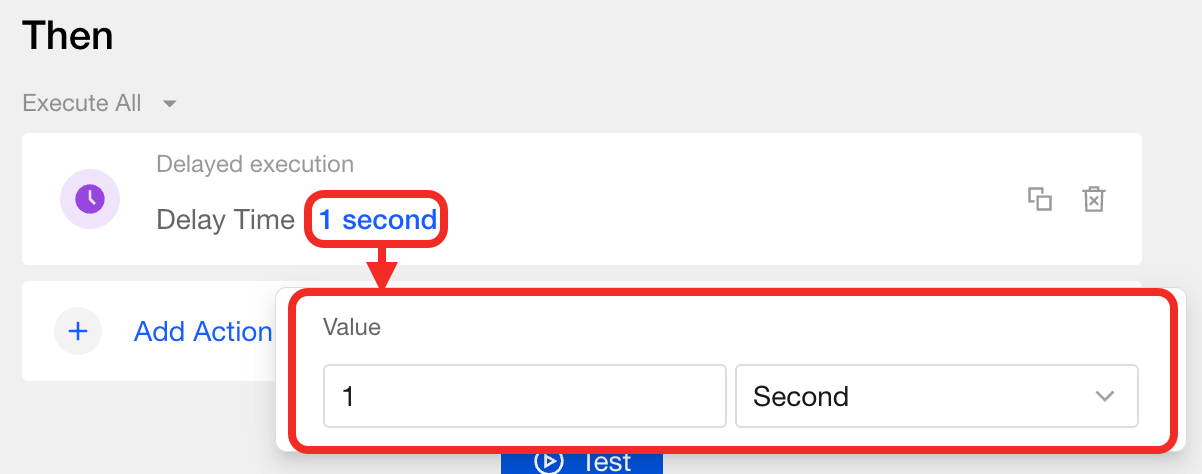
-
If you choose Delay: Click the blue duration field to change the delay length.
 tip
tipDelay only affects the actions that follow it.
For example:- Action A
- Delay
- Action B
In this sequence, once the triggers are met, Studio will first execute Action A immediately, then wait for the delay period, and then execute Action B. The delay is only for postponing Action B; Action A executes right away.
If your sequence is:
- Delay
- Action A
Studio will first wait for the specified delay, then execute Action A.
-
Set Execution Logic
After adding multiple actions, you can choose how they are executed:
- Execute all: Whenever the triggers are met, Studio executes all set actions, one after another.
- Execute in rotation: Each time the trigger fires, only one action is executed, rotating through the set list in order each time. The sequence repeats in a loop.

4. Test Automation
After configuration, click the Test button to check your automation.
5. Save
Once you confirm your automation works as expected, click Save. The new IFTTT automation (enabled by default) will appear in the Automation page.