Aqara Coap
This document explains how to connect an Aqara Gateway (excluding Aqara Studio Sub-hubs and Aqara Studio Primary Hubs) into Aqara Studio.
Once the Aqara Gateway is integrated with Aqara Studio, you only need to pair its sub-devices. The sub-devices will be synchronized and connected automatically—there’s no need to add them individually.
Prerequisites
Before you begin, please ensure you have an Aqara Gateway device.
Install Plugin
Please refer to the Plugin Market instruction and go to Aqara Builder to install the AqaraCoap Protocol Access plugin.
Import the Five-Tuple
-
In the left sidebar, click to enter the Devices page. In the left Protocols and Devices panel, click the ... button and select Add Protocol.

-
Select
AqaraCoap Accessin the popup.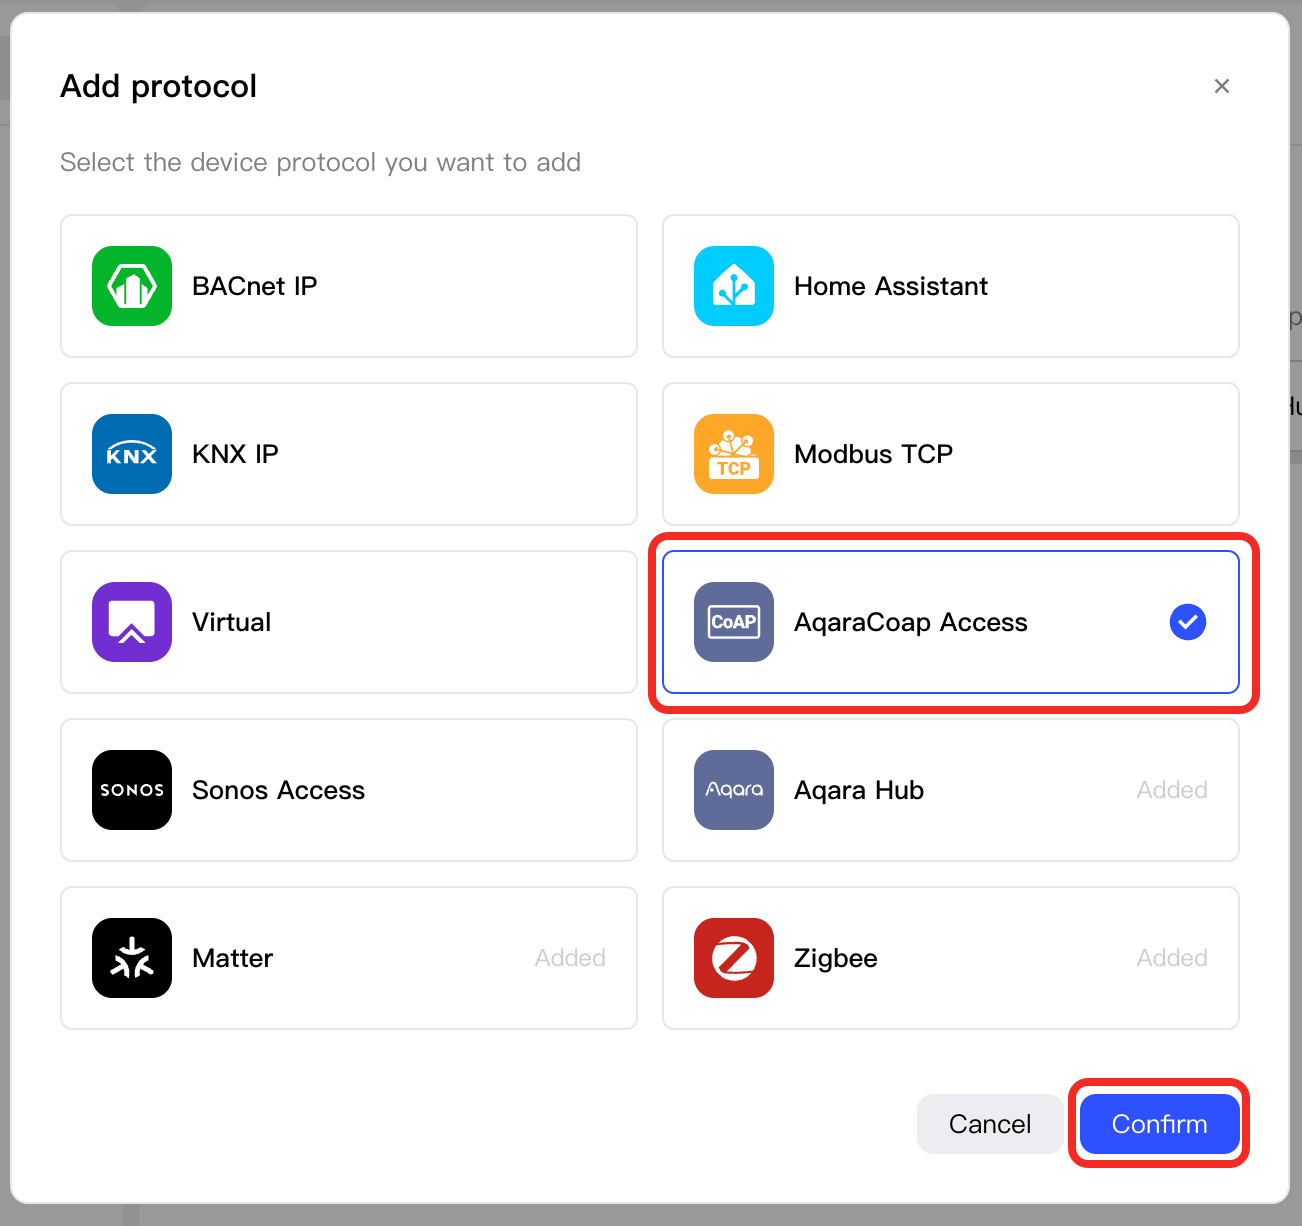
-
On the left sidebar, select
AqaraCoap Accessand click theProtocol Configurationbutton.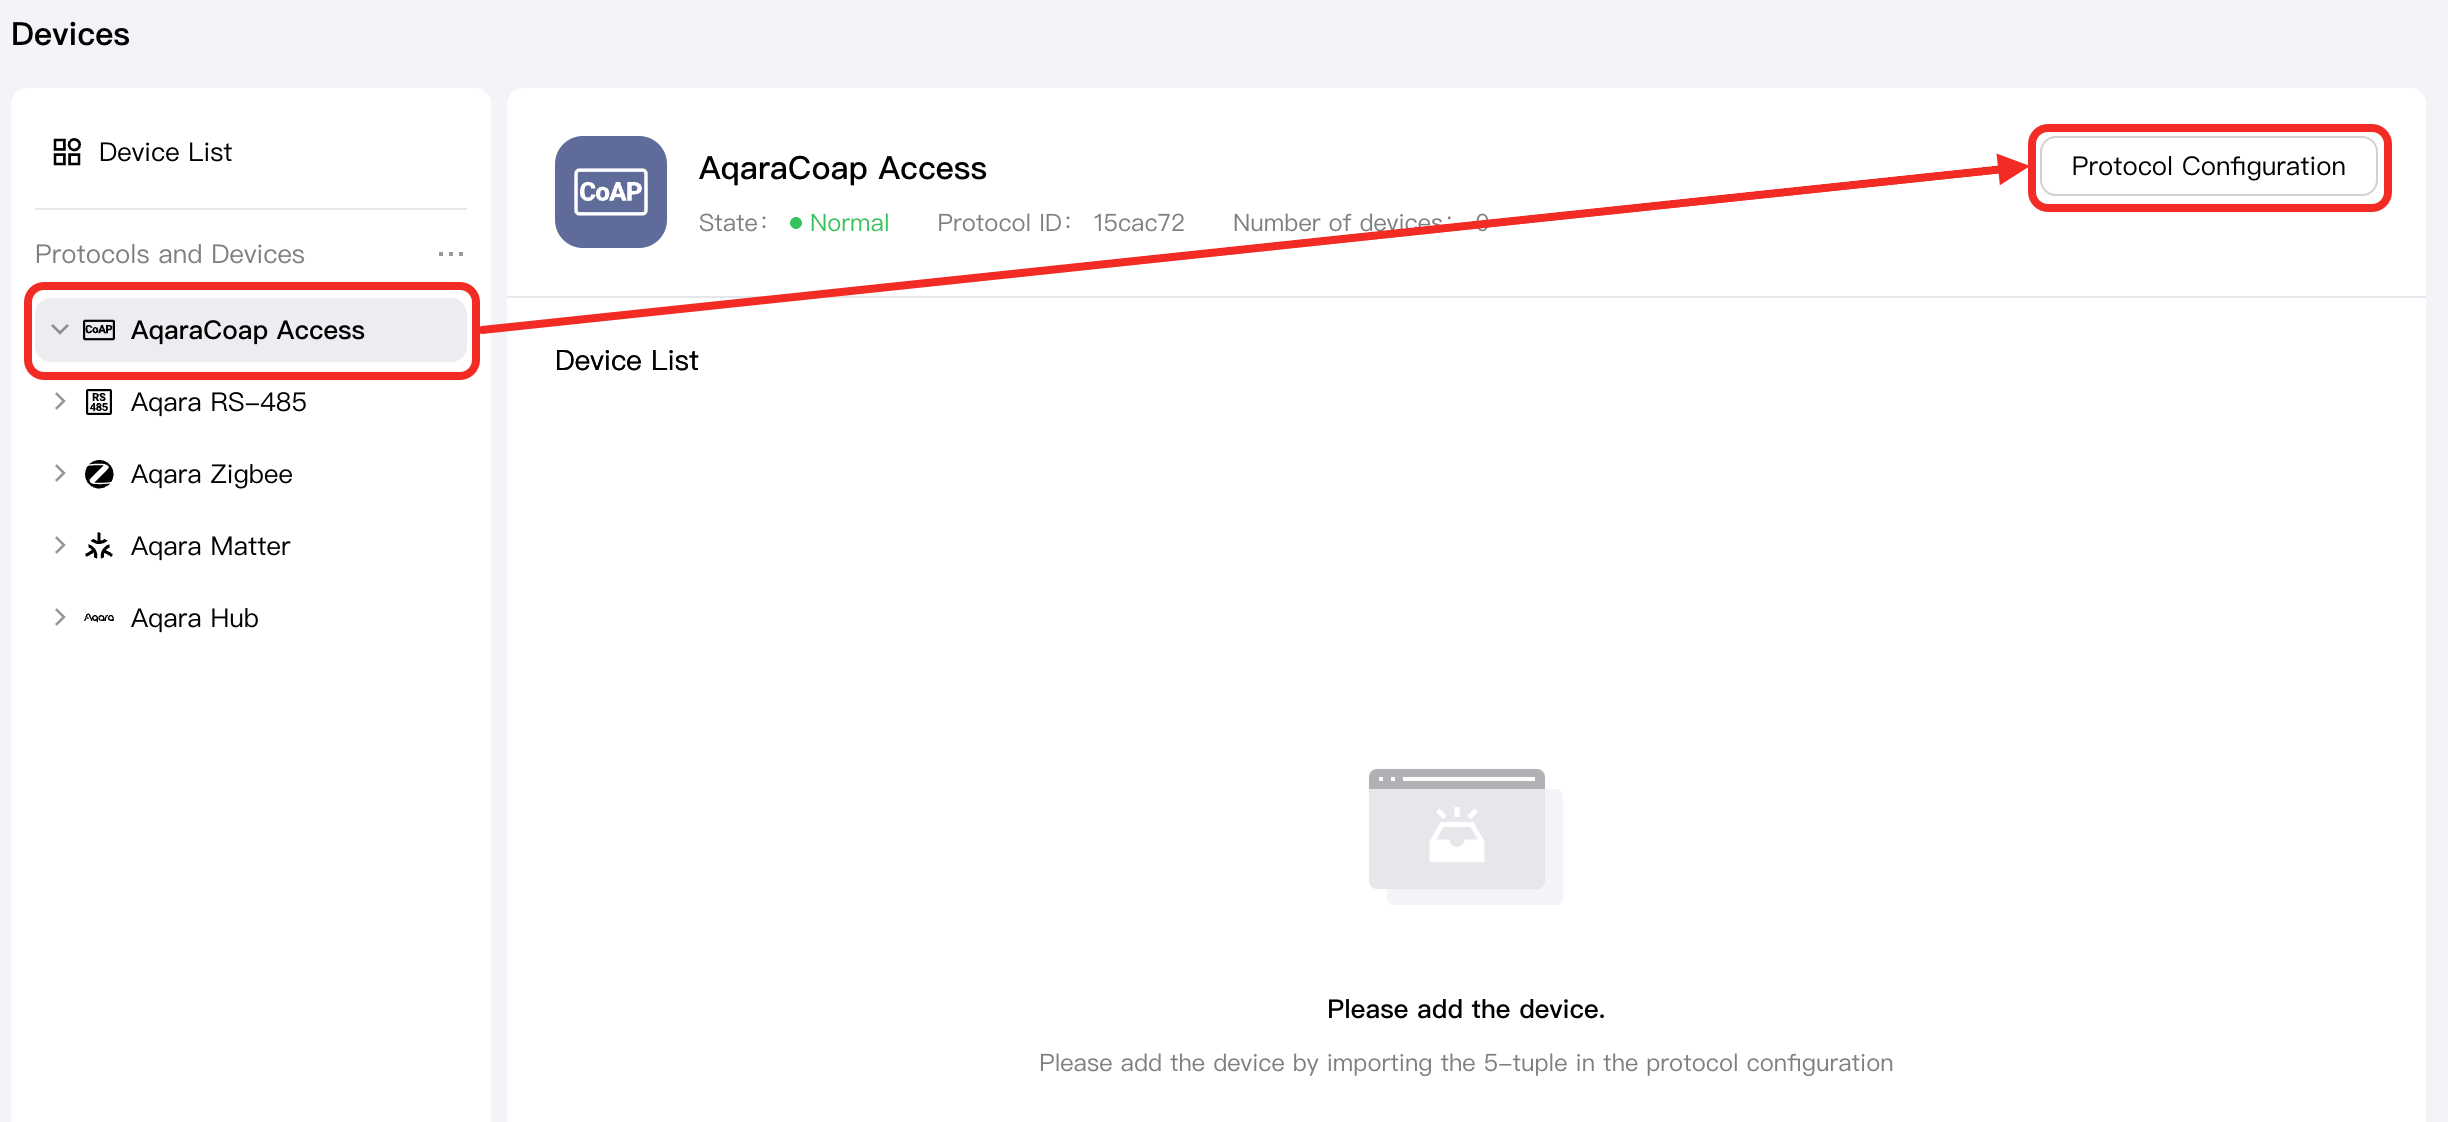
-
Contact Aqara business staff to obtain the five-tuple information file (JSON) for the gateway itself to be integrated into Aqara Studio.
tipOnly the gateway's five-tuple information is needed. Information for its sub-devices is not required.
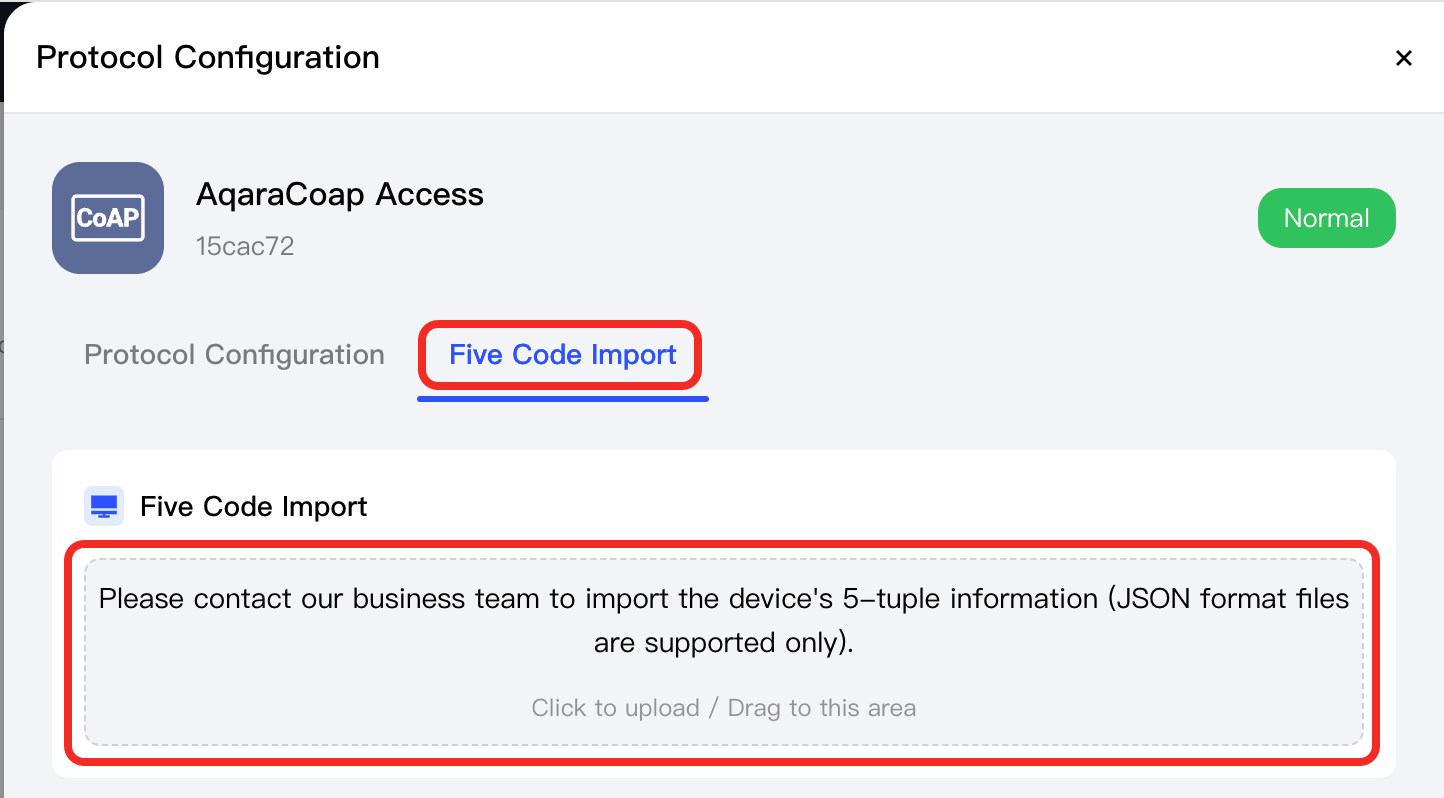
On the Protocol Configuration page, switch to the Five-Code Import tab and upload this file. Aqara Studio will automatically parse its contents and wait for the device to join the network.
Download Aqara Tool
Please use this link to download and install the Aqara Studio Tool App (currently supported only on Android).
Add an Aqara Coap Device
-
Launch Aqara Tool and fill in the required network login information:
Parameter Description Example BaseUrl Always contains the protocol (such as http:// or https://), followed by the host (IP address or domain name), and may include port and path. It’s the complete endpoint address. http://10.10.24.83:8000(IP address + port,usually 8000)https://xxx.yyy.com/zzz/(domain name + path)FastLinkUrl Always contains only the host (IP address or domain name); does NOT include protocol, port, or path. Used as a simplified identifier, often combined with default configurations like protocol and port for quick internal access. 10.10.24.83(IP address)xxx.yyy.com(domain name)CountryCode Country code, e.g., for the United States it's US. To get a full list of country codes, please check WiFi Country Code.US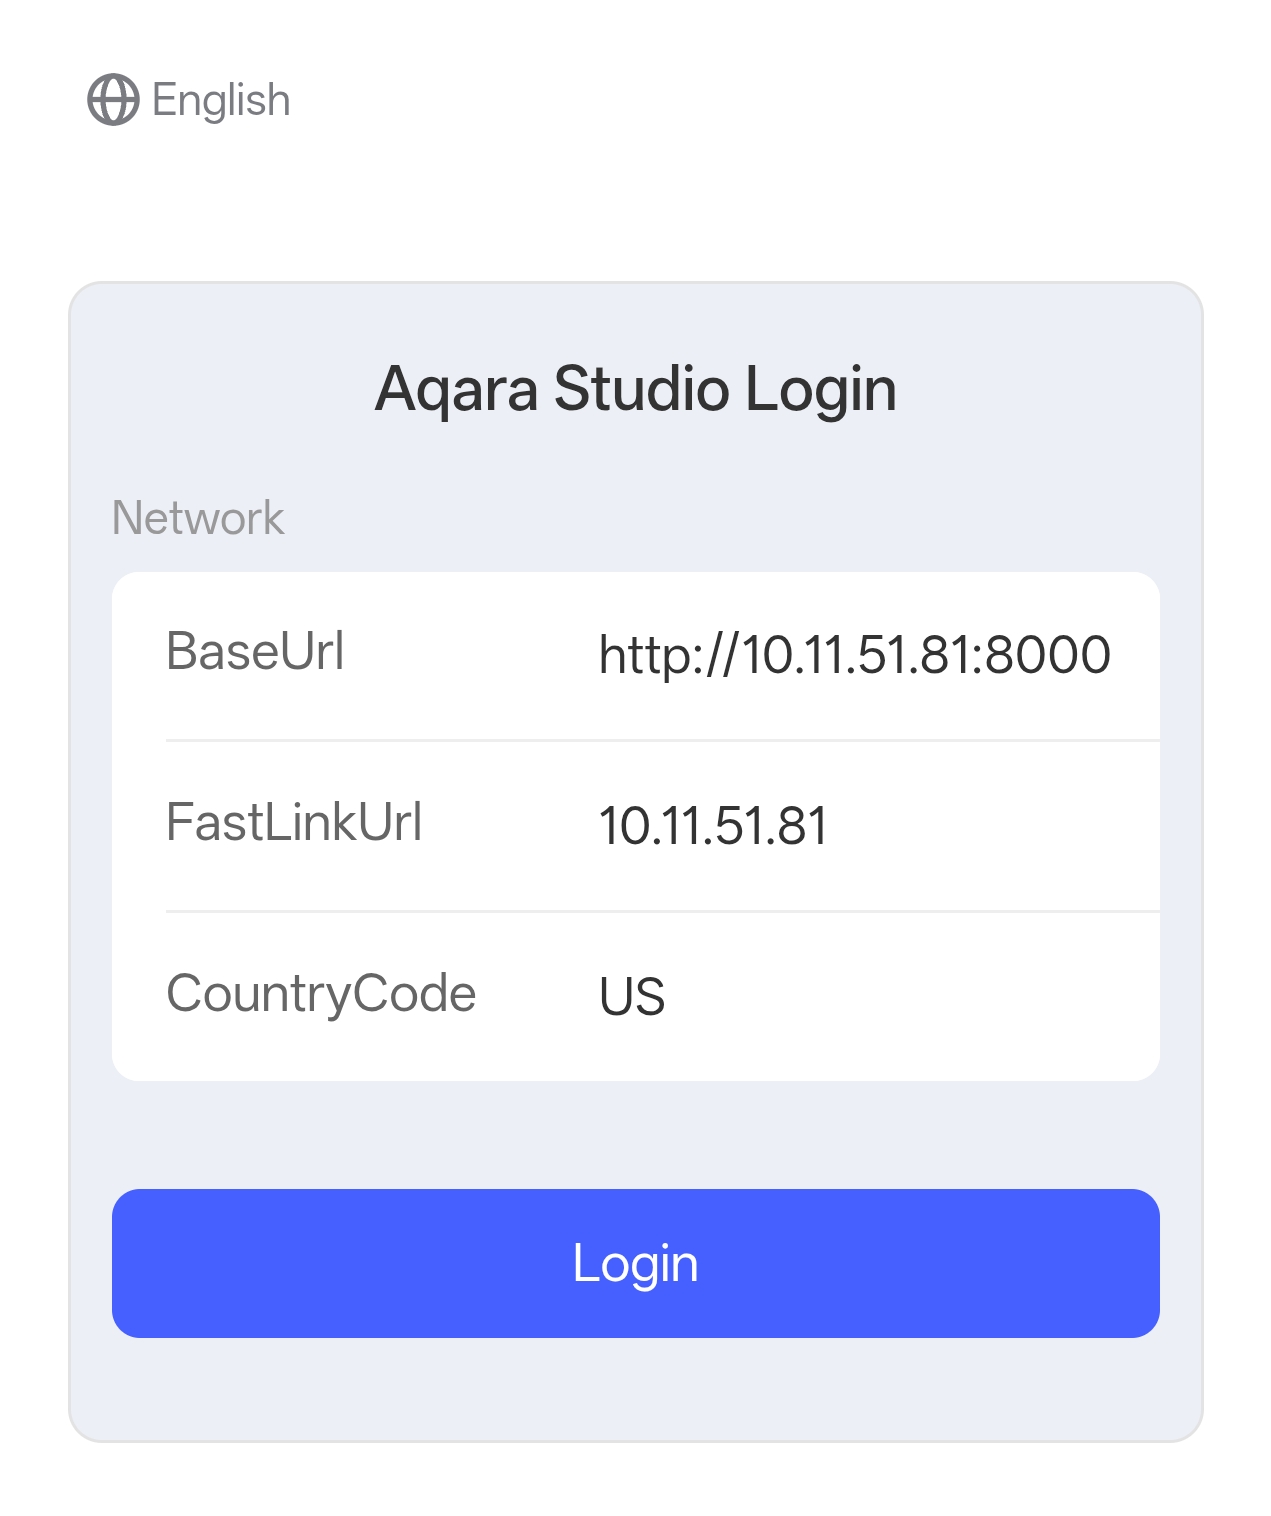
-
After a successful login, search for the Aqara Gateway that you want to integrate.
Select the gateway, and follow the prompts on the page to add the Aqara Gateway.
tipIf the Aqara Tool App appears to freeze during the device network configuration process, please pay attention to the gateway's indicator light.
If the indicator light changes to the normal working state described in the user manual (for example, for model M200, it is solid blue), this means the gateway has successfully joined the network.
At this point, you can refresh the Aqara Studio web page and check under Devices > AqaraCoap to see if the gateway appears.
-
After the gateway is added, put it into pairing mode according to its user manual.
-
When the sub-devices have joined successfully, their information will automatically appear in the
AqaraCoapdirectory of the right sidebar. There is no need to manually add function points—Aqara Studio will recognize them automatically.
Next Steps
Now, you can view details and control the device, or use the device in automation.