Infrared Equipment
This document introduces how to integrate infrared equipments into Aqara Studio, helping you conveniently manage and control infrared equipment via the Edge Hub M300.
Supported Types
Currently, Aqara Studio supports the following types of infrared equipments:
- TV
- Set-top box
- DVD player
- Air conditioner
- Projector
- Audio/Speaker
- Fan
- Camera
- Smart light
- Air purifier
- Water heater
- Custom
Create an Infrared Equipment
-
In the left sidebar, click to enter the Devices page. In the left Protocols and Devices panel, click the ... button and select Add Protocol.

-
In the pop-up window, select
Virtualto add aVirtualnode.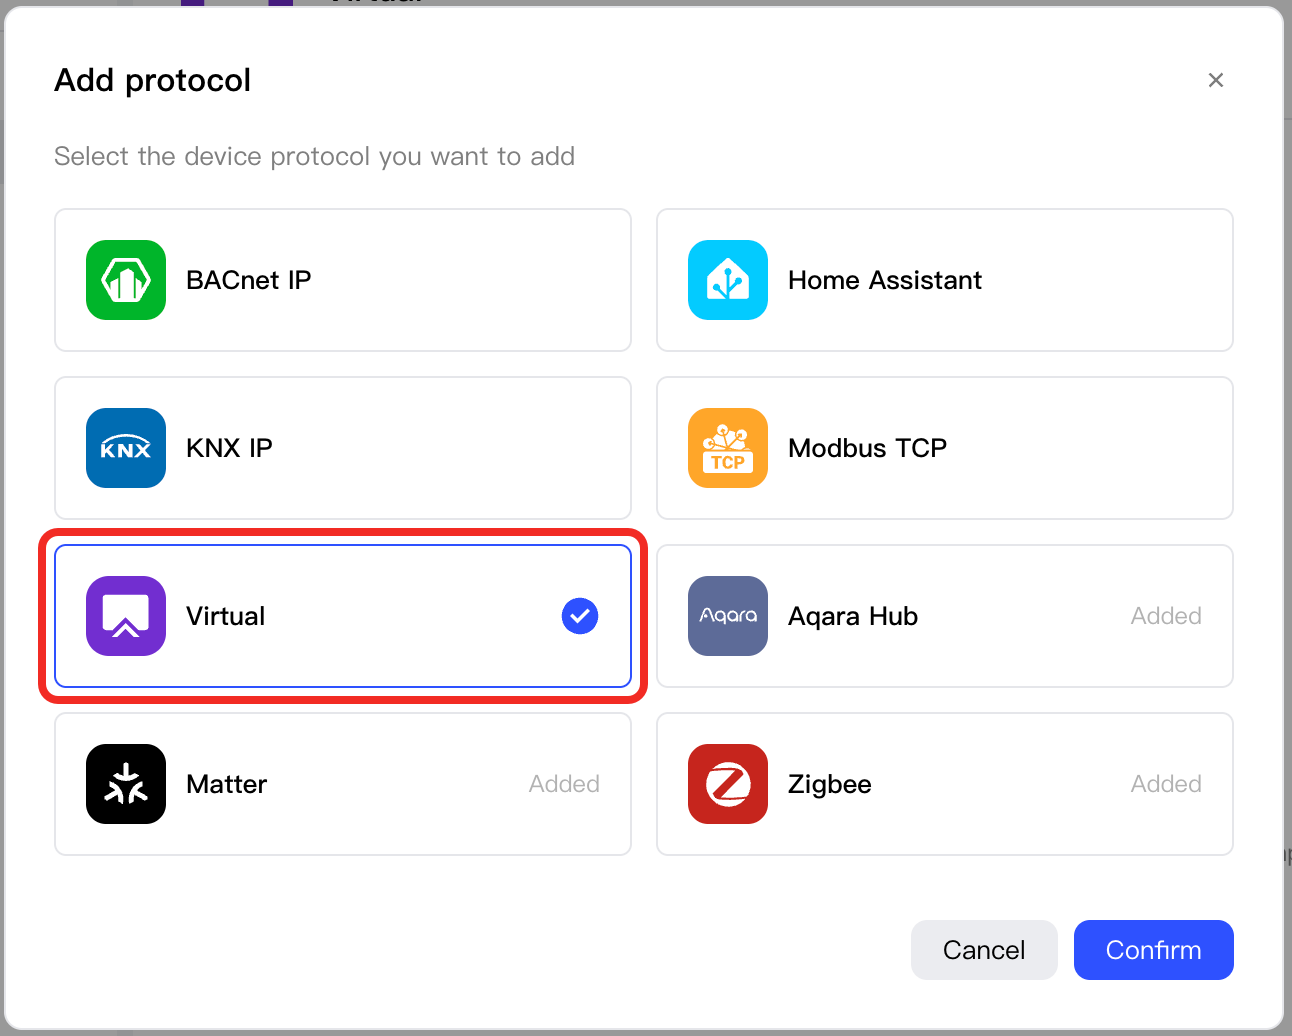
-
Select this node and click the
Add Devicebutton.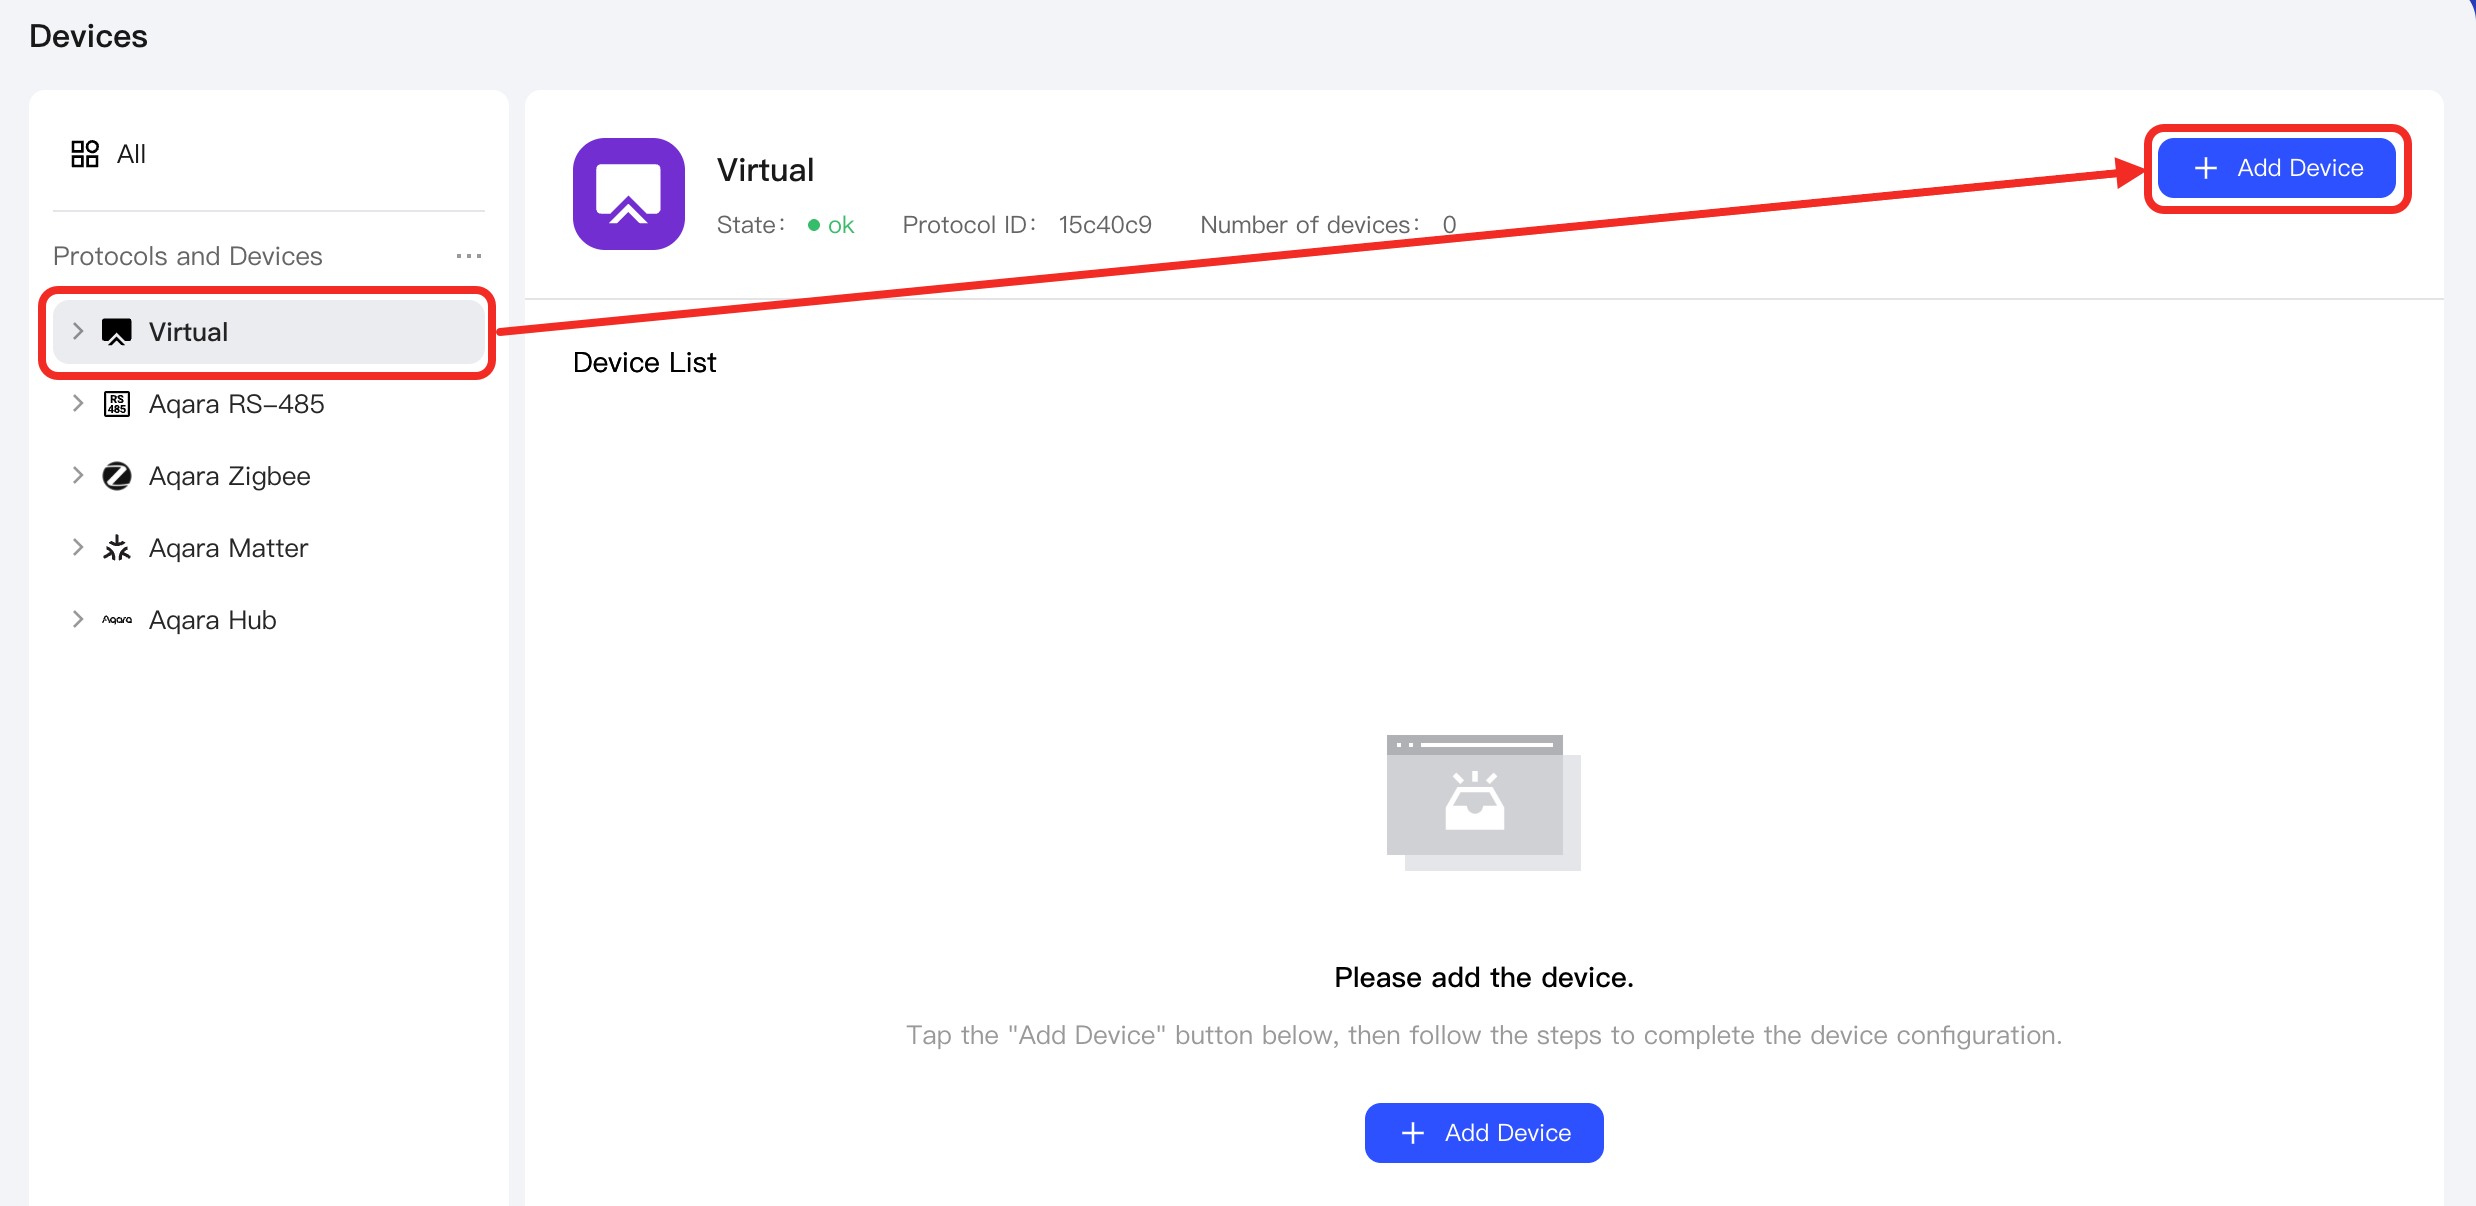
-
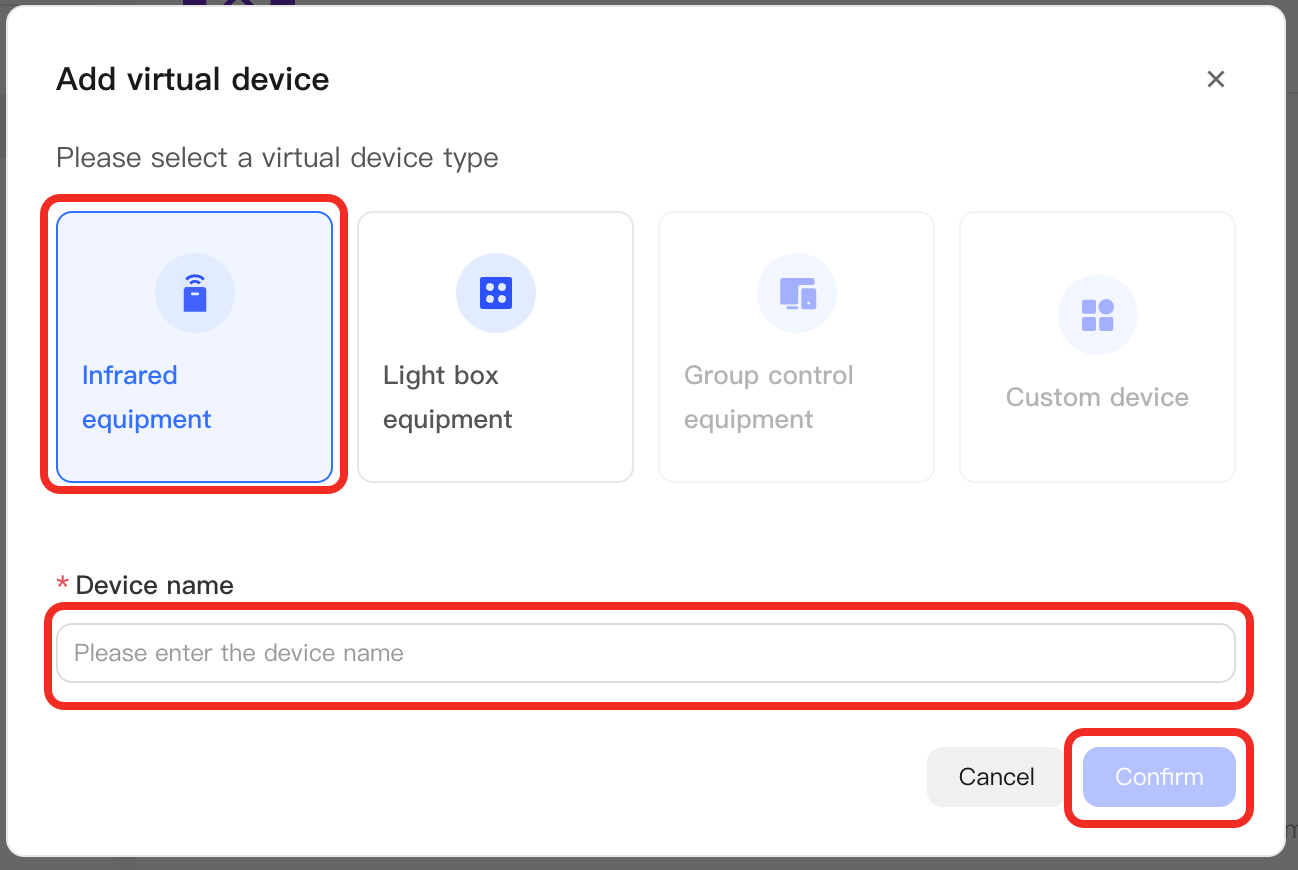
In the pop-up window, set the Virtual Device Type to Infrared Equipment, and configure the Name of the device.
-
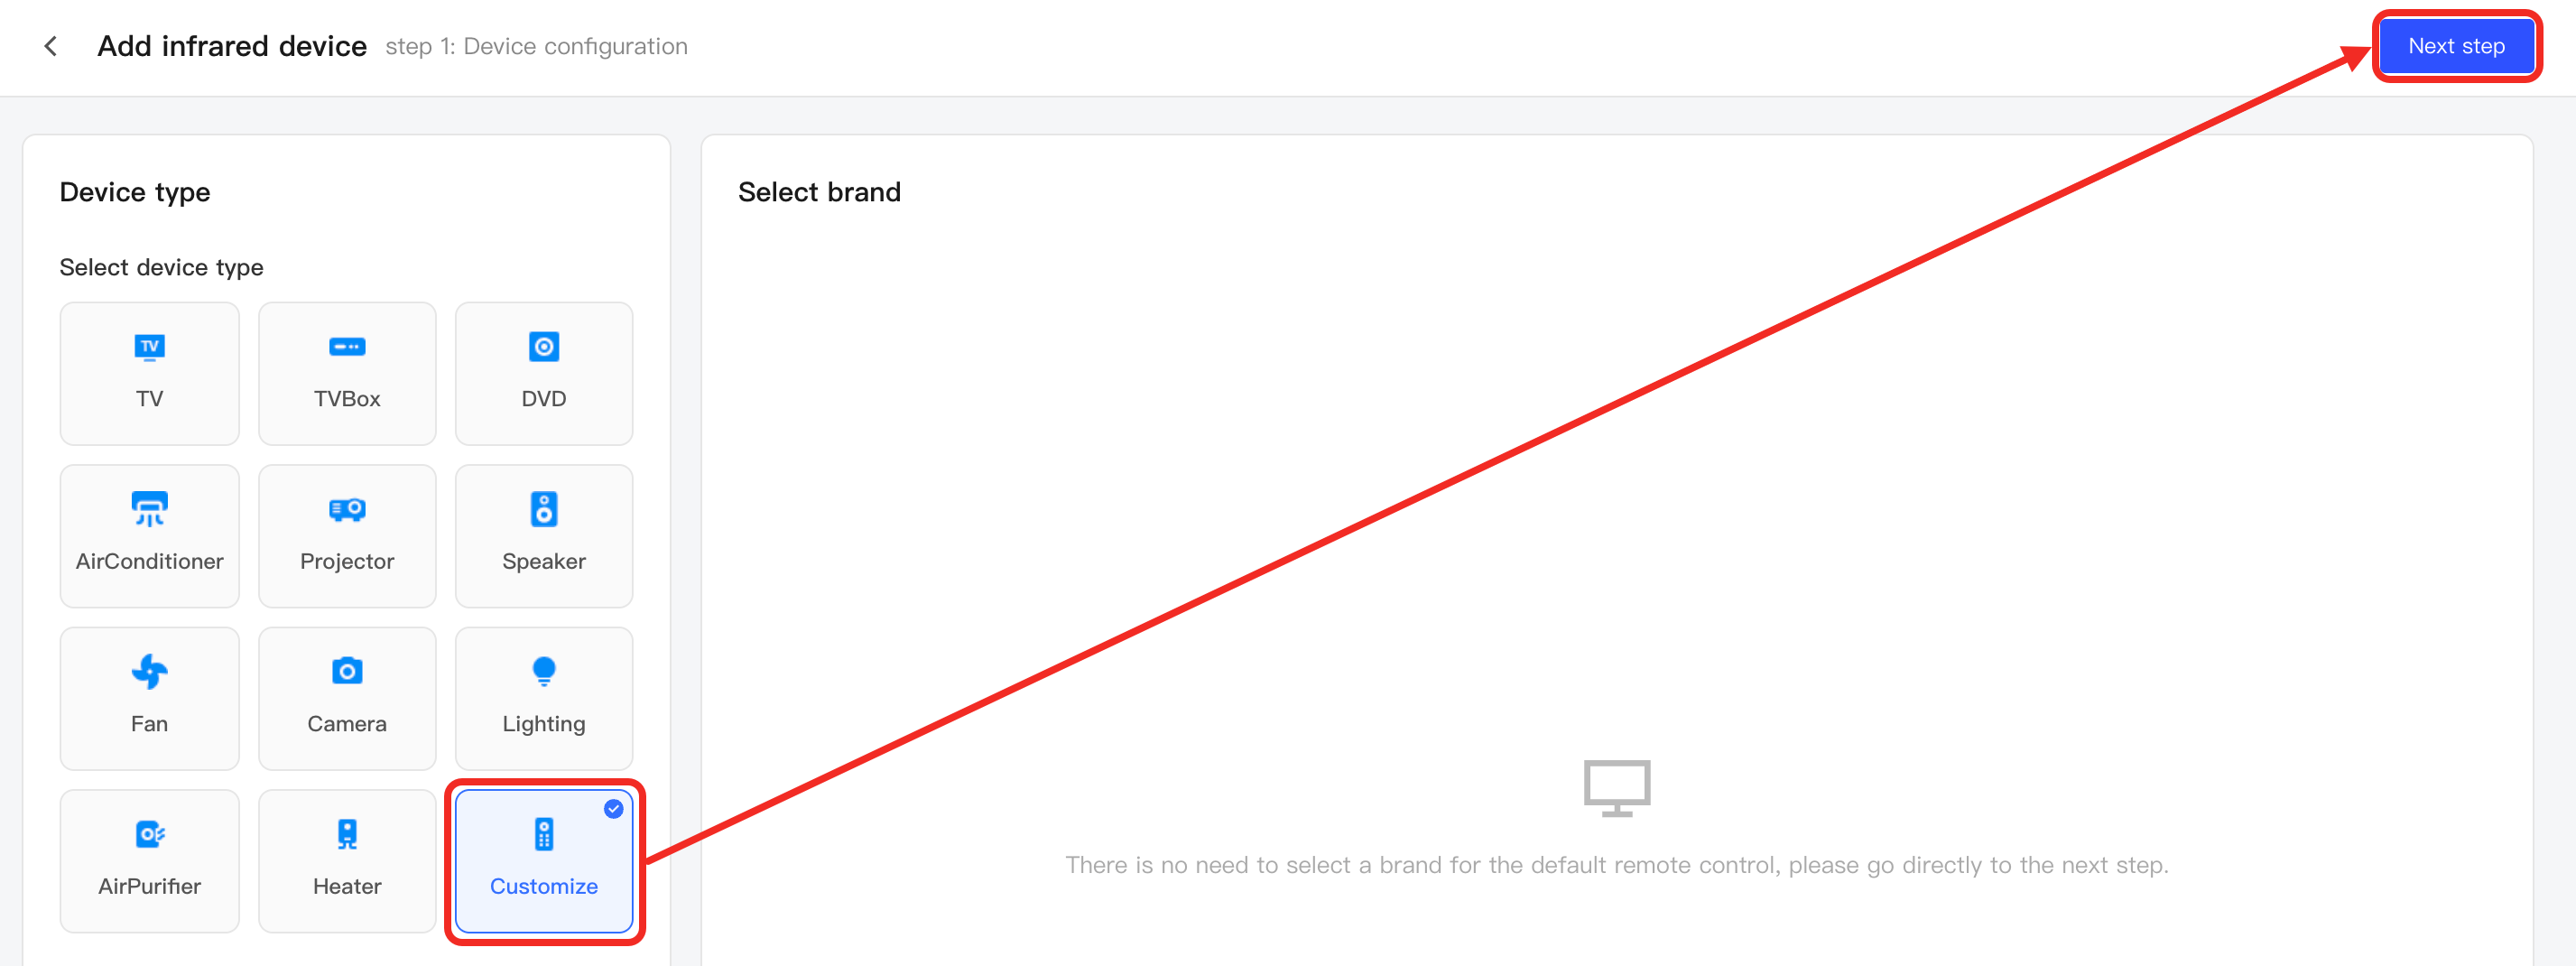
Select the Infrared Equipment Type and its brand.
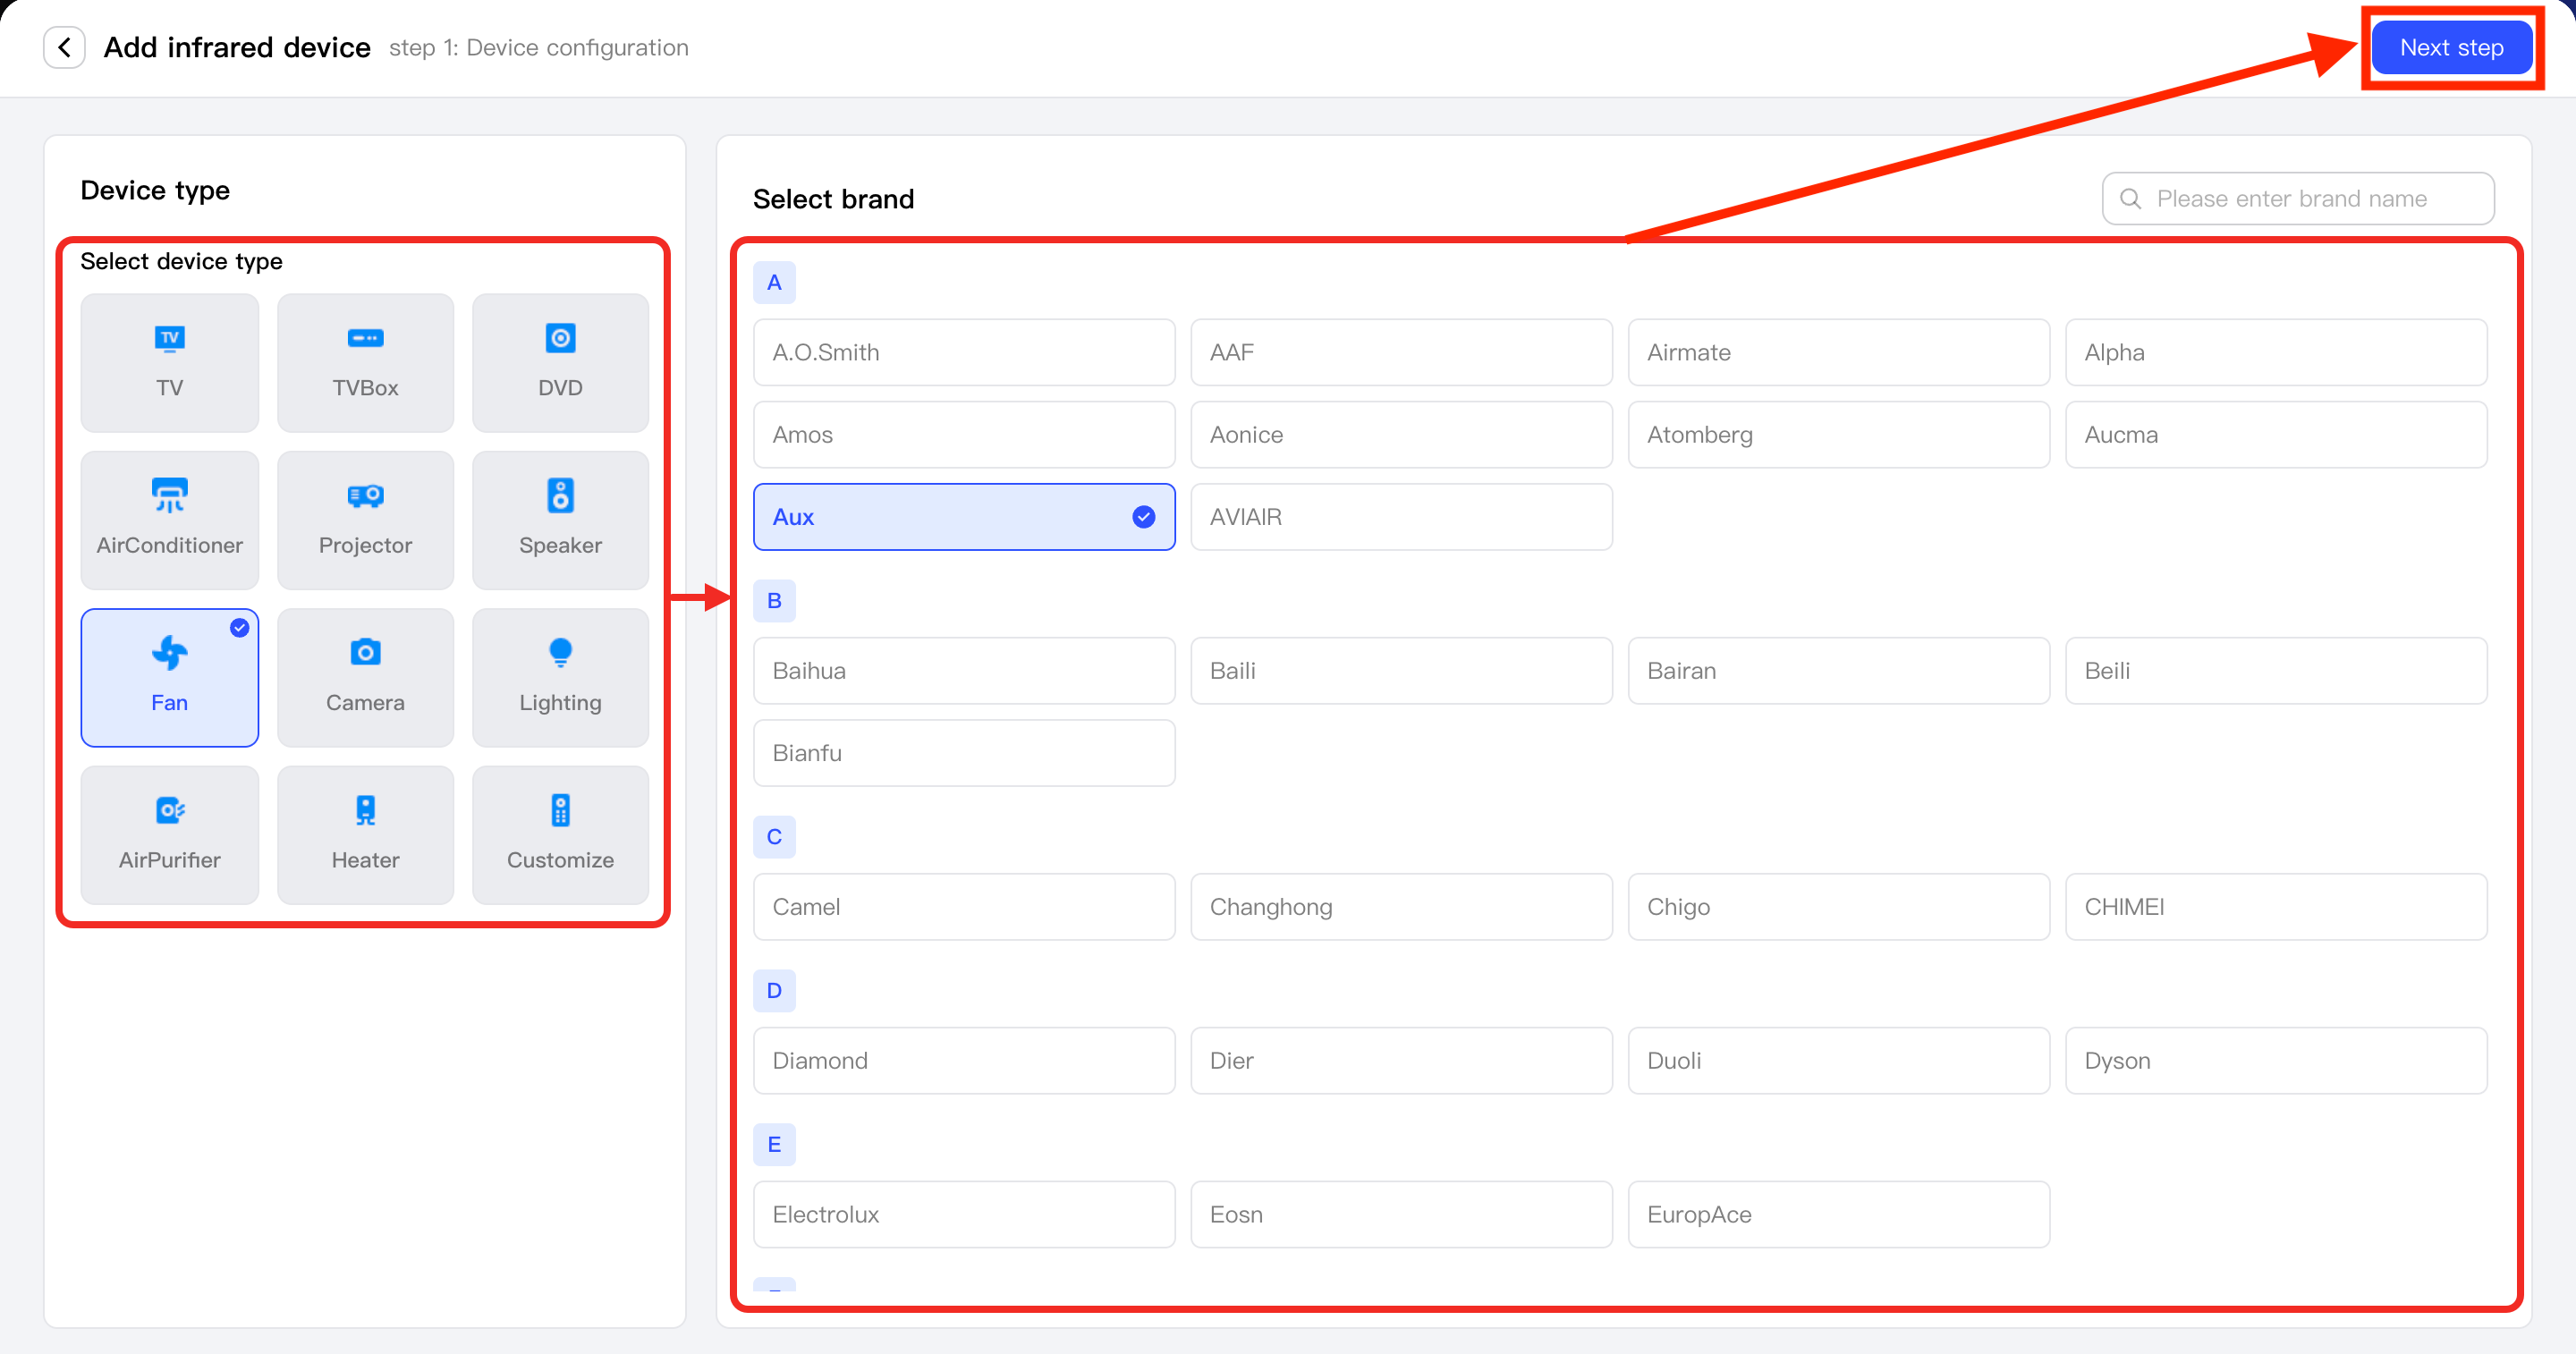
If the device type is not in the list or is a custom device, select Customize. Then click Next Step to enter the infrared learning process.
-
Aqara Studio will start downloading all code libraries for devices of this brand and type.
Match Code Libraries
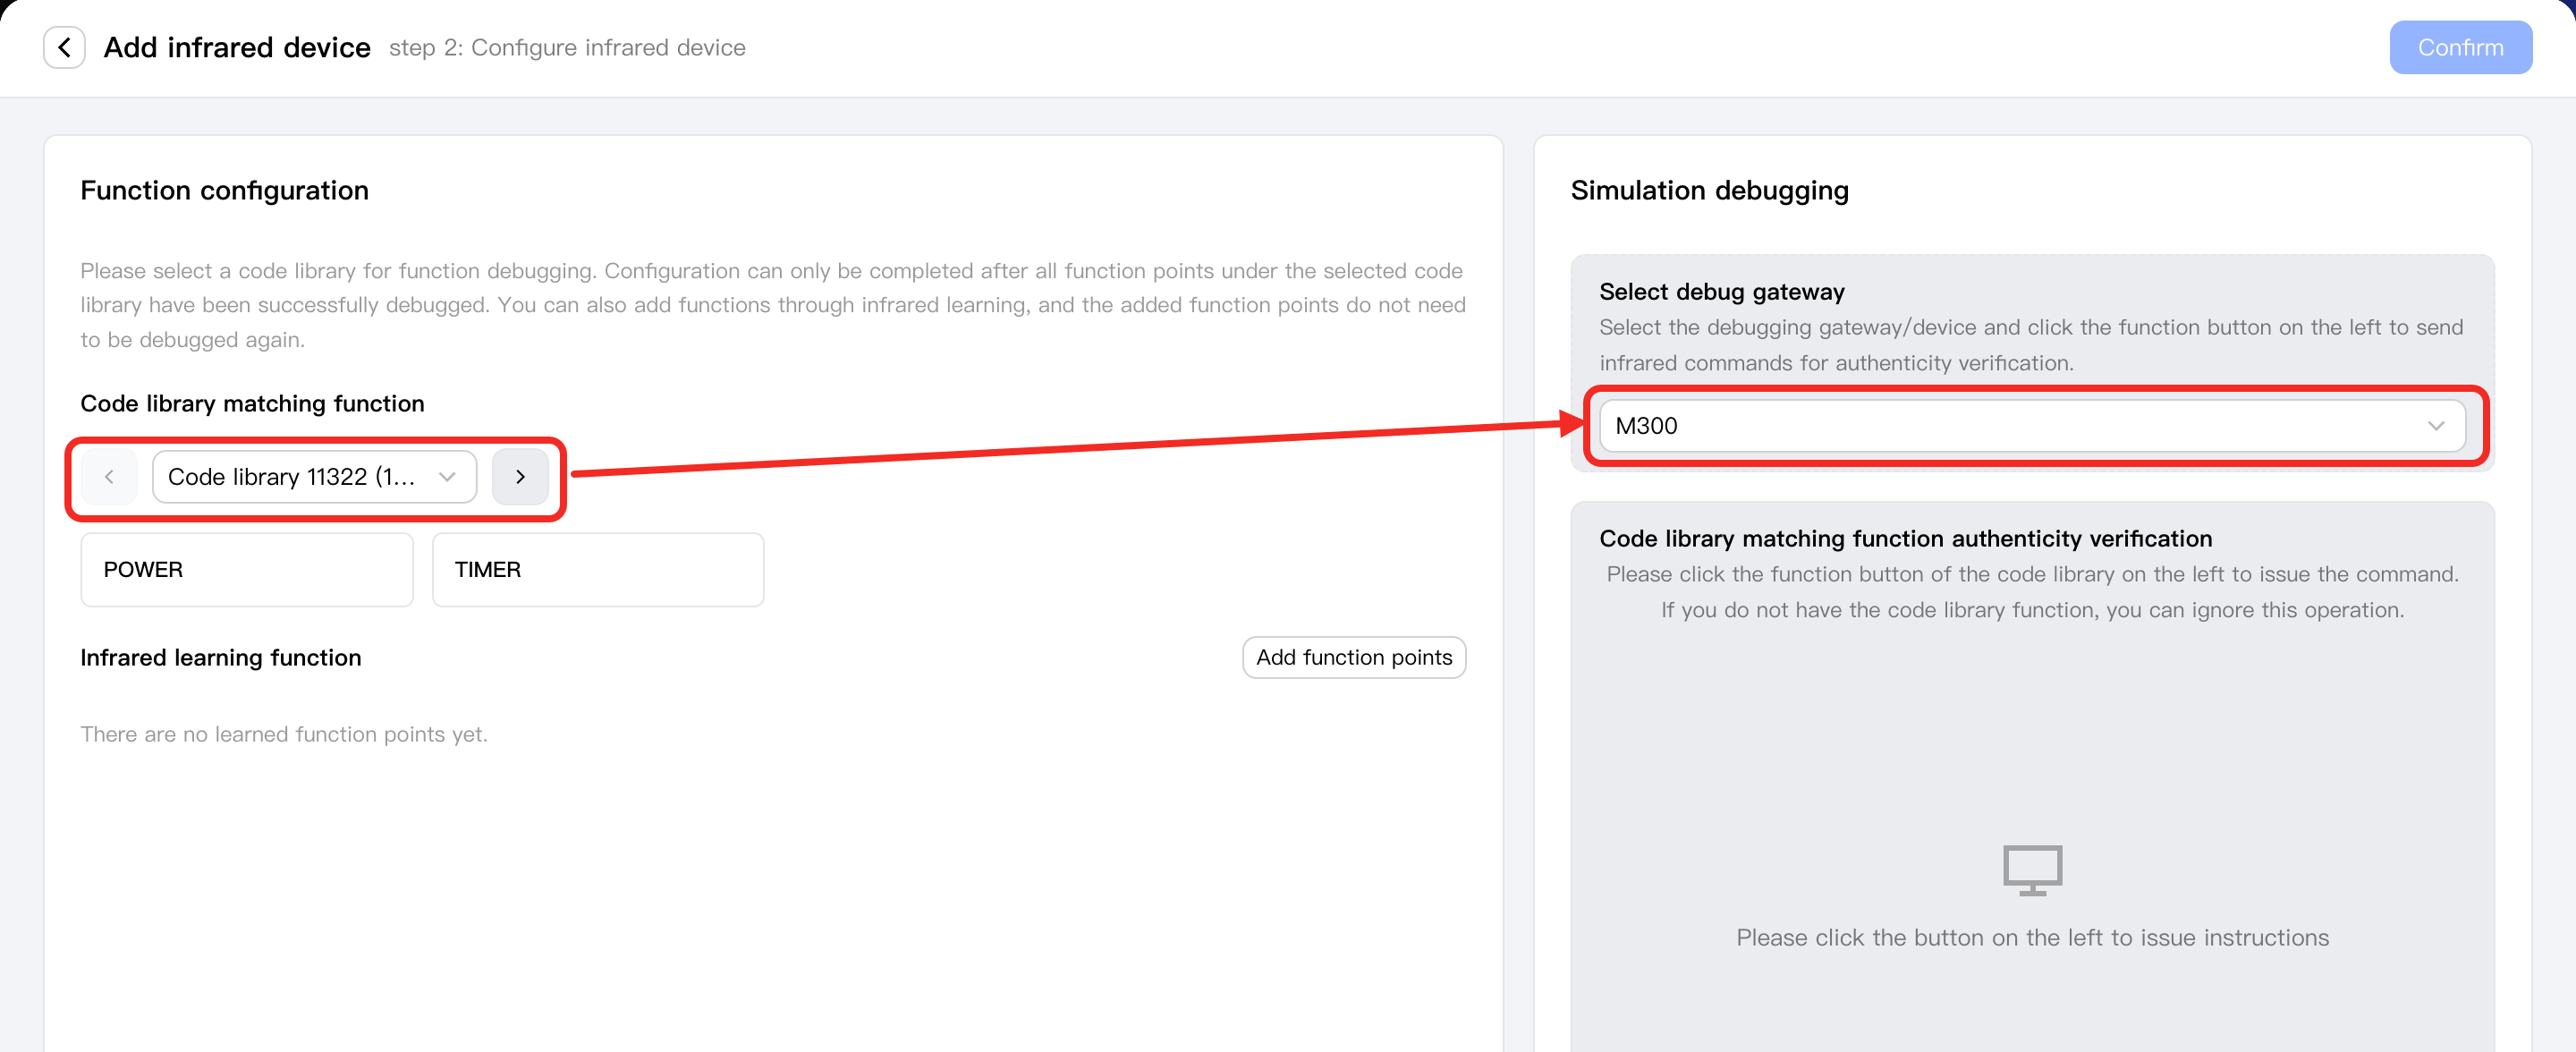
- Once the download is complete, select the applicable code library, and select the debug gateway (used to send infrared commands to control the infrared equipment to be integrated, such as the Edge Hub M300).
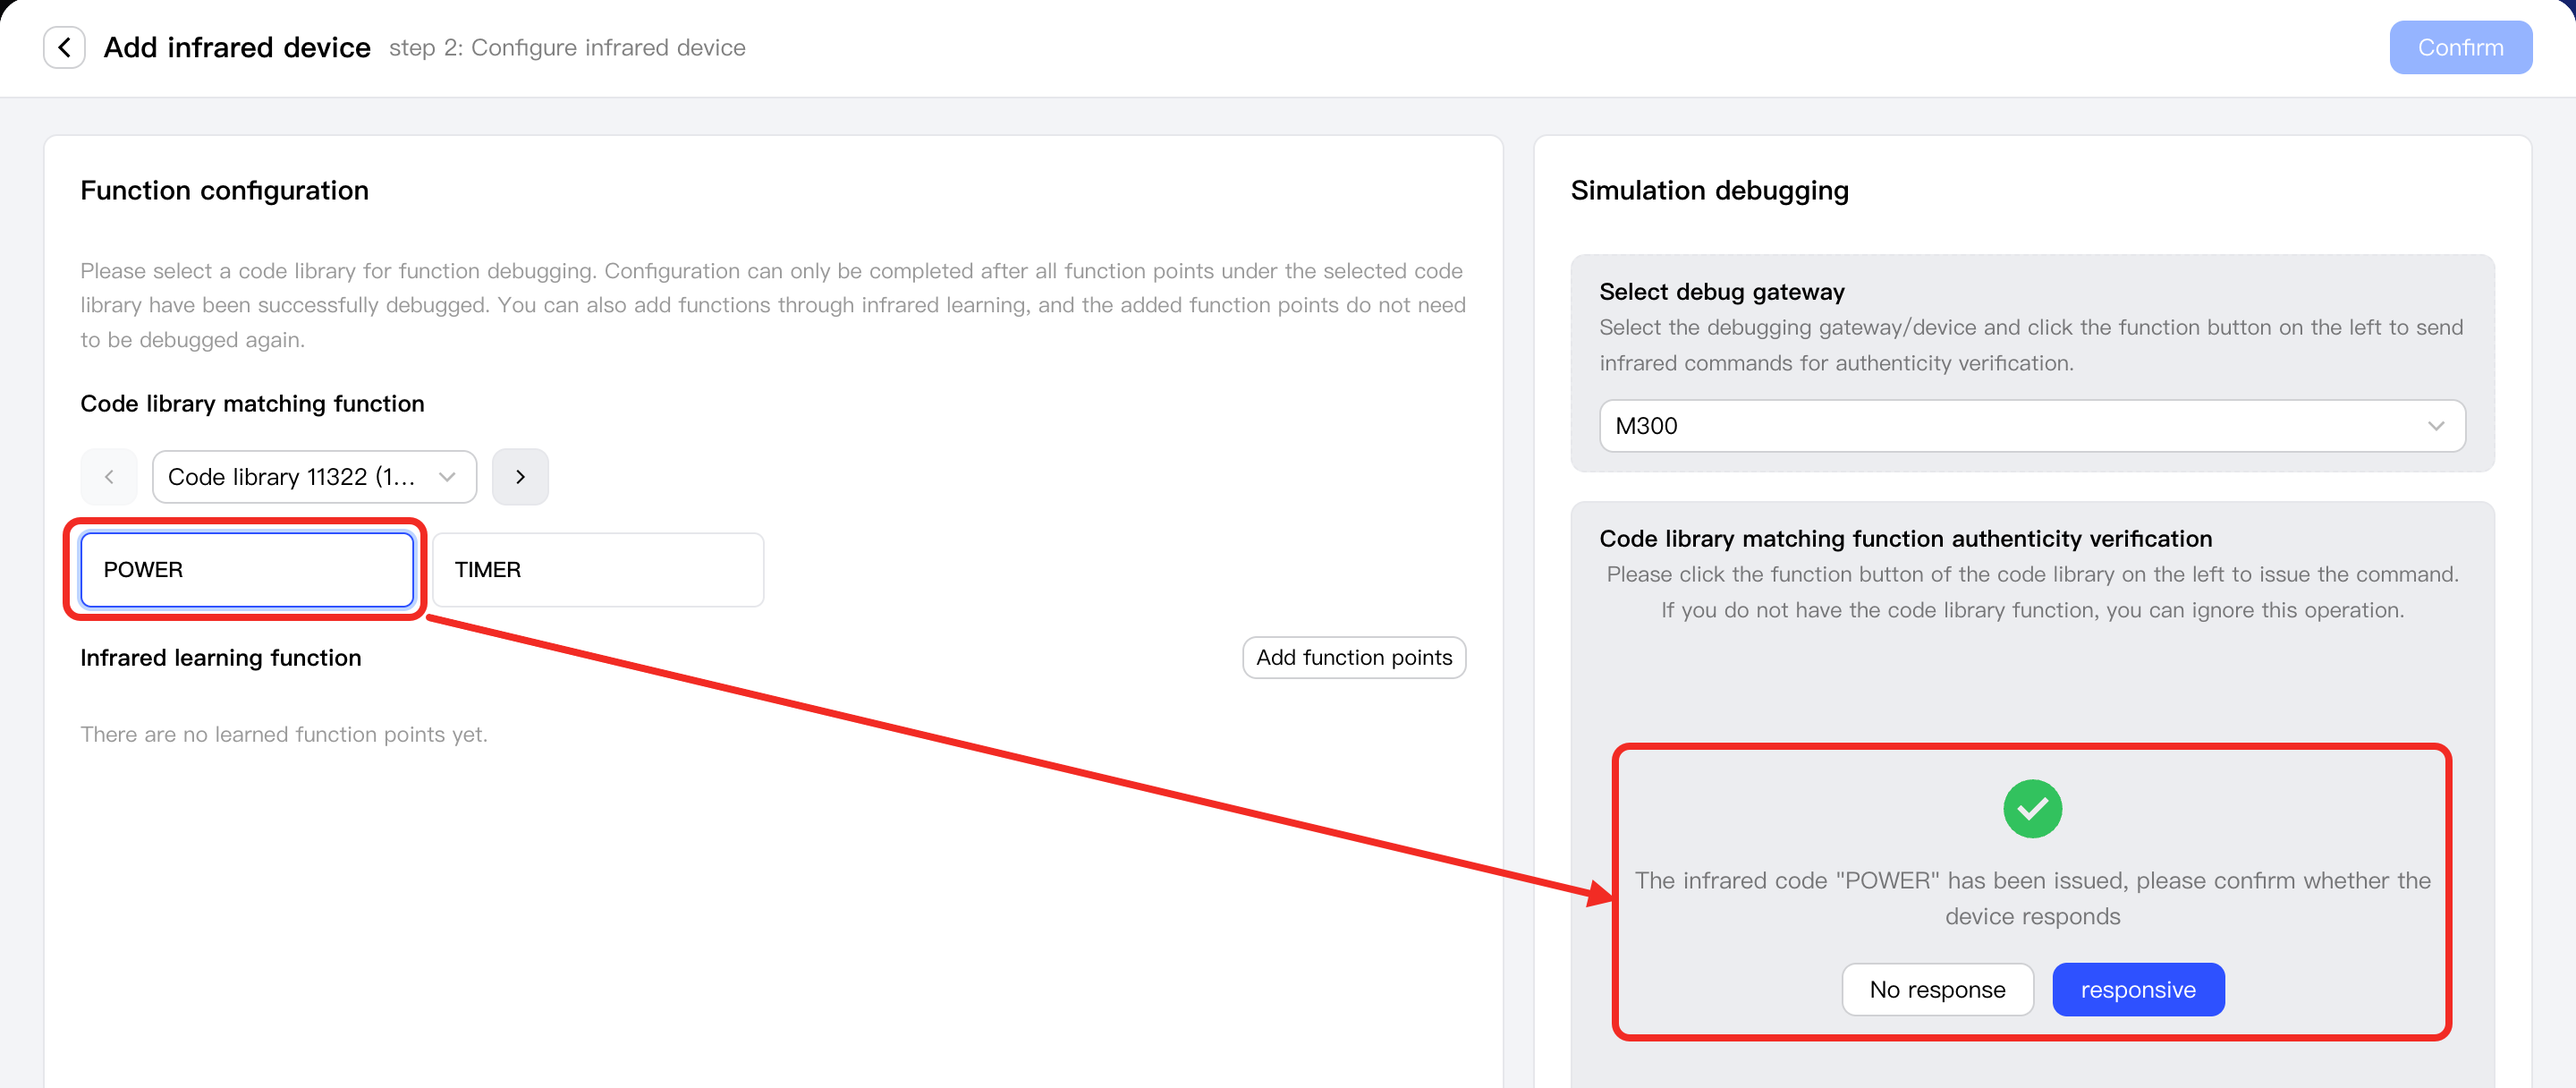
- Click an infrared command. The Debug Gateway above will flash a blue light. Observe whether the infrared equipment to be integrated responds.
If the device responds, it means this command can be used to control the infrared equipment. Click the responsive button.
If the device does not respond, it means this command cannot be used to control the infrared equipment. Click the No Response button.
Infrared Learning
-
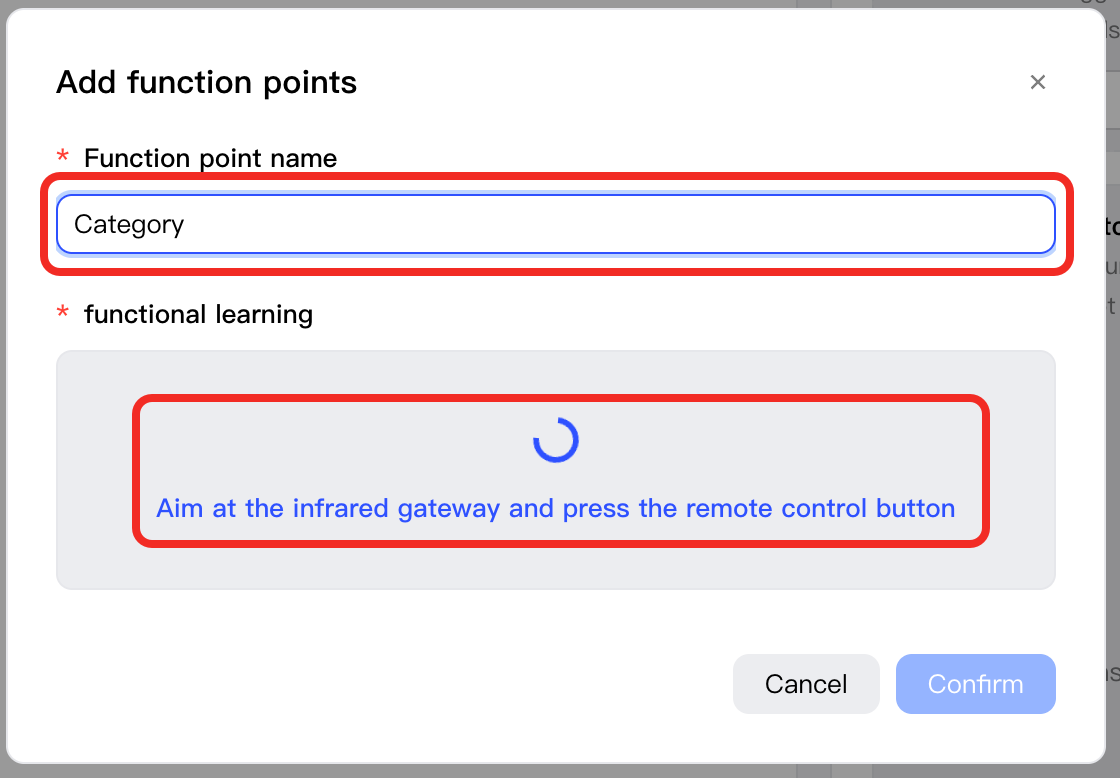
Besides using the preset infrared code libraries above, if the device has more infrared function points, you can add the required function points through the Infrared Learning feature. Click the Add function points button to open the Add Button pop-up window.
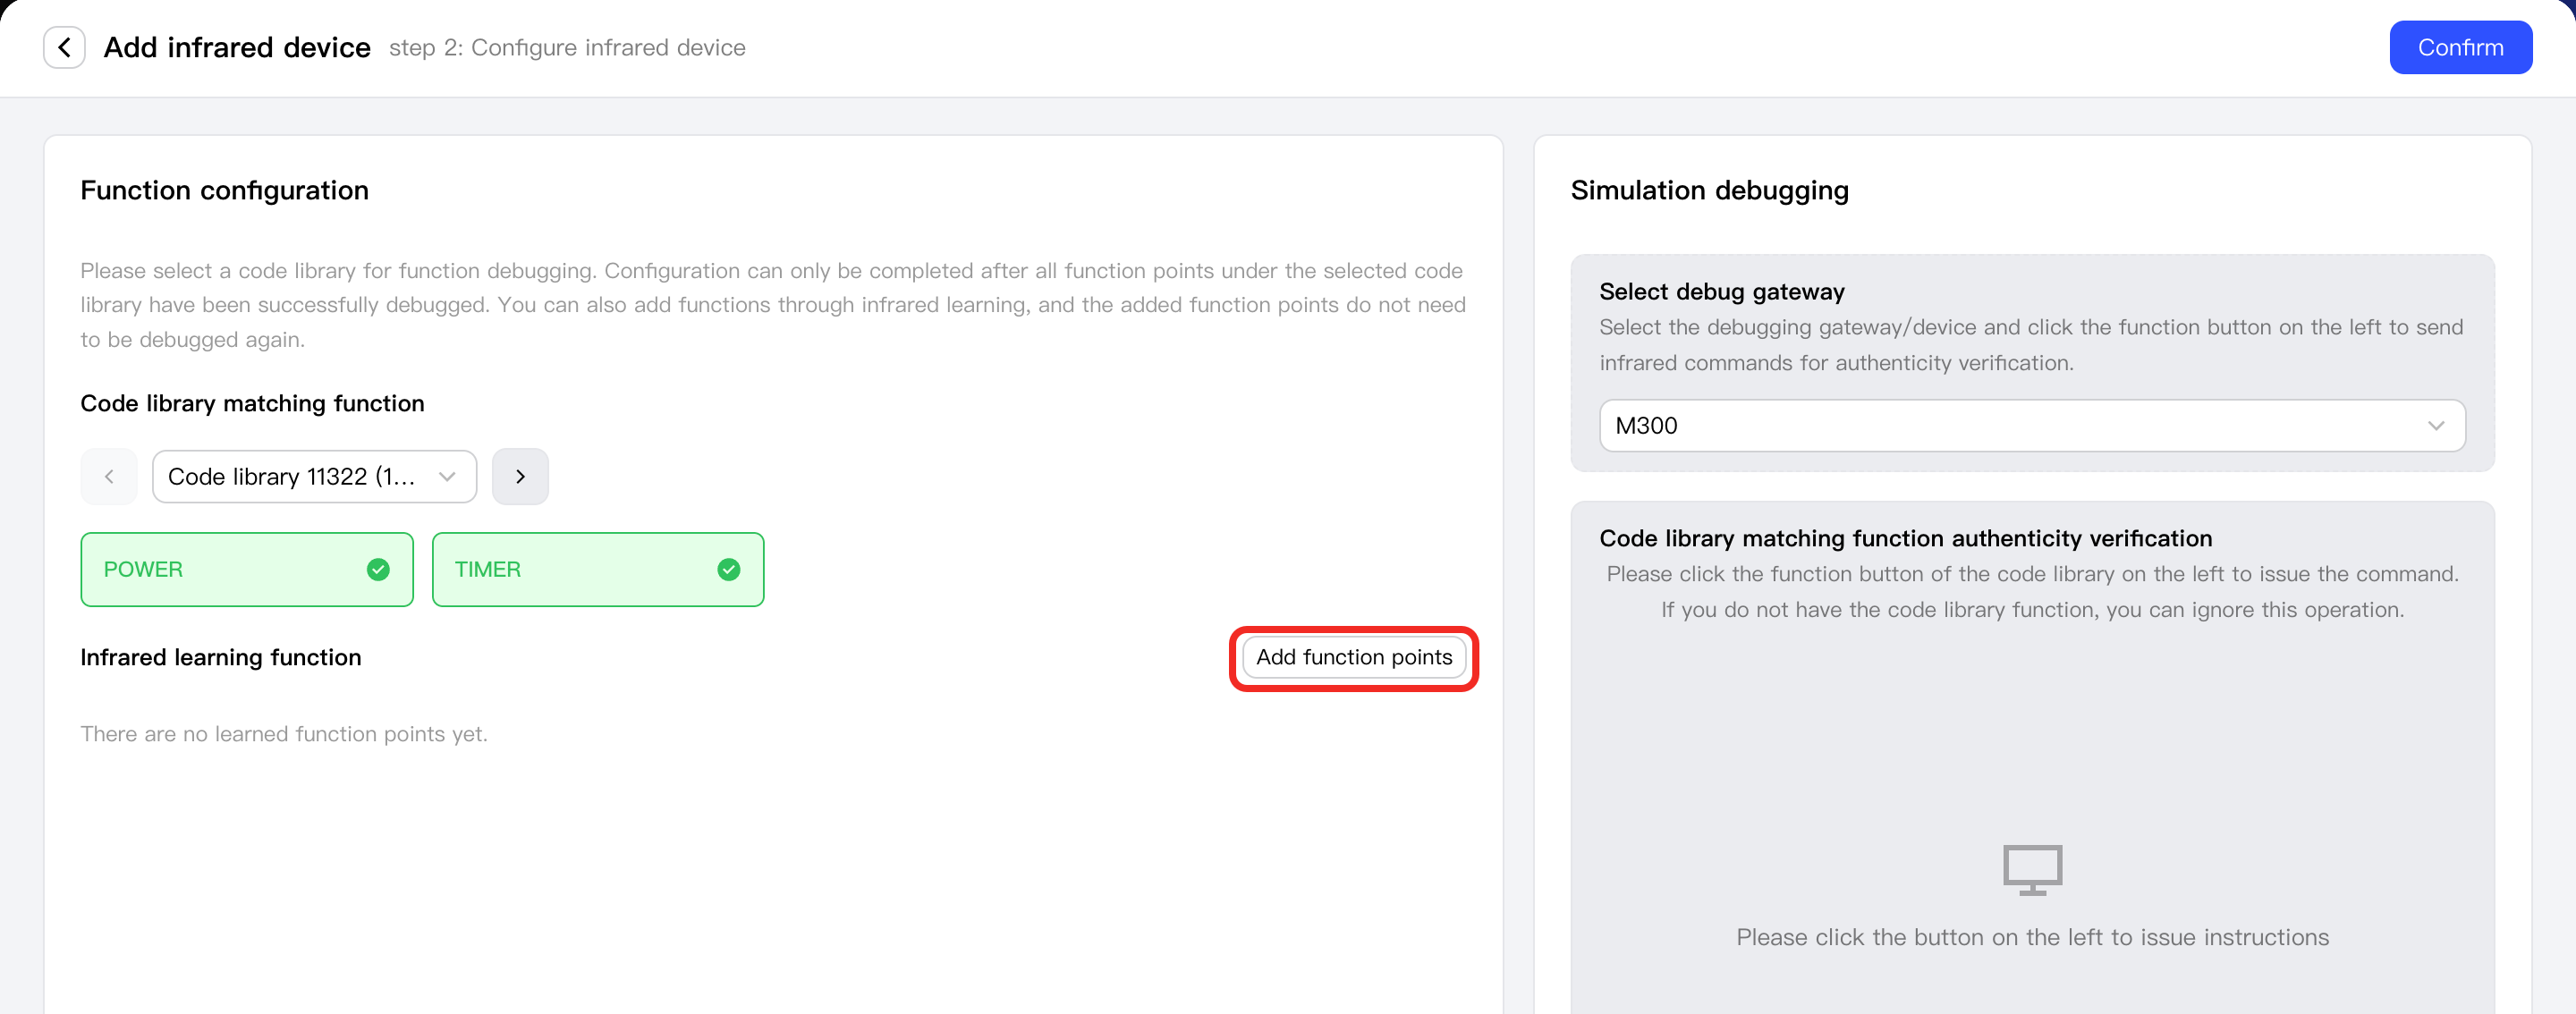
In the pop-up window, define the name of this function point, then point the remote controller of the infrared equipment at the debug gateway, and press a button on the remote.
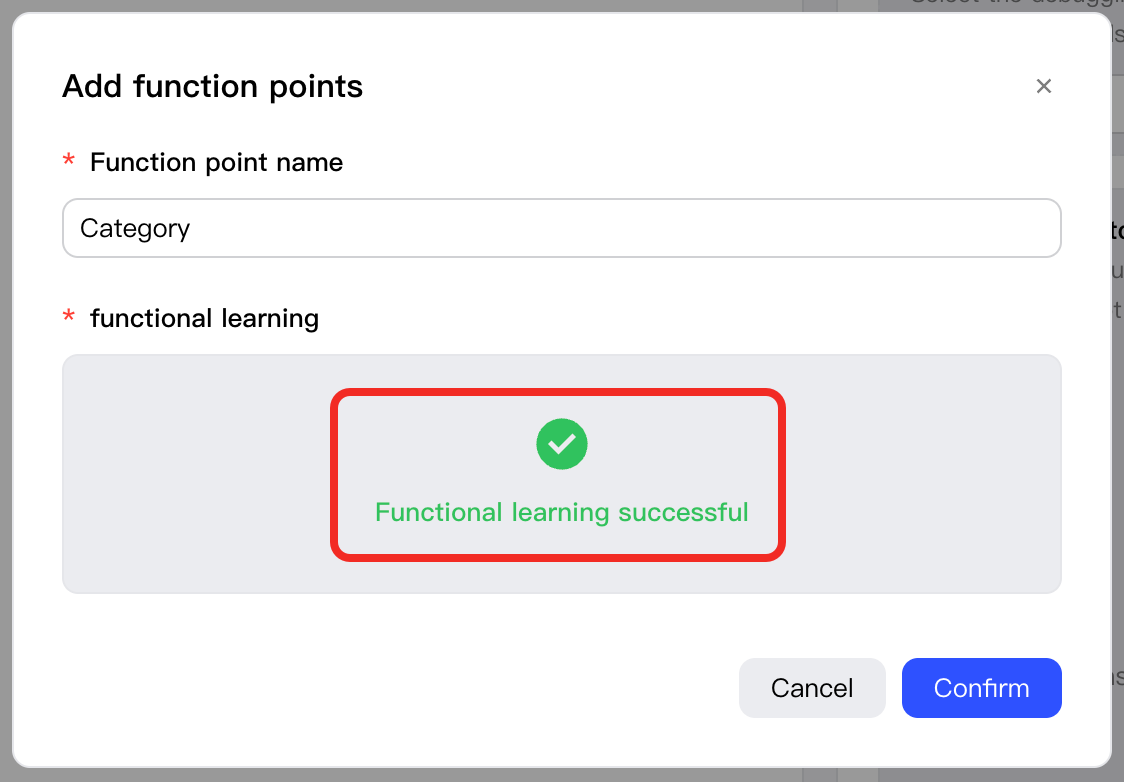
After successful learning, the pop-up will prompt Functional learning successful. Click the Confirm button to finish adding.
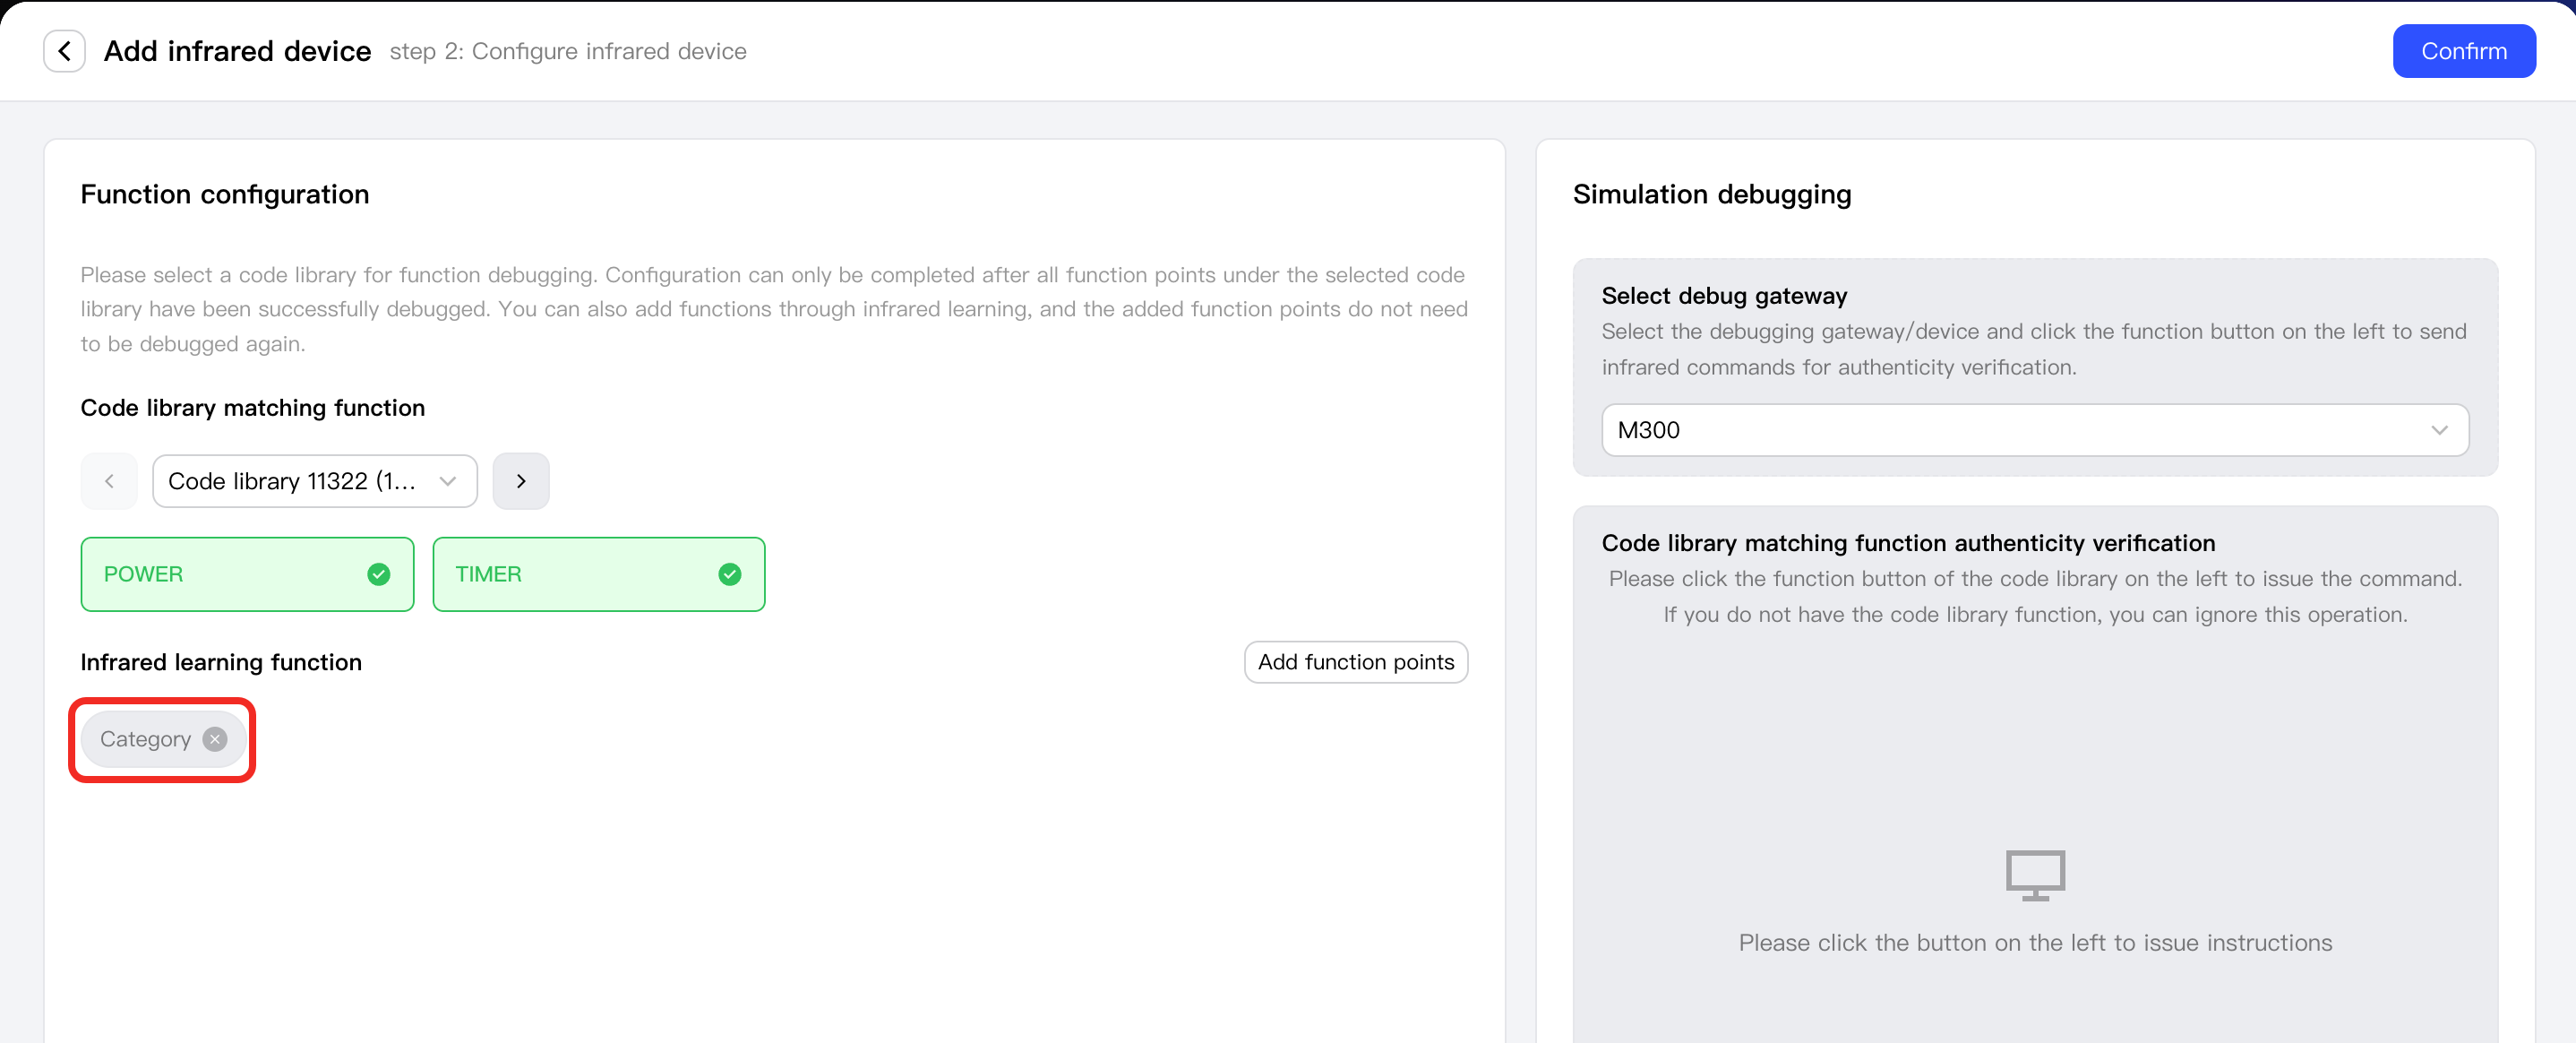
Newly added function points will appear in the Infrared learning function area.
Complete Device Integration
-
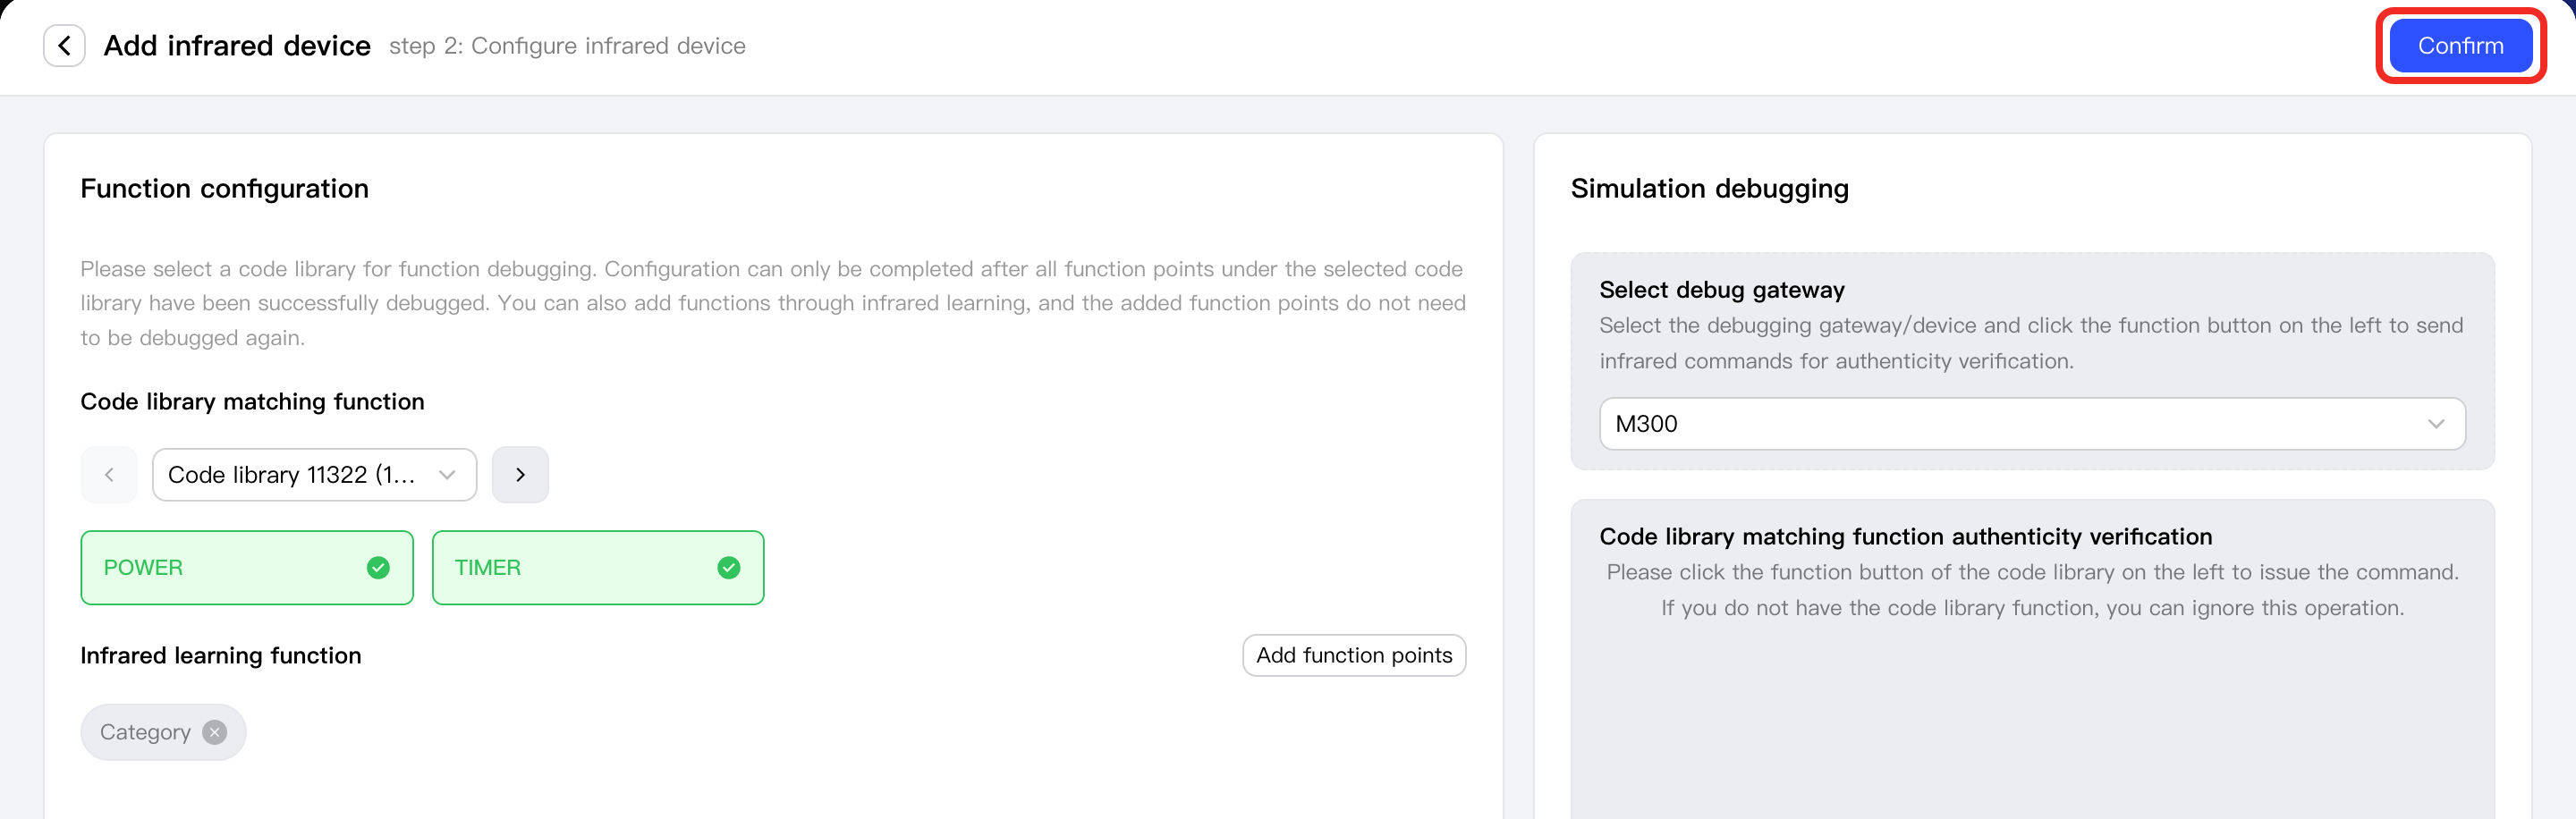
After completing infrared code library matching and adding all infrared function points, click the Confirm button to complete the device integration process.
-
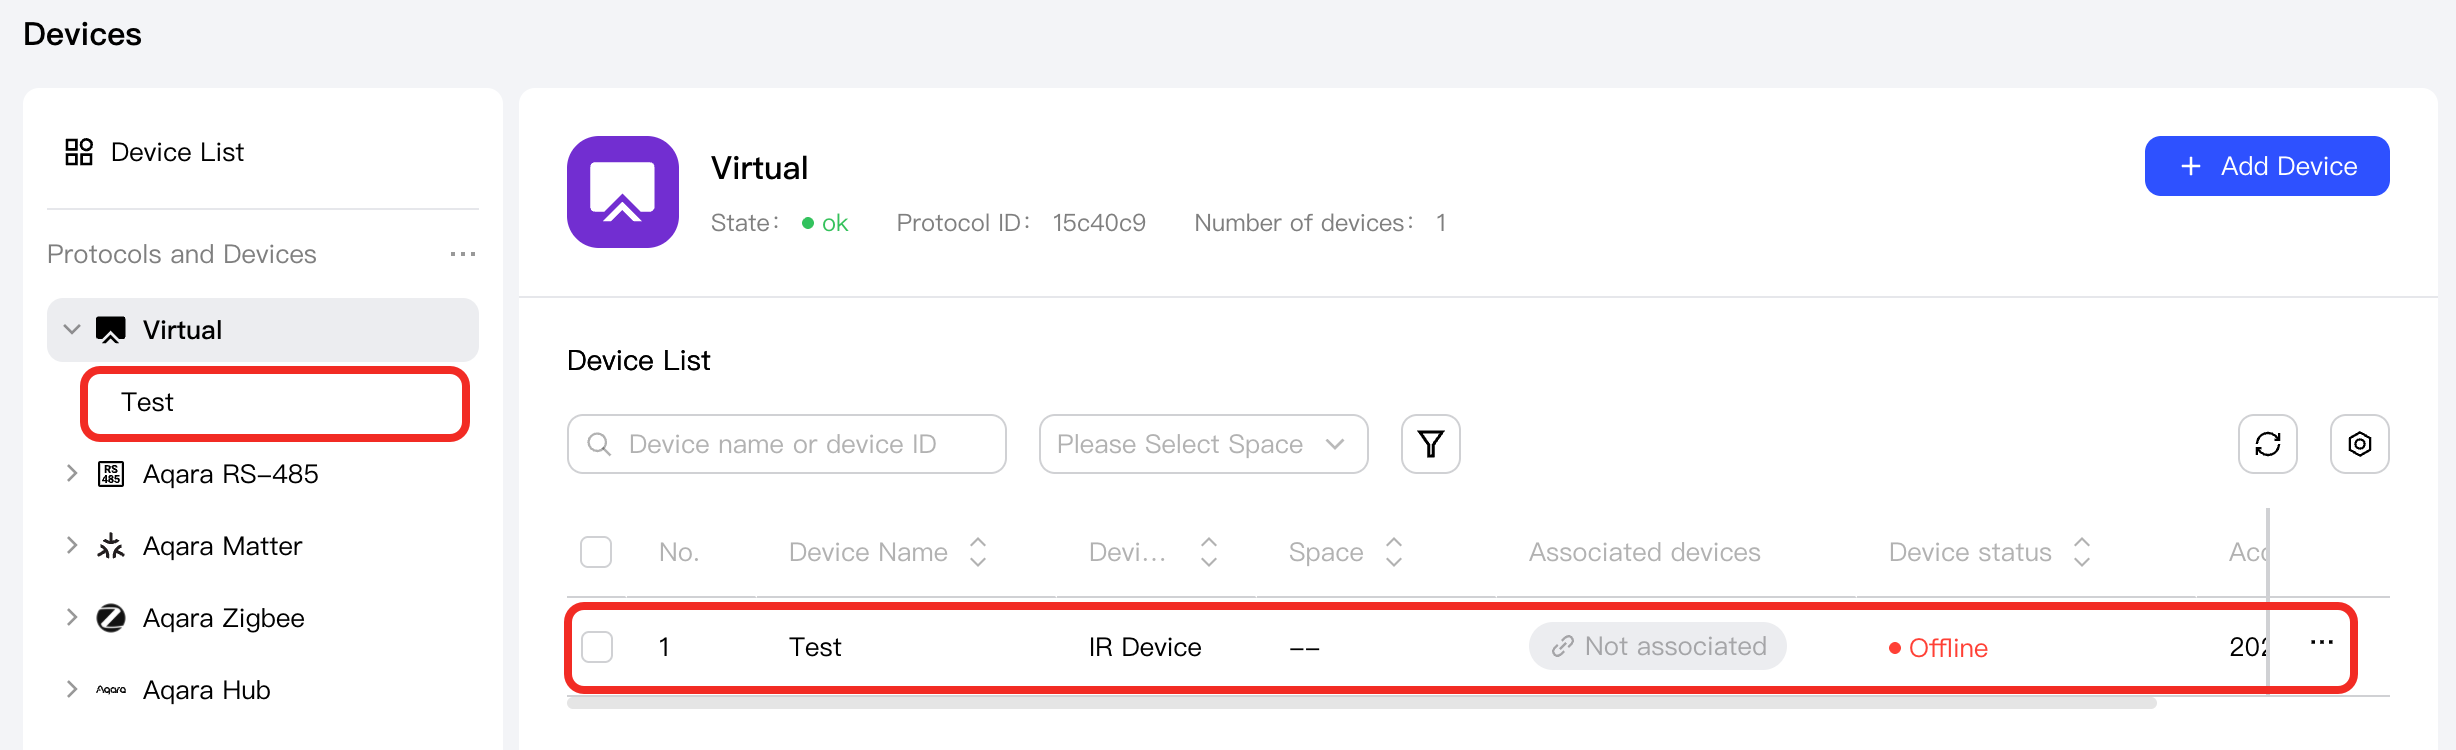
At this point, you will see the successfully added device under the
Virtualnode in the left Protocols and Devices panel, as well as in the device list on theVirtualmanagement page.tipAt this point, you will find that the device is offline. The device still needs to be associated with a gateway before it can be controlled.
Associate a Gateway
Completing the above device integration and infrared command addition does not mean you can immediately control this device. You still need to associate the infrared equipment to the Debug Gateway. The process is as follows:
-
Under the
Virtualnode in the left Protocols and Devices panel, select the device added above and click Device details.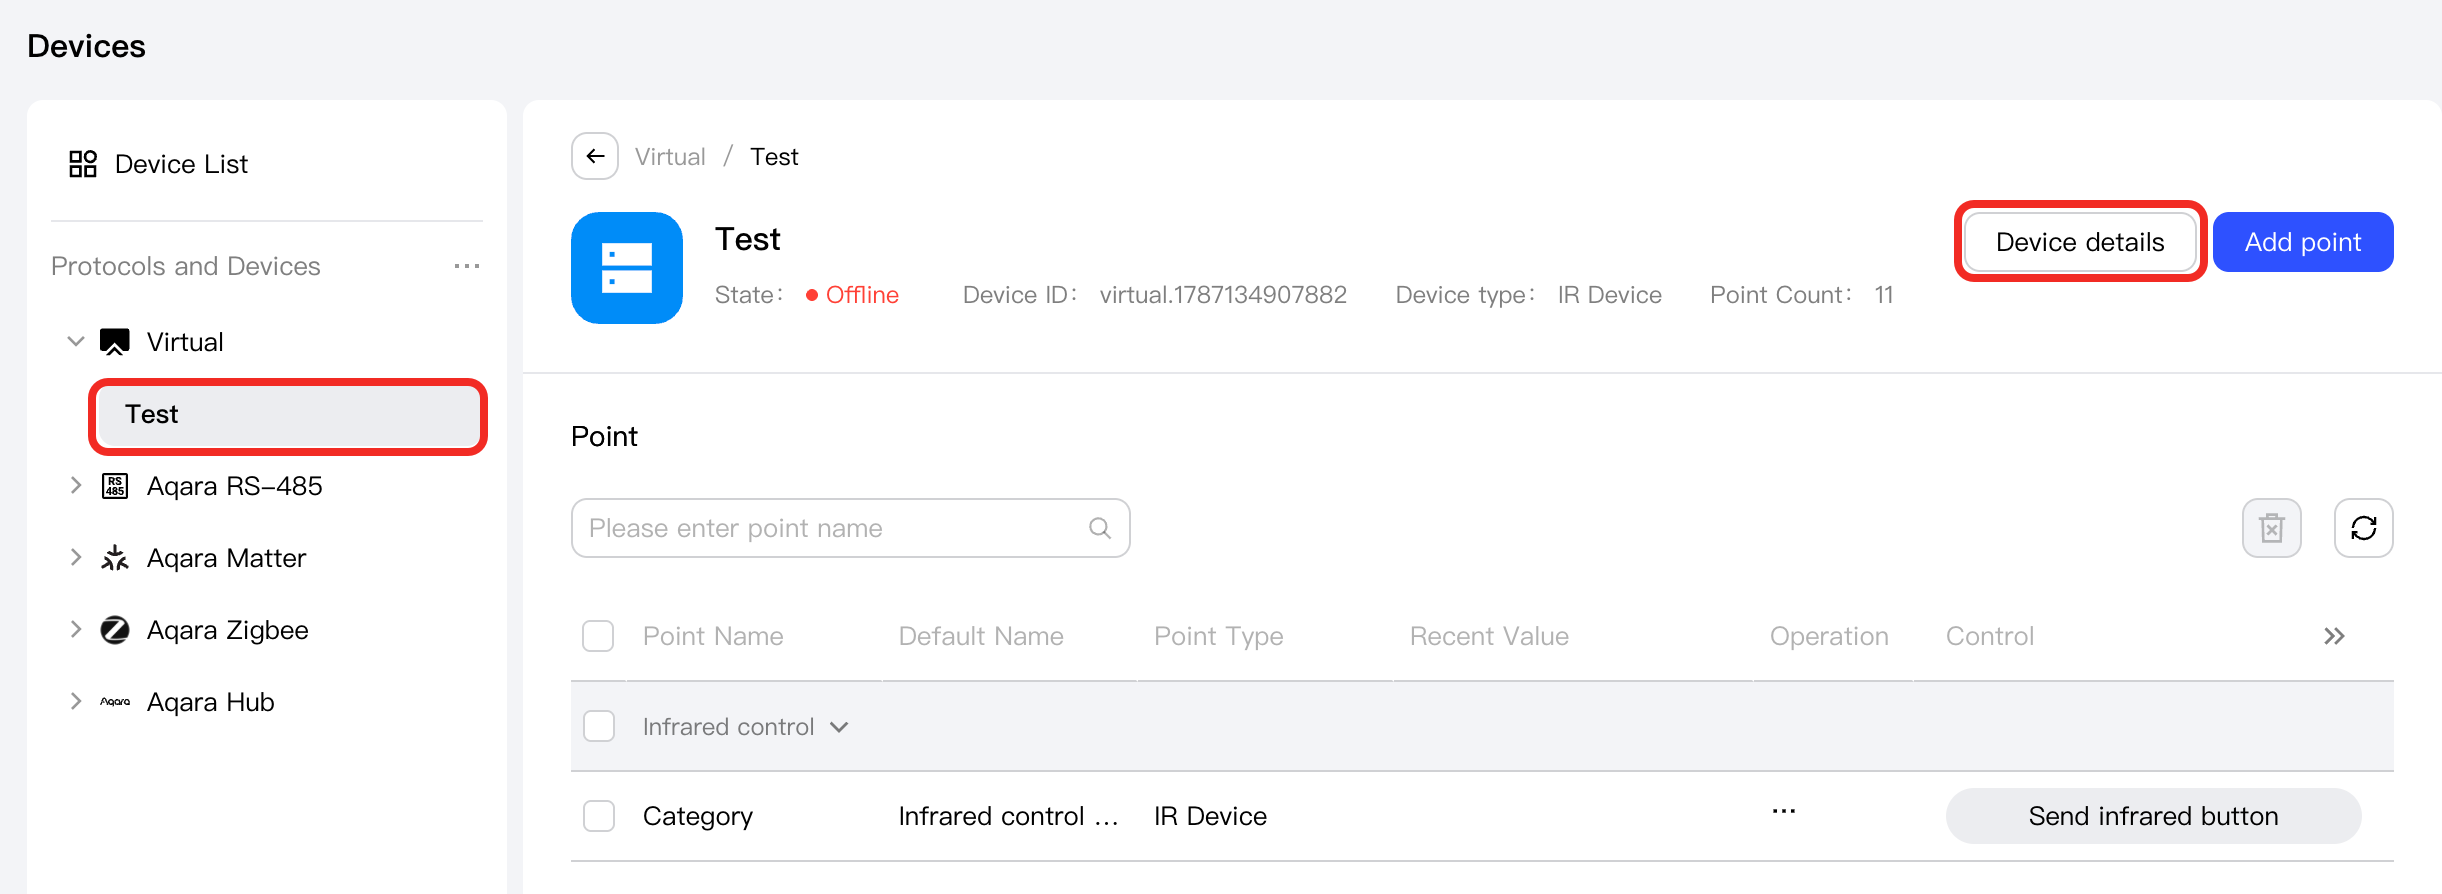
-
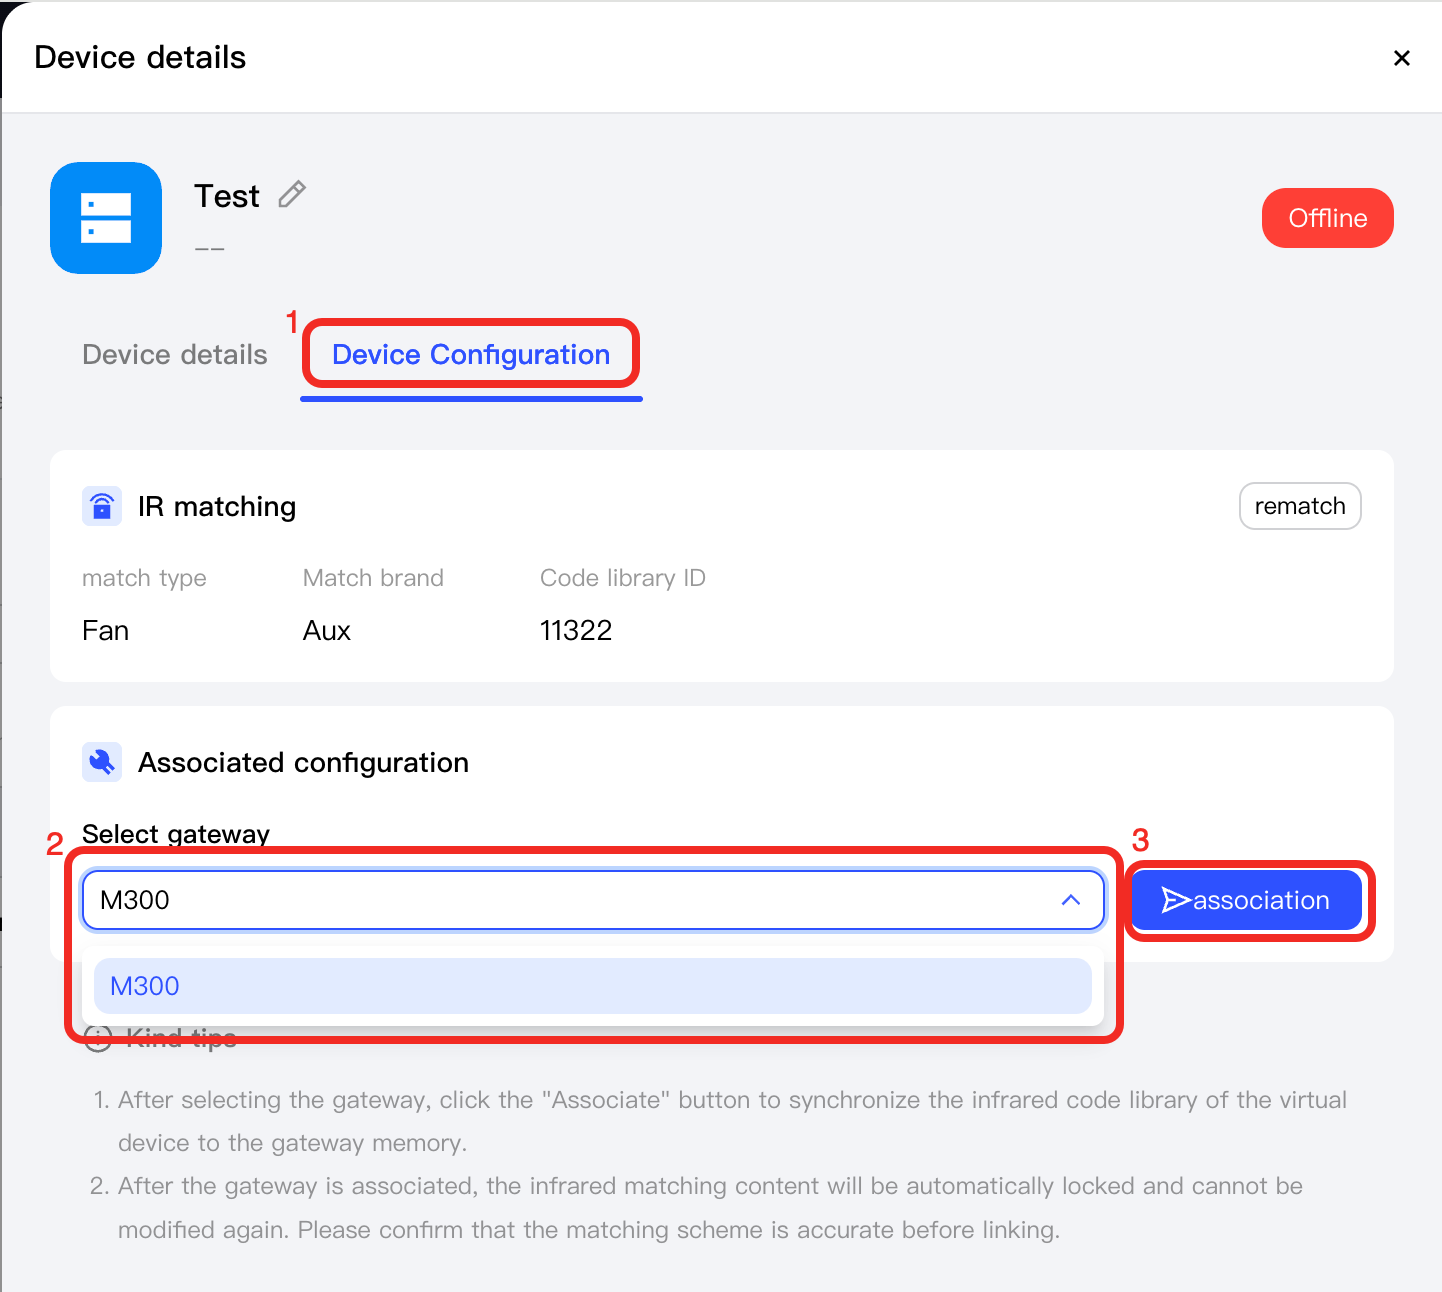
Switch to the Device Configuration tab, find the associated configuration, select the debug gateway, and click the Associate button.
tipAfter associating the gateway, the infrared matching content will be automatically locked and cannot be modified again. Please confirm that the matching plan is accurate before delivery.
-
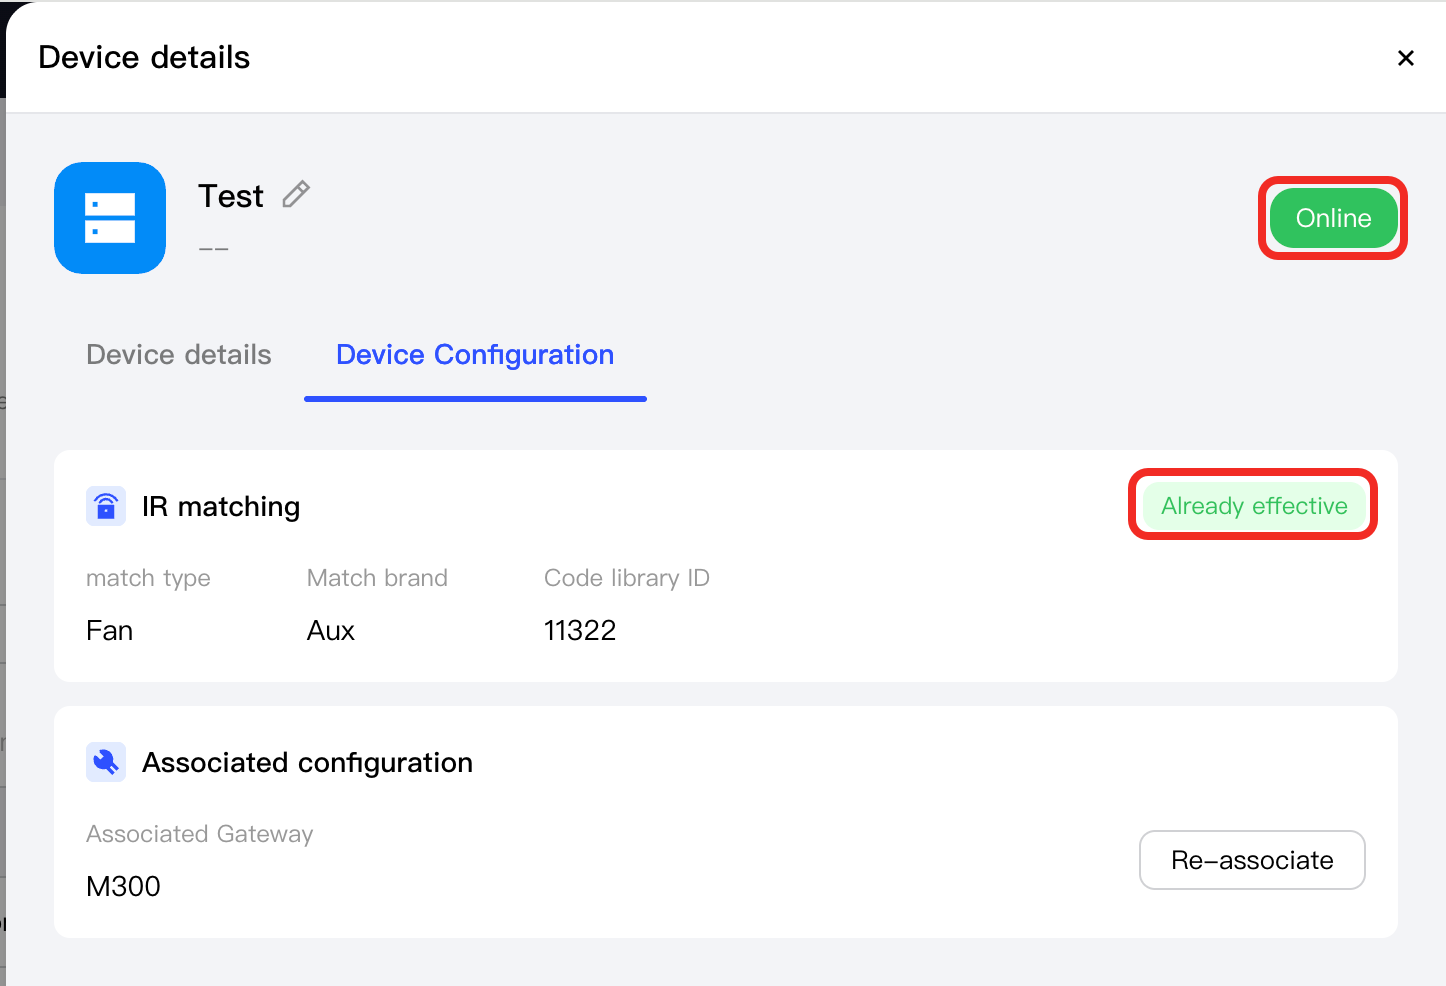
After successful delivery, you can see that the infrared code library status is Already Effective, and the device online status is Online.
-
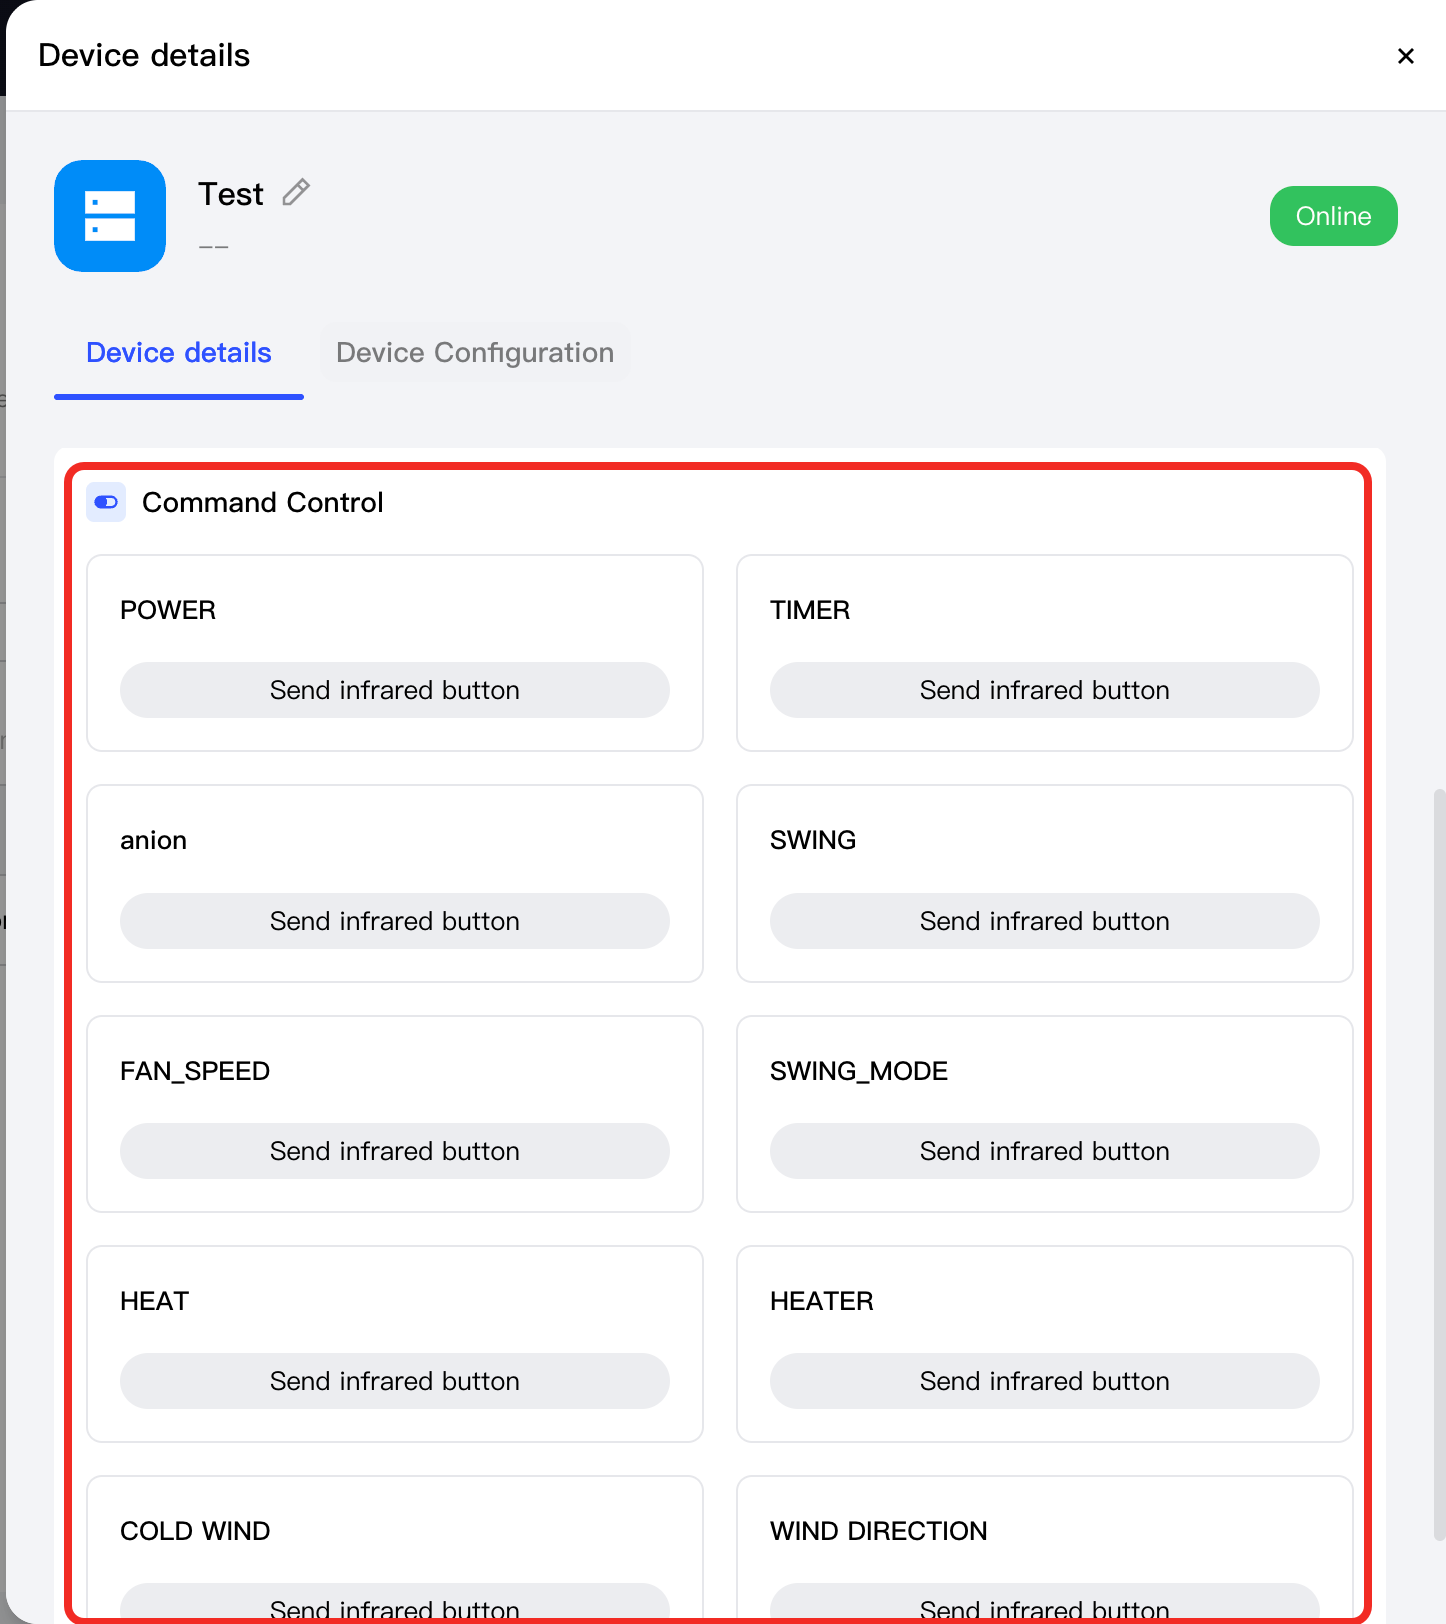
Return to the Device Details tab. You can see that the Command Control area has been added. This is the matched infrared code library, and you can control the infrared equipment here.
-
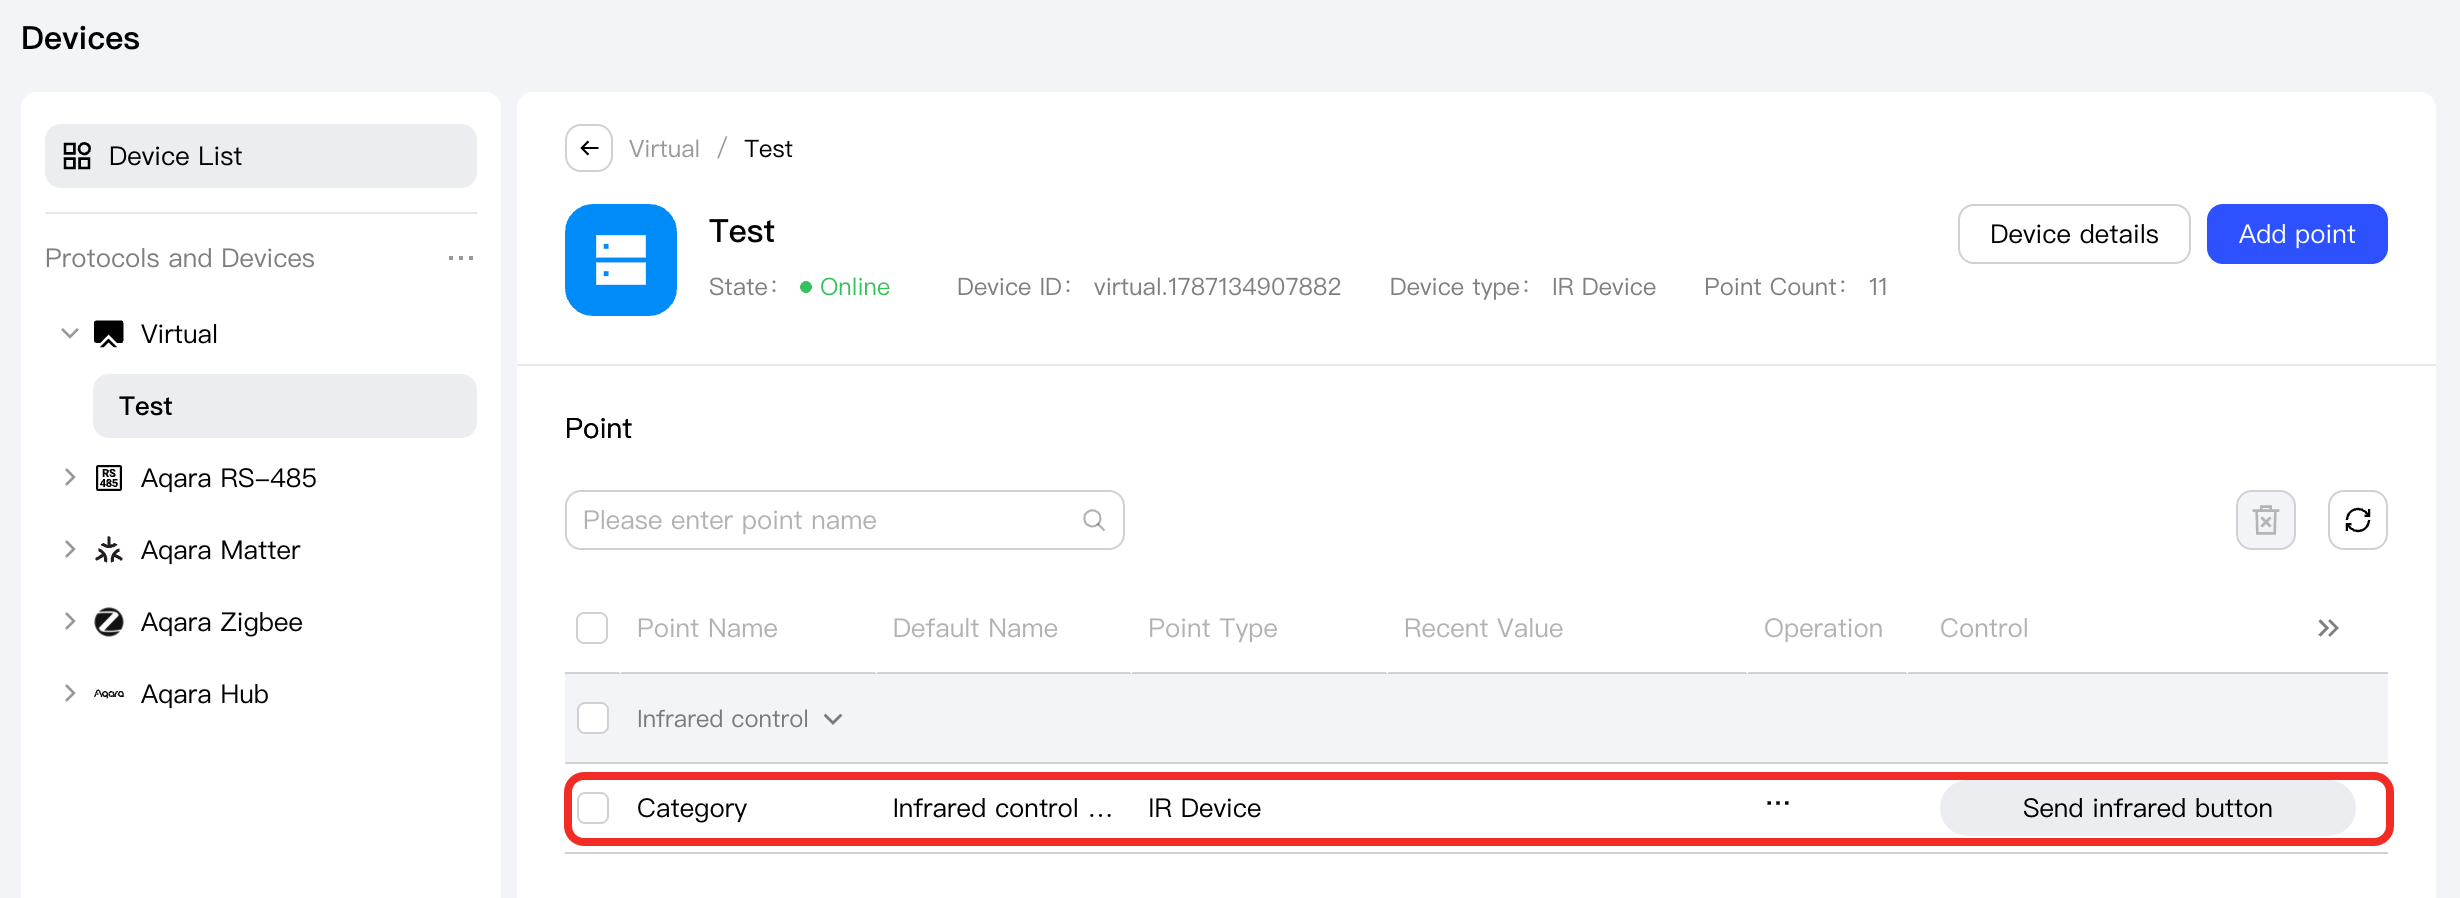
Return to the Device page. You can see that the Point list now includes the custom infrared function point (trait), and you can also control the infrared equipment here.
Next Step
Now, you can view details and control the device, or use the device in automation.