Light Box
This document introduces how to integrate light box equipment into Aqara Studio, enabling users to conveniently manage and control light box equipment via the M300 Edge Gateway.
Prerequisites
Before you begin, please make sure that:
- Your light box equipment has been connected to the Aqara RS485 lighting control device.
- The Aqara RS485 lighting control device has been added to Aqara Studio. For details, please refer to Aqara RS-485 Device Integration.
Create Light Box Equipment
- Click on Device Management in the left sidebar. Under Protocols and Devices, click the ... button and select Add Protocol.

- In the popup, select
Virtualto add aVirtualnode.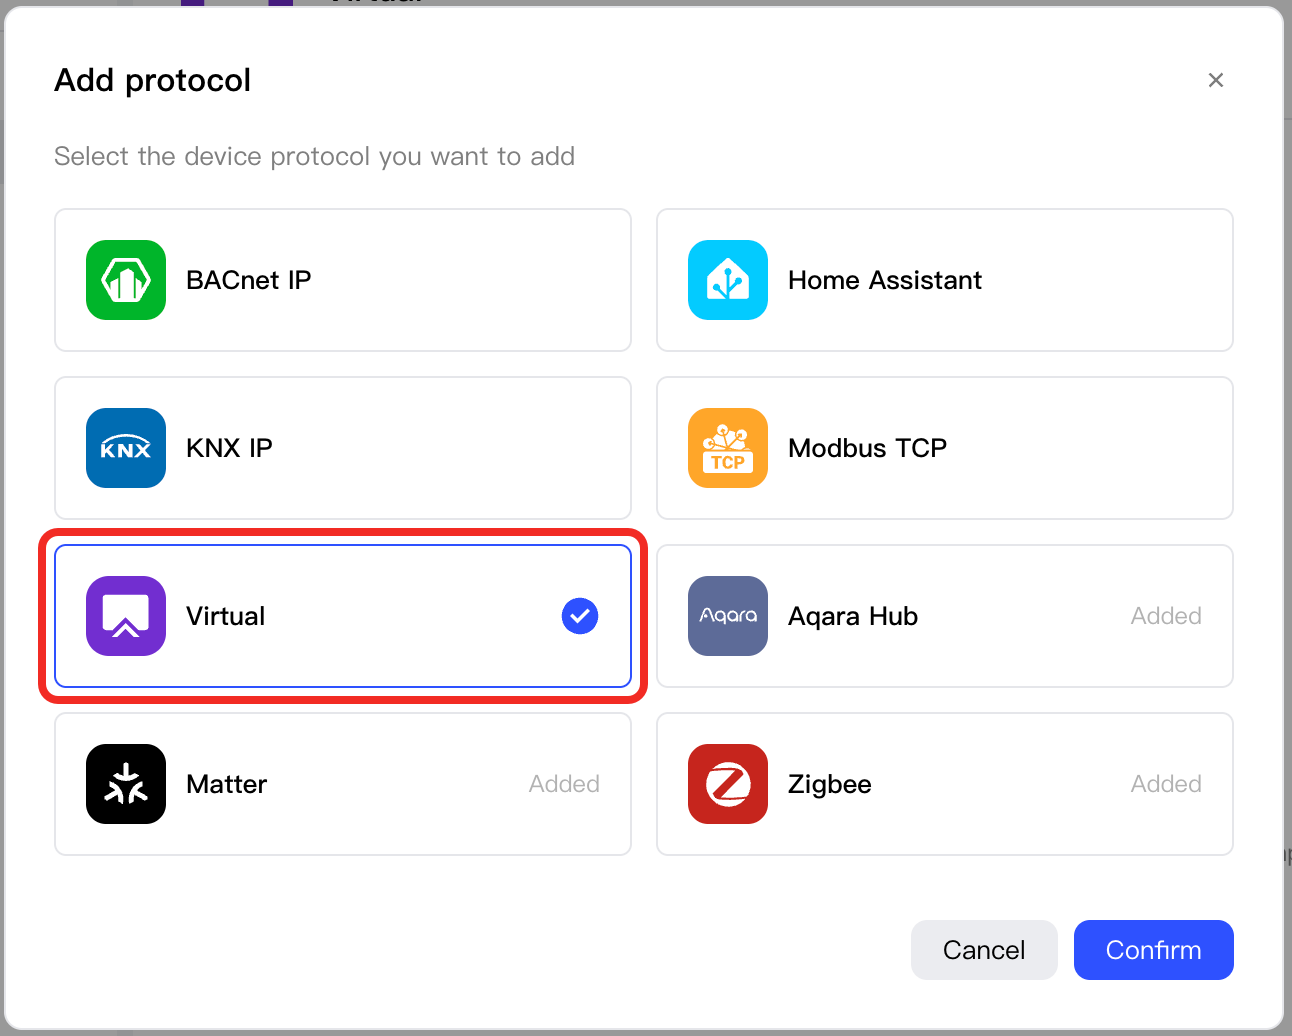
- Select this node and click the
Add Devicebutton.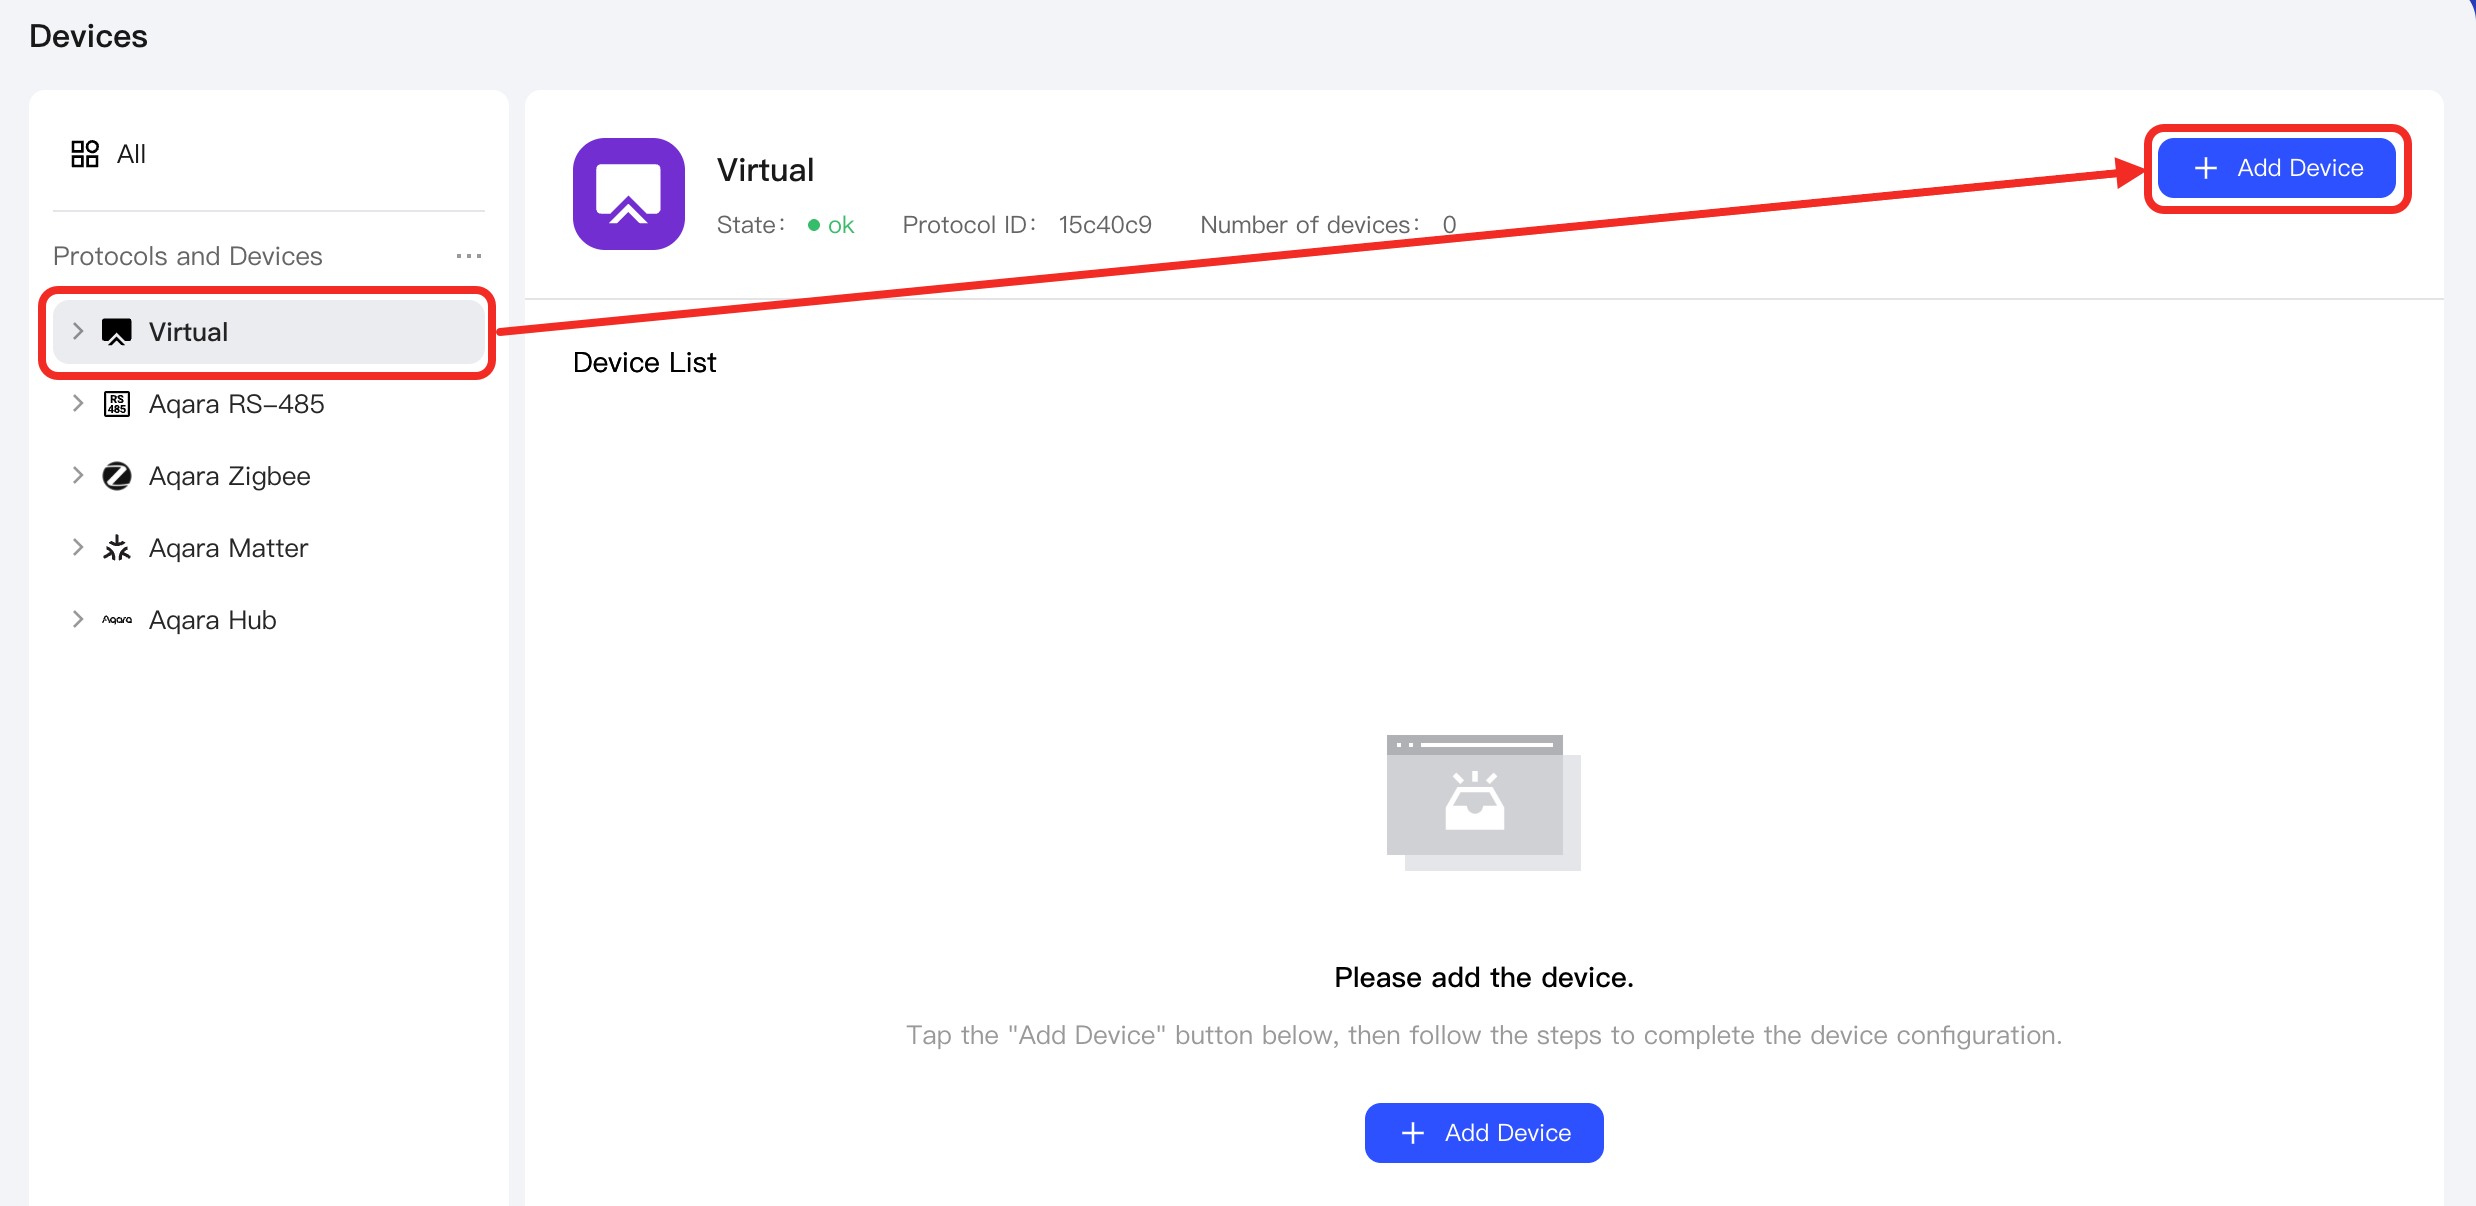
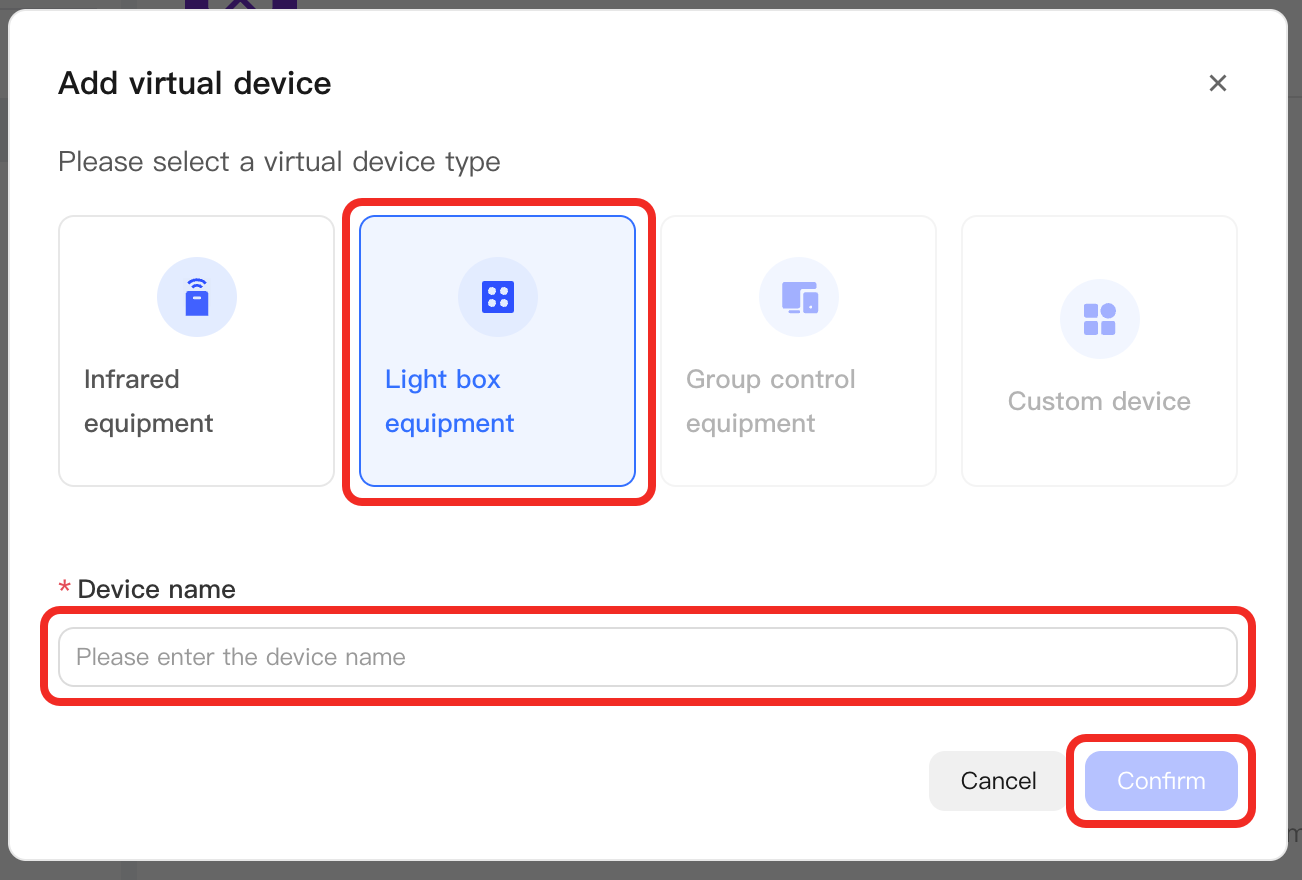
- In the popup, set the Virtual Device Type to Light Box Equipment and configure the Name of the device.
- Configure the color display for the light box equipment, including the lighting load device model, lamp bead type, and lamp bead protocol.
- Configure the canvas (number of lamp bead columns and rows, and spacing between columns and rows).
- At this point, you will see the successfully added equipment under the
Virtualnode in Protocols and Devices on the left, as well as in the device list on the management page for thatVirtualnode.
Configure Sub-controllers
-
Under the
Virtualnode in Protocols and Devices on the left, select the equipment you just added and click Device Details.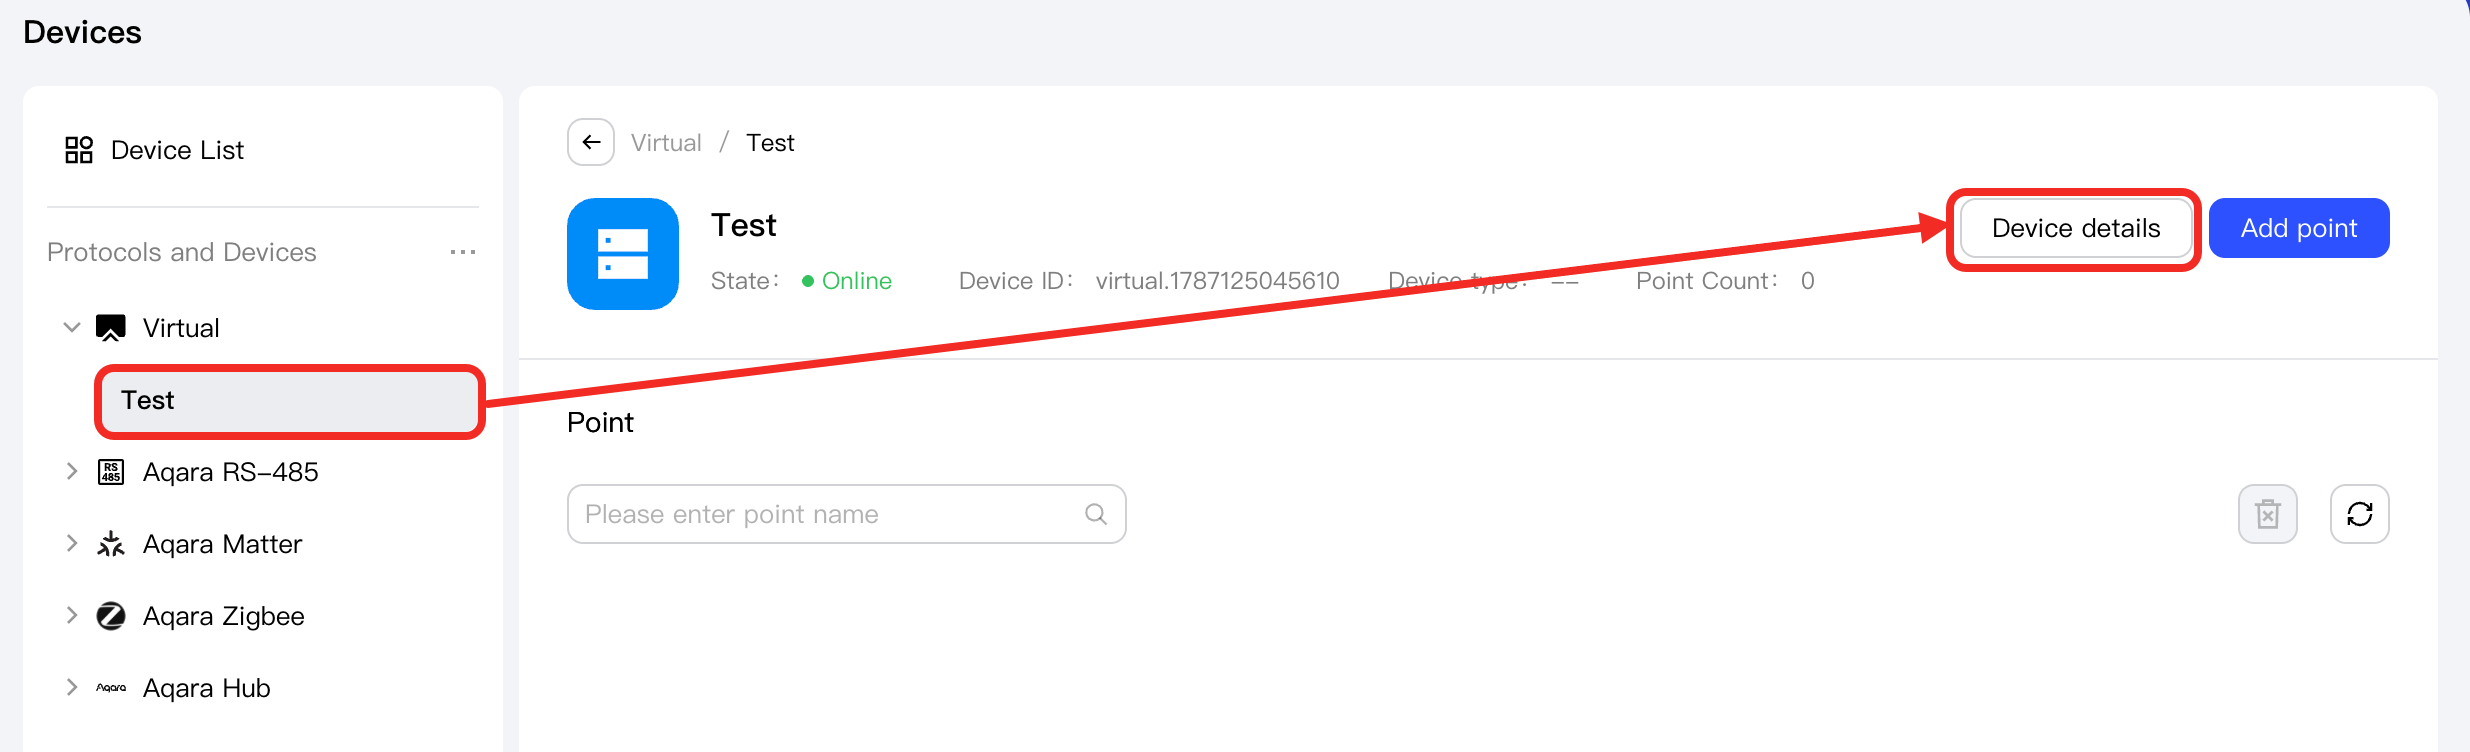
-
Switch to the Device Configuration tab on the device details page.
-
In the Light Box Configuration area, select an Aqara RS485 device as the sub-controller.
-
Enable the channels of the sub-controller to control the lamp beads of the light box equipment.
-
Click the Position Association button to map the enabled sub-controller channels to the lamp beads of the light box equipment, allowing precise control.
In the Sub-controller List, select one channel, then drag and select lamp beads on the canvas to indicate that the channel controls the selected lamp beads.
After completion, click the Save button to exit the configuration process.
-
Click the Deploy button to send all configuration in one step and synchronize it to the light box equipment, ensuring the settings take effect.
-
Return to the Device Details tab. You will now see many new feature points, indicating that the light box equipment has been successfully integrated into Aqara Studio and can be controlled.
Next Step
Next, you can use this device for the following purposes: